

Hi friends,
We made a Watercolor Old Fashioned Candy Garland, the candy-like striped rounds will add a little more whimsy and nostalgia to any tree, and folds up nicely when not in use. It works great around a window, a mantle, or zig-zag it on a wall to form a tiny Christmas tree. It was inspired by our watercolor hearts and my Grandma B. Check it out below.
*Click on photos for closer look
What You'll Need
(5) Sheets Medium Weight Paper
Glue
Red & Green Craft Paint
Container + 5TBSP Water
Paintbrush
Pencil
Scissors
Cardboard Tube
(13-15 ft) Twine/Yarn
Optional: Painters Tape, Wipes,
The Steps
While we set up our Christmas tree, we came across some of my childhood Christmas decorations. A few of the items my grandma had purchased for us, and others had been passed down. It reminded me of the hard, colorful candy my Grandma B used to have in her candy dishes. It was a constant in her house.
I never knew when they appeared or disappeared, but they were always there. I realized I’d never purchased any for our family or given my kiddos that simple pleasure. So I’ve decided to buy some this week, even if no one eats them, because I NEED a daily dose of Grandma B, and want to proudly display my little candies lol So until then, this garland will have to do. = )


Add 10-15 drops of paint in each container(we added 10 and layered the color) and mix.
Your kiddos can do the fun painting parts and you can do the rest. Having a helper makes this go by way quicker too lol


Optional: Painters tape helps with straighter lines and wider white stripes. Using a thinner brush also helps create a thinner red line.
2. We chose to freehand our stripes and used a wider brush for the green and red ones. We also layered the paint in different sections to get some variance.
3. Repeat the green/red stripes on the 3rd & 4th papers and let dry 10min.
Double these steps to double the size or for a 2nd strand.


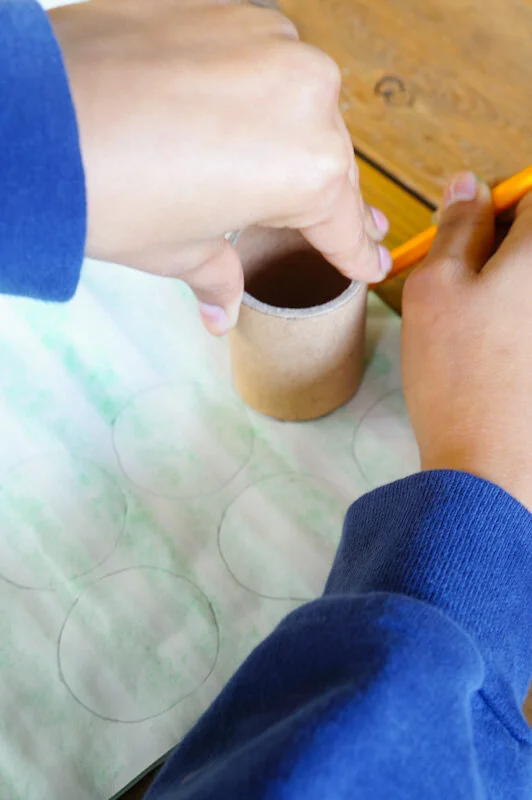

4. Fold the white paper in half and trace the roll/circular item 12-13times (repeat for a longer strand).
5. Stack the green/red sheets on top of each other(facing down), fold in half (not shown on the striped pages) and trace the paper roll/other circular item, 12 times.
6. Cut out the white circles (12 -13 sets), *green and red ones(24 sets each).
*For ease in cutting, tape the corners and a few edges together with painters tape.


7. Cut 13- 15 feet of twine/yarn and tie a knot at each end.
8. Lay a bottom circle under the string, add glue to the center area, then press the top piece on top, repeat in random order or in a *pattern, leaving 1 inch between the circles.
9. Let dry for 15- 20 min.
That’s it!
*Our pattern: 1 white, 2 green, 2 red


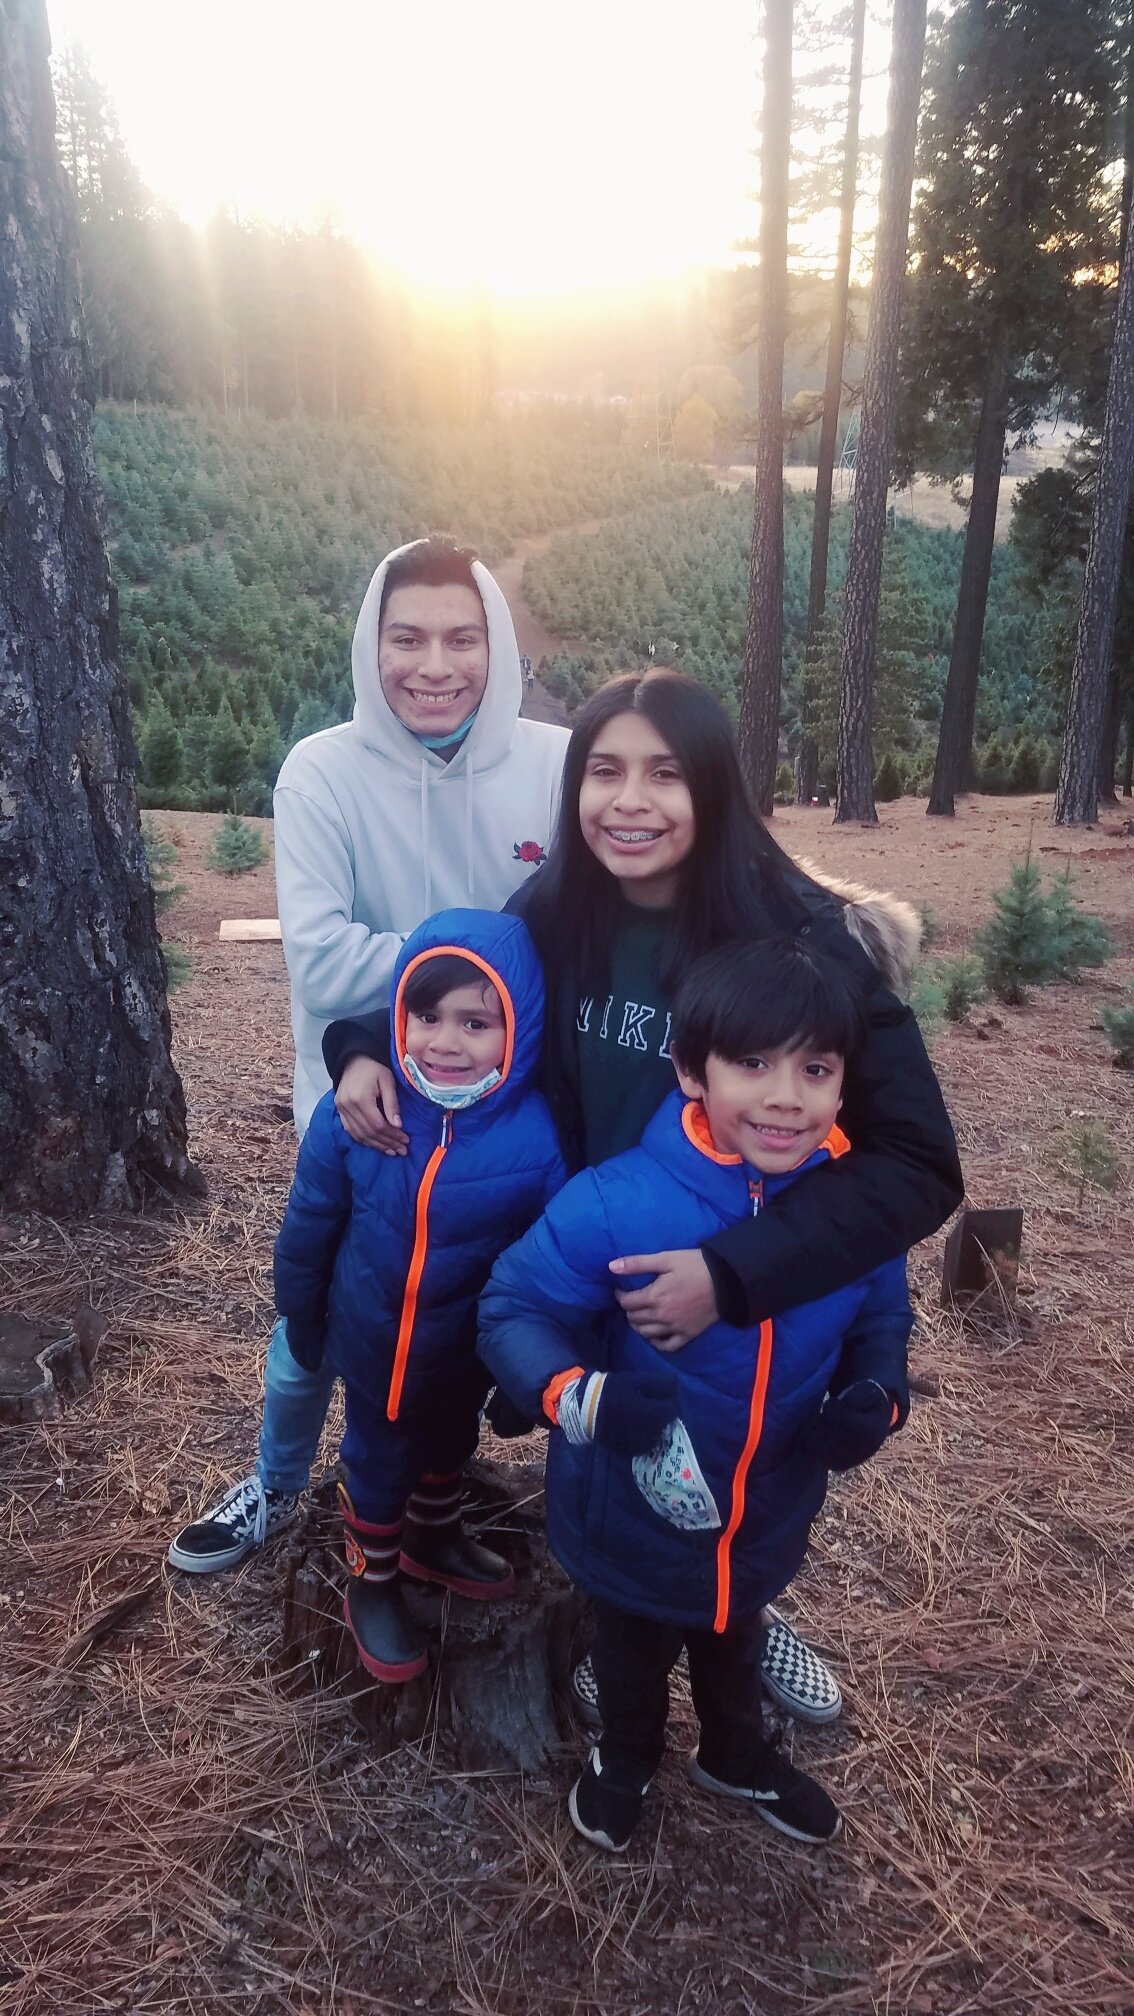
The strand is displayed outside on a pine tree branch, then on our tree, and lastly the kiddos at the top the hill of the tree farm.
Happy crafting
Amanda and Naomi
To share: take a photo of your craft and let us see it! Click on photo submission and submit the photo.


