

Friends,
Valentine’s is this week, and we’re sharing how to make these Berry Nice Valentine’s for a berry-themed celebration. You just need a few supplies and any berry-flavored candy, too. Check it out below!
*Click on the photos for a closer look
What You'll Need
For 32 valentine’s
(2) Red or Dark Pink Construction Papers
(2) Pink Construction Papers
(2) Berry Sheets
Glue
Scissors
Pencil
(32) Popsicle Sticks
(32) Berry Candies
(32) Green Twine/String Strands
The Steps
We want to see your craft! Click on PHOTO SUBMISSION and submit
I’m excited for this year’s Valentine’s as we missed crafting for it last year. Micah is officially in school, which means we got to make these valentine’s for his kindergartner class! Even though most people prefer chocolate (I do!), we decided to put a cute spin on strawberry themed valentine’s.
Thankfully Micah was OK with the candy and berry theme; he was mostly happy about having valentine’s made by mom. They turned out super cute and I can’t wait to hear all about his first V-Day party; maybe help him with his candy = )


HEARTS
Fold each of your papers 4 times to create 16 rectangles per sheet.
*You’ll need 32 sets in all (dark pink or red & pink). Our red looks dark pink in most of these photos.


Decide which color you prefer to be the top and which to be the border. We chose red to be the top and pink as the border.
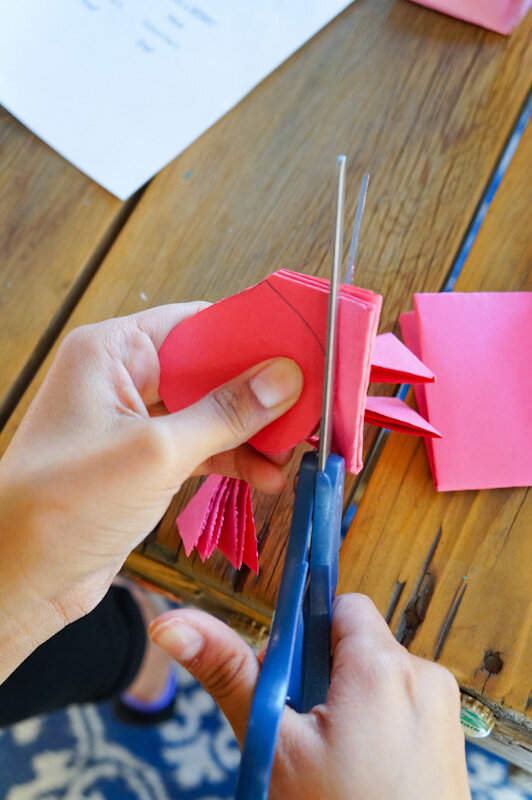
2. With the pencil, draw a wide (horizontal) heart on the “top” color.
3. Carefully cut out the heart, either on the line or just on the inside. You’ll have 16 total.
4. Use that heart as a stencil on the second, same-colored page and carefully cut those out.


5. Then use the same heart to now stencil on the opposite/bottom color.
6. This time cut OUTSIDE of the line, leaving a border. Repeat with the 2nd page.
You can skip this step if you have a paper cutter or are great with freehand cutting.
LABELS
Now take one of the berry *print outs and use background light to help you line up the words in the front/back. Fold in half.
*My printer was having issues, yours will not look like this.


2. Continue with the folding until you have horizontal & vertical lines around the wording. Repeat with the 2nd page.
3. Cut out all the wording.


ASSEMBLE
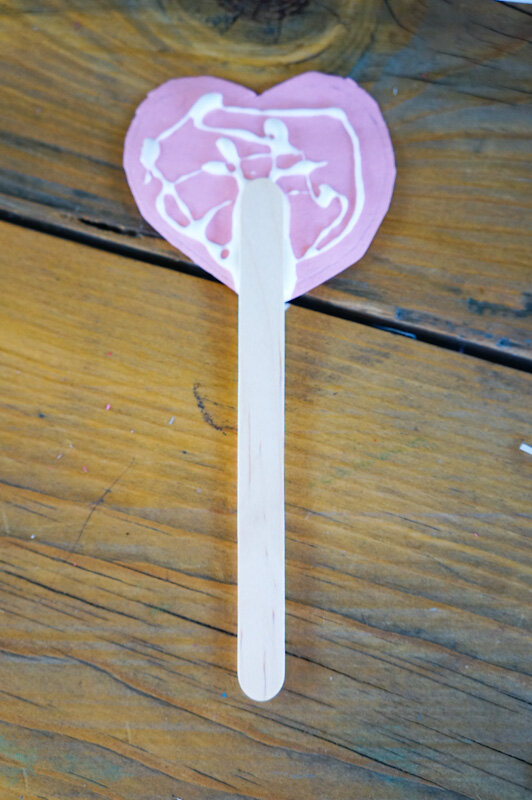
Add glue to the bottom heart and lay a Popsicle stick down, about 1 in. from the bottom.
Flip the Popsicle over 1 time(not shown) so both sides have glue, then lay the top heart down,
Add a little glue to the top of the 2nd heart and press down berry label.
Continue with all the hearts and set aside to dry, about 5-10 min.


5. If you haven’t already, cut out (32) 4-5 in. strands of *green twine/string.
6. Evenly tie 1 strand before adding the ^candy then double knot it or create a bow.
That’s it!
*We found ours at Dollar Tree. ^Purchased at Walmart.
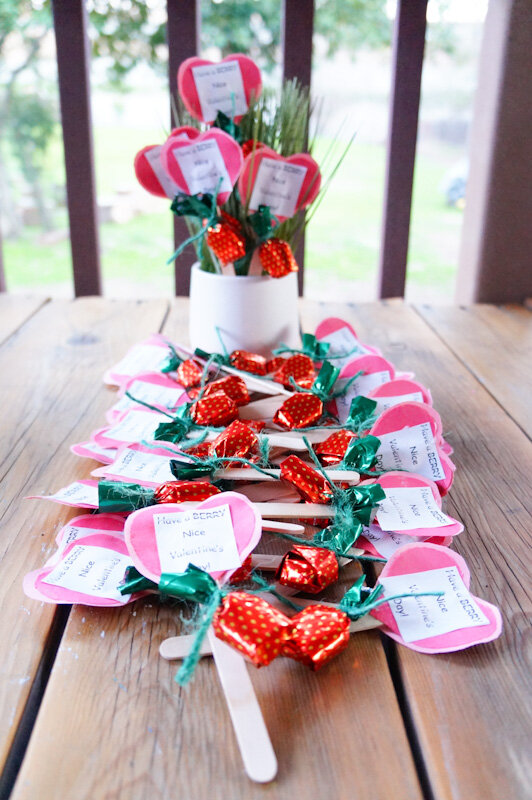

Aren’t these cute?!


Happy crafting and Happy Valentine’s Day!
Amanda and Naomi
To share: take a photo of your craft click on photo submission and submit the photo


