

Hi friends,
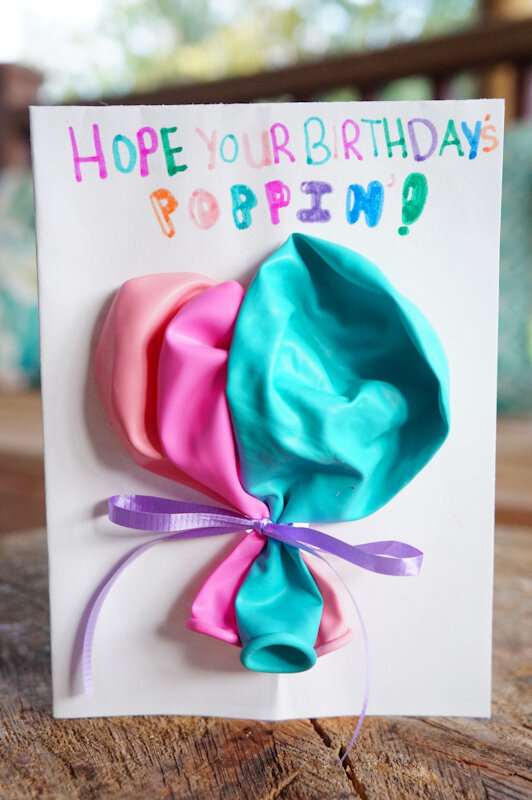
We have a fun DIY Balloon Bouquet Card. There’s so much goodness; it's cute, birthday-inspired, a gift, an activity, it’s handmade, customizable, inexpensive, and above all, EASY!
*Click on photos for closer look
What You'll Need
White Construction Paper
Pencil
Markers
Scissors
Balloons (3 per card)
6” Narrow Ribbon/String
Hole Punch
Glue Stick (not shown)
The Steps
We want to see your craft! Click on PHOTO SUBMISSION and submit
STORYTIME:
I had Naomi’s birthday in mind as I planned this craft, because we were about to celebrate hers. She’s since celebrated her 14th birthday. I didn’t tell her at the time where my inspiration had come from, though I’m sure she suspected; we just talked and worked happily. When we were done with the cards, I said, “Wasn’t this so easy?! “ she agreed.
I said it was in honor of her upcoming birthday. She smiled and responded, ‘I kind of figured Mom.” I couldn't help but tease her with my reply, “Well, you just made your own birthday card”. Her expression of disbelief made me laugh, but I told her I was kidding. She chuckled, knowing I almost fooled her.


PREP
Fold the paper in half towards you.
optional: Open up and glue the inside, then fold back down.
Fold over once more.
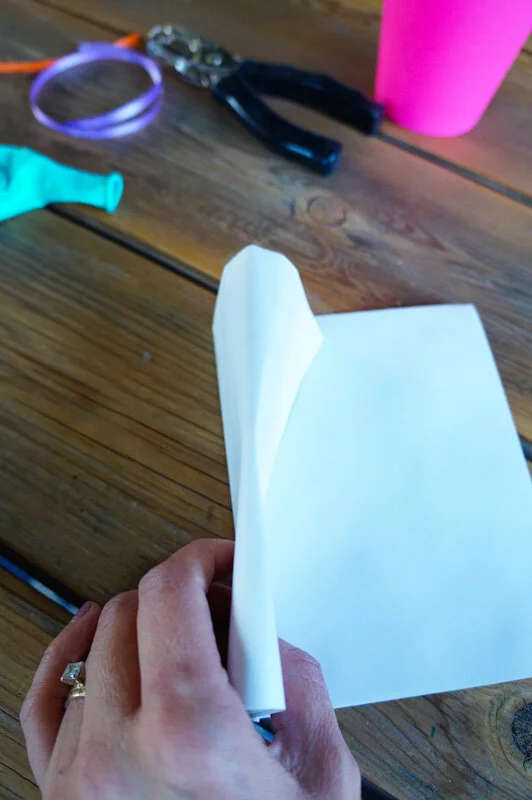


3. Take the left(top) side of the card and gently fold it in half, towards the inside crease.
You do NOT need to make a hard new crease there, it’s just a placement guide for the hole punch.
4. Place the hole punch about 2 in. from the bottom and near the edge of the “crease”, punch a hole.
5. Unfold the crease and straighten out as much as possible.


ASSEMBLE
We thought tape would work but it did NOT.
1. Pick 3 balloons and fan them out so they’re all visible.
2. Apply a bit of glue between them and press together.


3. Cut 6 in. of string and loop through the holes from the inside.
4. Place the balloons in the center of the holes and tie a bow with the string.
5. Add a quarter sized amount of glue onto the card and press the balloons down firmly.
It should all dry withing 5-10 min.


MESSAGE
With a pencil, write, “Hope Your Birthday’s POPPIN’!” or “Have A POPPIN’ Birthday”.
Then trace over with markers and erase the pencil writing.
That’s it!

⭐Gifting the card: the recipient is able to undo the ribbon, peel the balloons away and blow up. OR blow up and POP!
⭐Themed gifts for the recipient: Give them various sizes of balloons with the card or include all things that pop: Soda Pop, Popcorn, Pop Rock Candy, Bubble Gum, Bubble Wrap and Party Poppers.
Whatever you decide, it'll be a fun gift to receive!
Happy crafting!
Amanda and Naomi
To share: take a photo of your craft click on photo submission and submit the photo


