

Hi friends,
Today we have a super cute craft, we share how to Minion-ize With Minion Eyes Giftbags & Goggles, a gift bag with Minion eyes that includes wearable goggles too!
I love to give practical things(boring, I know), even better when they’re affordable and fun. This craft is just that! The recipient gets this cool Minion bag, your gift inside, and goggles for playtime. The craft is inspired by my littlest minion, who is turning 3 this week, and celebrating Minion style. “Minons”, have taken over our home! Try out this Minion gift bag and wearable goggles for your special Minion.
*Click on the photos for a closer look
What You'll Need
Minion Giftbag
Medium Yellow Giftbag
Construction Paper: White, Black
Small Canning Ring(trace)
Markers: Black, Grey, 2 Green, 2 Brown
Glue Stick
Scissors
Pencil
optional: Medicine Syringe (iris)
What You'll Need
Minion Goggles
Felt: Grey or Black
Black Construction Paper
Small Canning Rings
Elastic: White or Black
Scissors
Glue Gun & Glue Stick
Stapler
optional: (8) Mini Nuts, Pencil, Silver Craft Paint & Brush
The Steps
We want to see your craft! Click PHOTO SUBMISSION, then submit the photo.


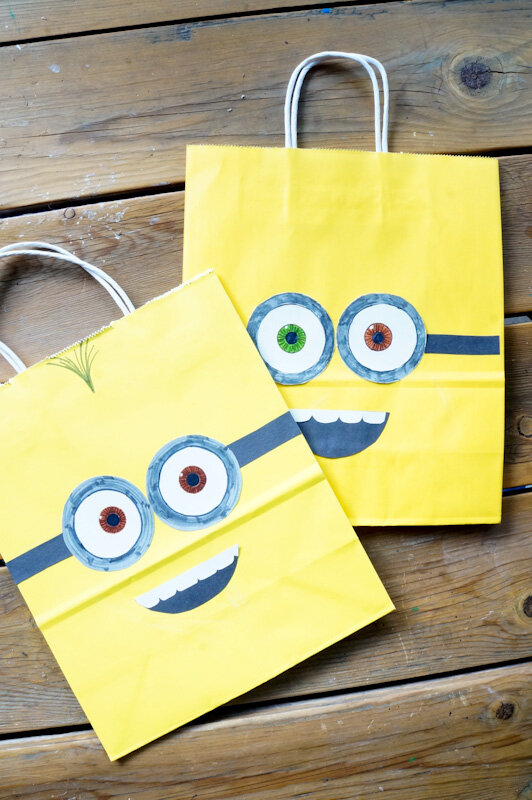
MINION EYES BAG
PREP
Trace the inner and outer sides of the ring 2x(not shown).We traced the outer ring last, which was a bit harder.
Trace the end of the glue stick or medicine syringe for the iris and the end of the marker for the pupil.


3. Before coloring in the pupils with black, leave a small white glare circle on the upper left side, then color the irises from the center out:
BOB: 1 green eye and 1 brown eye
KEVIN: 2 brown eyes
4. Color the goggles and cut around the outer edge.


MOUTH & GOGGLE STRAPS
Draw a wide mouth on the black paper about 3 inches wide and draw teeth the same width on the white paper. Cut them both out and glue them together.
Cut out 2 strips from the black paper about 2 inches wide
Glue the goggles and straps right above the natural center line.
Lastly, draw Kevin’s sprout of hair near the top.
Your bag is done!


MINION GOGGLES
STRAPS
Turn your black paper horizontally, fold it in half, and cut.
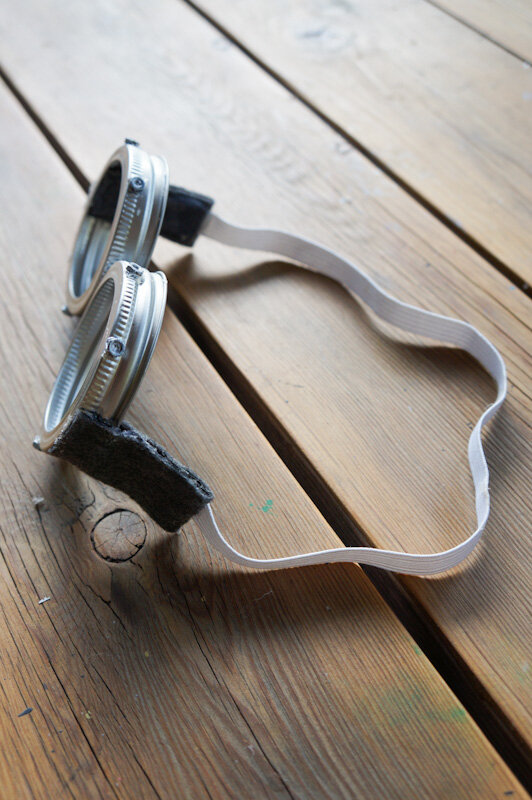
Glue half of the black paper to the felt with plenty of glue and let it dry for about five minutes.
Measure (2) 1-inch x 4-inch strips per goggle on the paper side and cut them out.
Fold the straps in half with the paper on the inside.


ELASTIC
Measure your child’s head from ear to ear and add 3-4 inches to that number, then cut out a strip of elastic that same length.
Place the edge of the elastic over the edge of the felt and staple 6-7 times. Stop before you get to the fold you previously created. Repeat with the other end.


ASSEMBLE
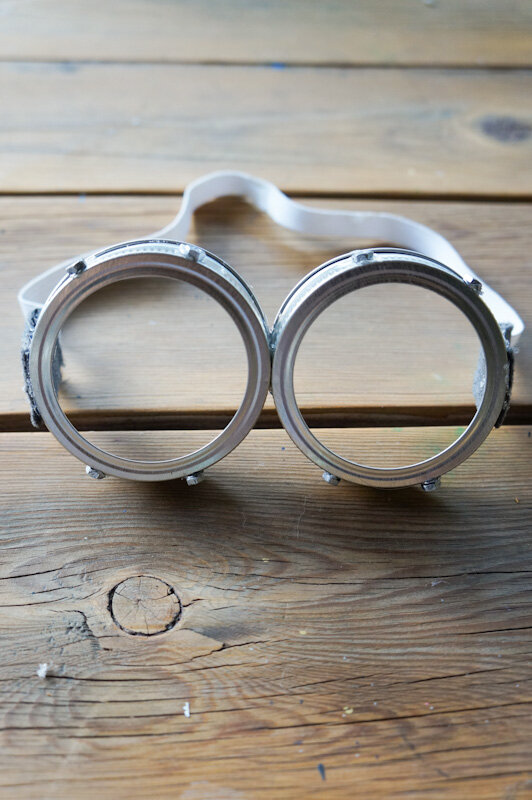
Add hot glue between the rings and hold carefully.
Then add hot glue to the paper side of the strap and on the outside of the ring. Carefully press the paper on the inside and outside of the ring. Repeat with the other end.
Cut a small strip of felt to cover the staples and glue it over them. Repeat on the other side.


OPTIONAL DETAILS
Glue 2 mini nuts to the top and bottom of each ring. Ours were dark grey so we painted them a light silver color. Let them dry.
Your goggles are done!

These came out so nicely!


Large Minion toys purchased at Dollar Tree, mini Minions are from a board game.


Place gifts inside the bags, tissue paper, and carefully place the goggles over. You will have to bend the felt out a bit so the goggles lay flatter against the bag.
That’s it!
My oldest will also be celebrating a birthday this week; thankfully, their birthdays are a few days apart. Which means this mom will be switching up the birthday decor pretty quickly.


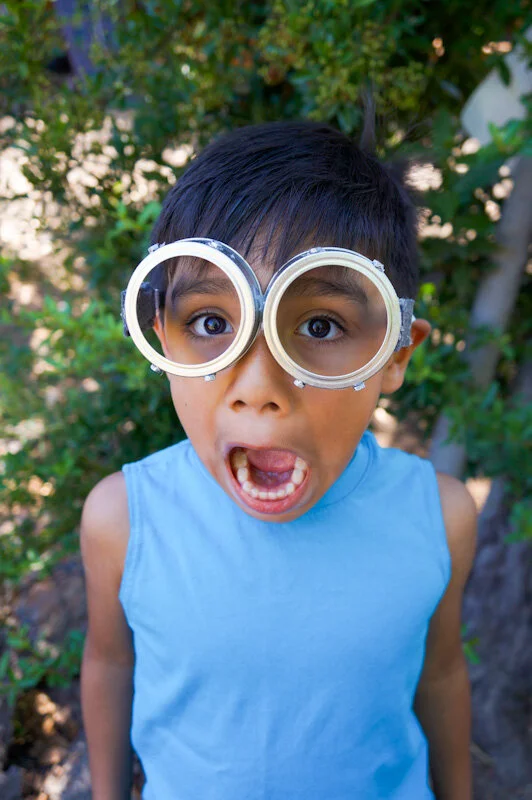

Matthias was feeling shy, but Micah couldn’t resist wearing the goggles! My littles are going to have lots of fun being Minions.
Happy crafting!
Amanda and Naomi
To share: take a photo of your craft and let us see it! Click on photo submission and submit the photo.


