

Hi friends!
Micah and I created this cute Snowmany Smiles craft. These snowmen are made with potato flakes, glitter, twigs, and a few more items. Check out our snowman craft below.
*Click on the photos for a closer look
What You'll Need
Heavyweight White Construction Paper
Glue
(3-4 TBSP) Potato Flakes
Glitter (silver/iridescent)
Felt
(1) Black Pipe Cleaner (not shown)
Twigs
Scissors
Pencil
(3) Small Round Containers in Varying sizes
optional: Wipes, Cookie Sheet/Disposable Pan, Crayons/Markers
The Steps
We want to see your craft! Click on PHOTO SUBMISSION and submit

SNOWMAN
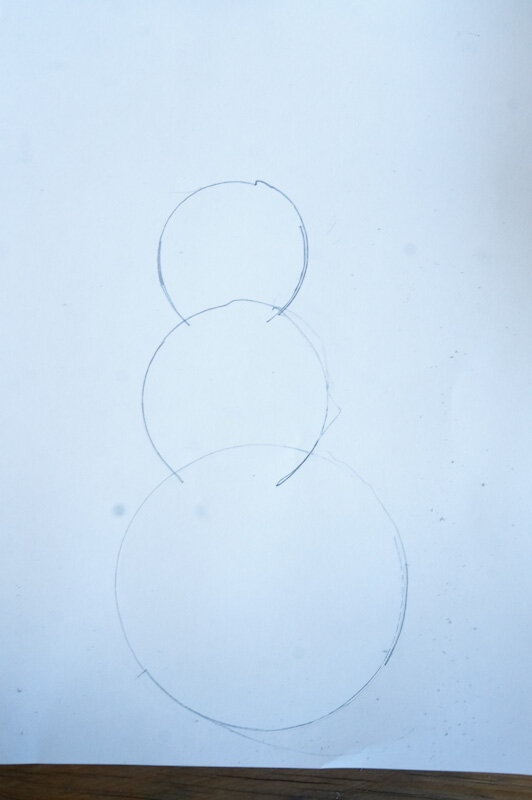
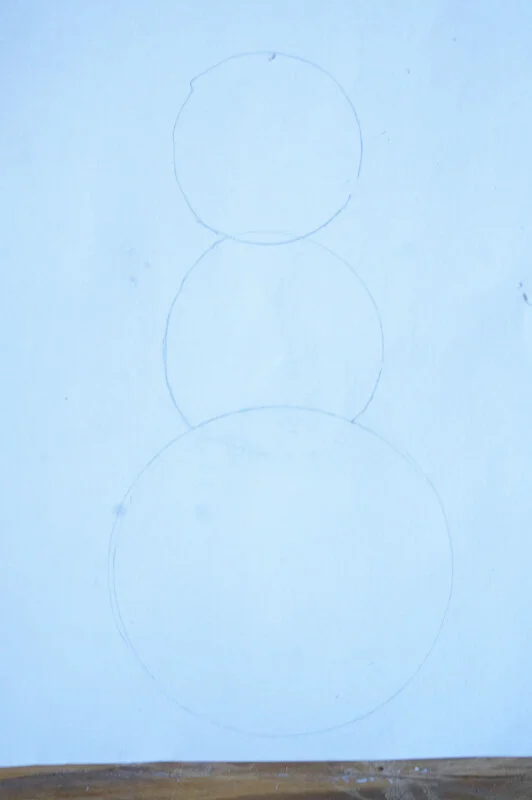
Decide if you would like a vertical/horizontal facing paper and start tracing the largest container at the bottom.
Trace each following container, overlapping a bit or right at the top of the circle.


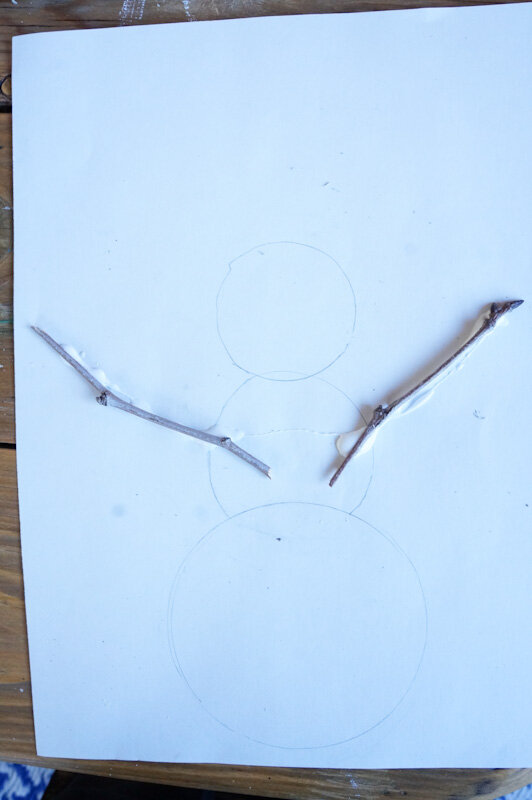
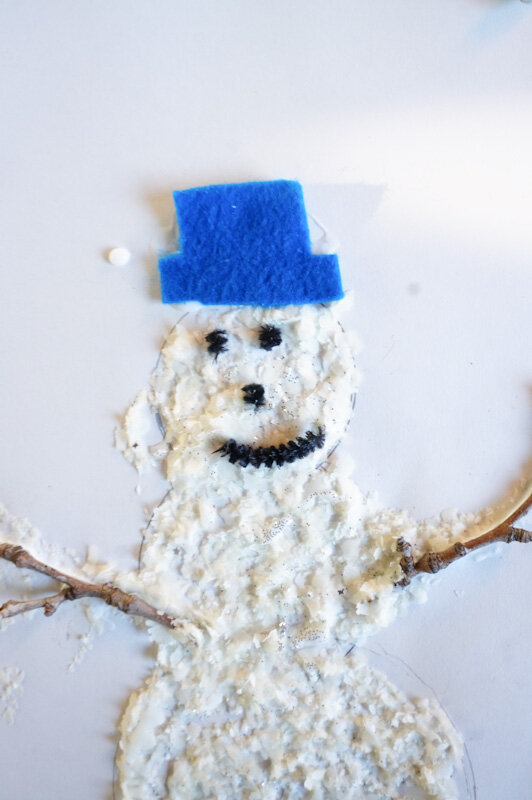
3. Break your twigs down to size and glue them onto the snowman with a generous amount of glue.


SNOW
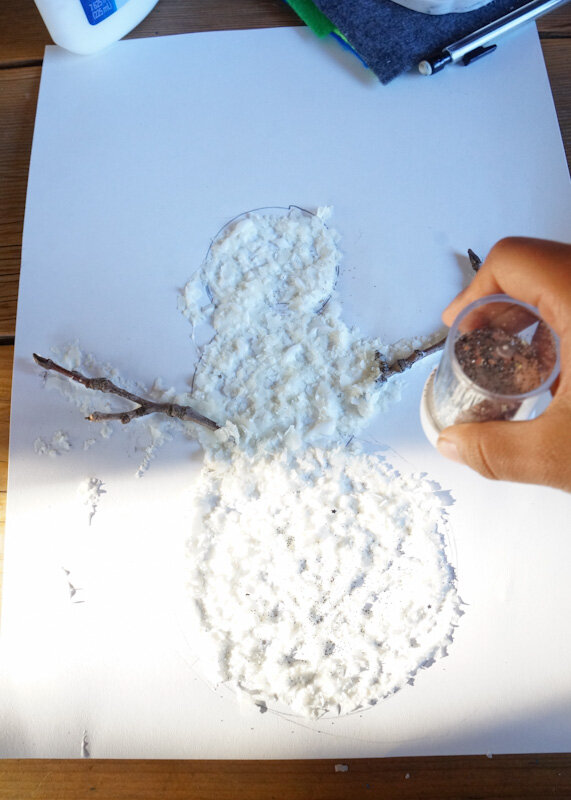
Place the flakes in one of the containers.
Add 1 or both types of glitter to the flakes and mix with the pencil or scissors. Or you can add the glitter after the flakes are glued on. Micah chose both glitters and I opted for the iridescent.
Add a generous amount of glue all over the snowman.
Sprinkle the flakes/glitter combo on the head of the snowman and carefully tilt the paper down over the sheet/pan to spread the flakes and catch the falling ones. Continue until it’s fully covered.
optional: add more glue to the snowman and sprinkle extra glitter.


FACE
Cut out two eyes, a nose, and smile from the pipe cleaner.
Glue everything to the face and hold them down temporarily.


HATS
Top Hat: Cut out a rectangle and then cut a bit from the sides, then glue the hat on.
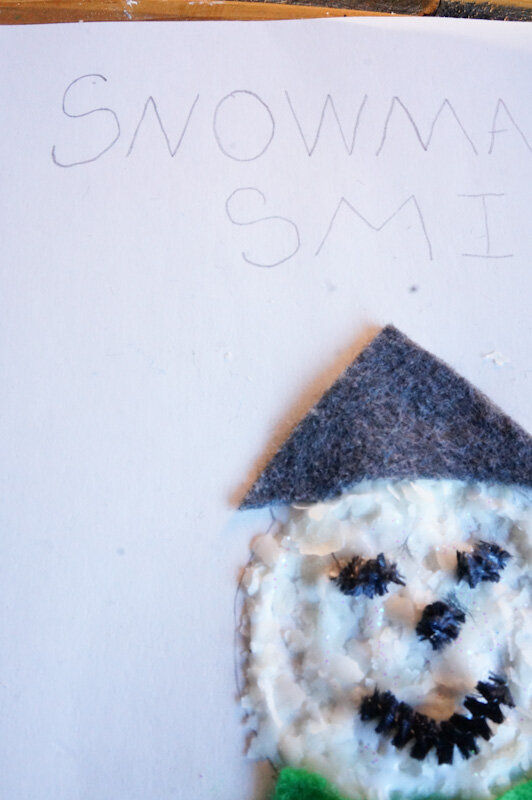
Pointy Hat/Elf Hat: Cut out a triangle wide enough for the snowman’s head, then cut a rounded edge at the bottom. Glue the hat on. (shown further down)


SCARVES
Cut a narrow strip of felt and a smaller strip, about 1 inch long. Leave as is or cut small notches to create tassels.
Add glue and lay the smaller piece down near the edge of the neck, then the larger piece on the neck and overlapping the smaller piece.

MESSAGE
With a pencil write one of the messages-
“SNOWMANY SMILES”, “SNOW-MANY SMILES”, or “SNOWMAN-Y SMILES”
Color the words in with crayons or markers and let everything dry completely for 15-30 minutes.
That’s it!


Glitter!
Happy crafting!
Amanda, Micah, and Naomi
To share: take a photo of your craft click on photo submission and submit the photo


