

Hi friends,
In honor of Christmas this week, we’re sharing these simple Thumbprint Wreath Ornaments. The littles were sick the last 2 weeks and didn’t enjoy many holiday activities, so I rounded them up for some easy thumbprint fun.
*Click on the photos for a closer look
What You'll Need
Heavyweight White Construction Paper (1 sheet= 2 ornaments)
Cup
Glue
Pencil
Marker
Green Craft Paints
Scissors
Toothpick(not shown)
Plate/Paint Tray
Hooks
optional: Table Cover, String/ribbon, Wipes
The Steps
We want to see your craft! Click on PHOTO SUBMISSION and submit


optional: Cover your work space with newspaper, extra wrapping paper or a table cover.
PREP
Fold your paper into fourths.
Open up the paper, add glue to one half, and glue it together.


3. Cut the glued paper in half.
4. Use the cup and pencil to trace a circle on each half.


THUMBPRINTS
1. Squirt a bit of paint onto the plate.
2. Use the right thumb for one color and the left thumb for the second color.
3. Press each thumbprint on the drawn circle, switching between the thumbs, and rotating the paper.
You can overlap the prints or space them out.


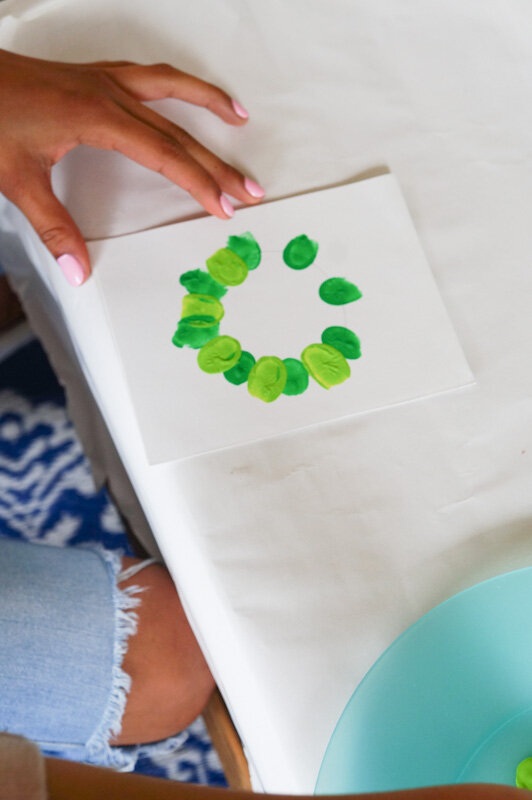


Blend the colors if you’d like.
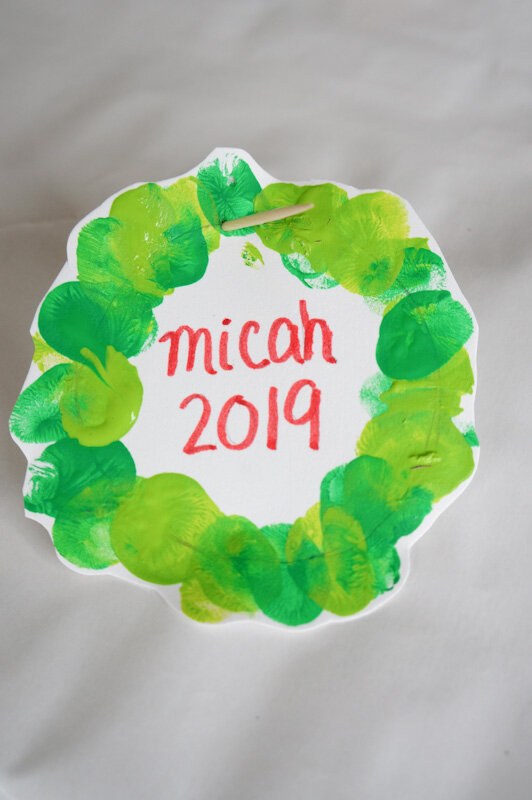
Matthias’ s wreath, Micah’s, and mine.
4. Let the wreath’s dry for 15- 30 minutes.


LABEL
1. In the center, pencil in the and the year.
2. Trace with a marker and then cut it out.


RIBBON & HOOK
Use a toothpick to poke a hole near the top for the hook and two more further down for the *ribbon/string.
*The string/ribbon is optional but adds a cute touch. With the end of the toothpick push the string through the whole and then pull through.
That’s it!
Happy crafting and Merry Christmas!
Amanda, Micah, Matthias and Naomi
To share: take a photo of your craft click on photo submission and submit the photo


