

Hi friends,
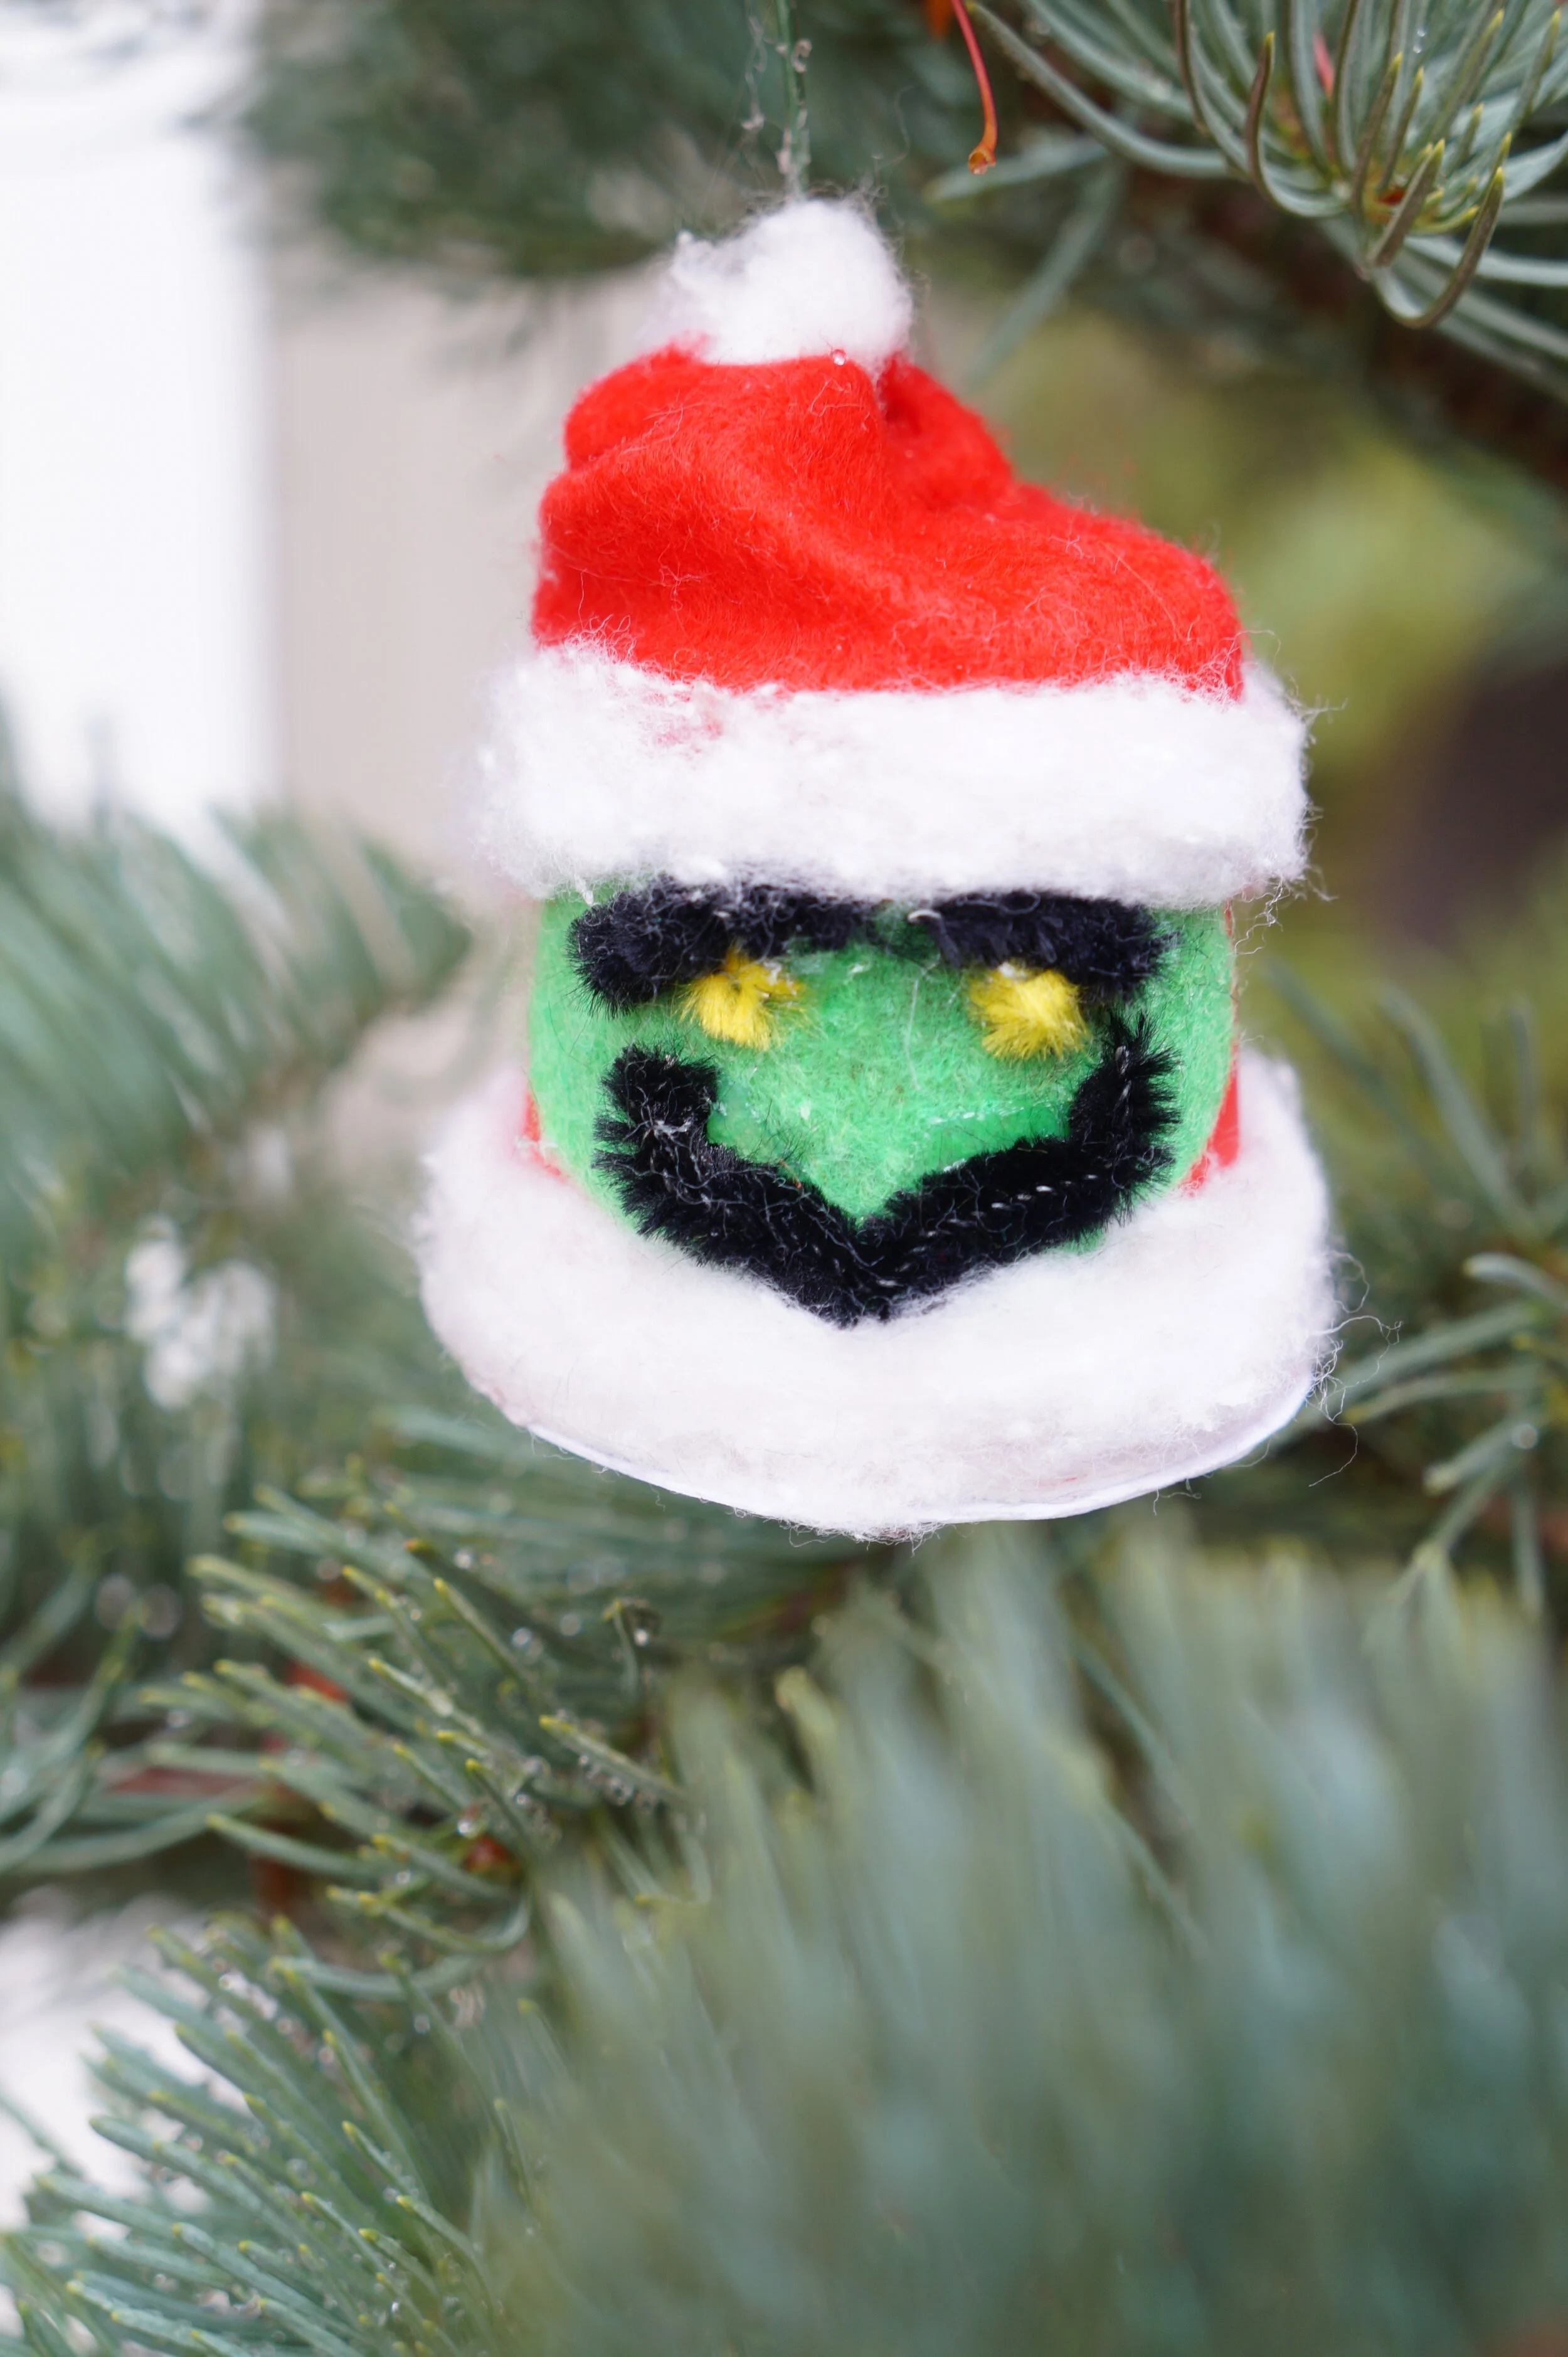
Today we bring you a little grinchy festivity with our Grinch inspired ornaments. Micah had previously suggested we do some kind of Grinch craft, so we came up with this recycled K-cup craft. We’ll show you how to make your own smiling Grinch or scowling Grinch. Check it out below!
Click on photos for closer look
What You'll Need
(1) White Construction Paper
K-Cups
(1) Cotton Ball per K-Cup
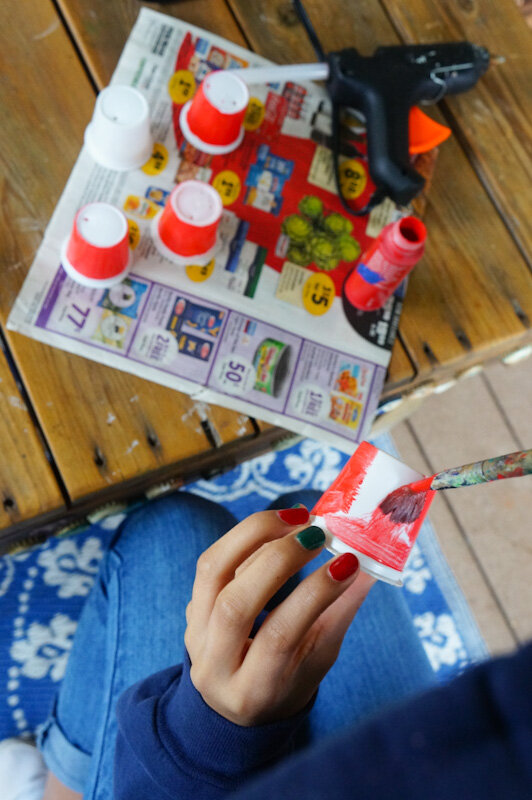
Red Craft Paint & Brush
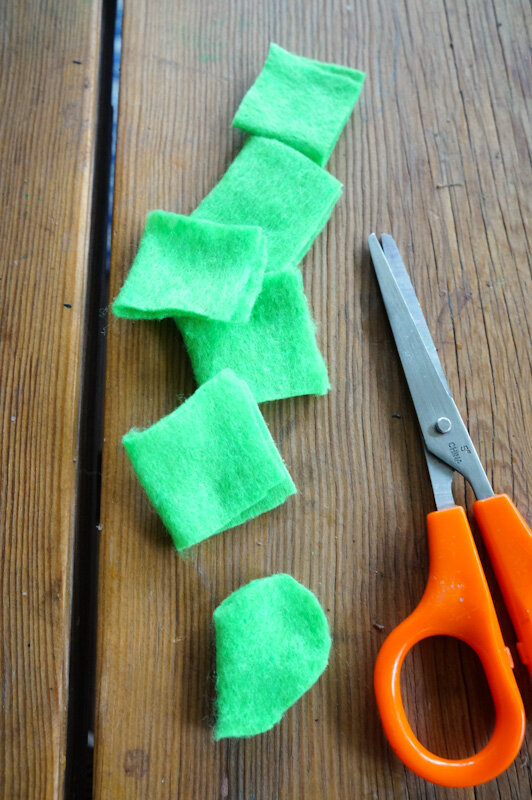
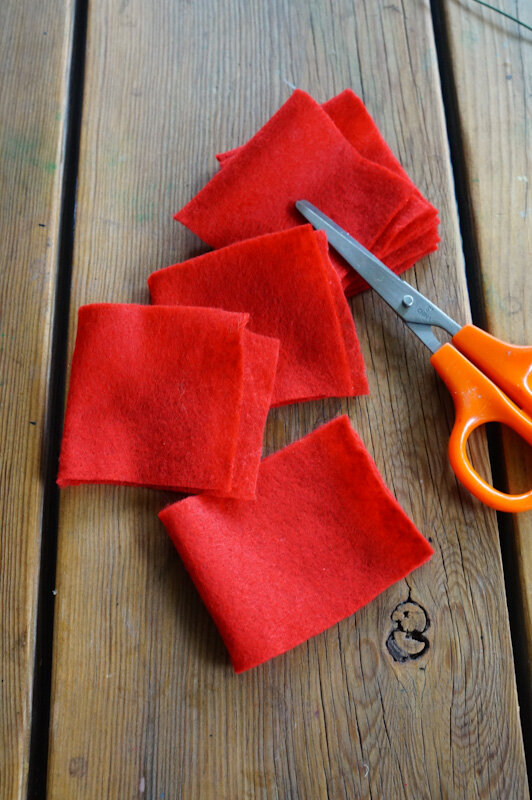
Red & Green Felt 1 sheet each
(2) Black & (1)Yellow Pipe Cleaners
Pencil
Scissors
Long Ornament Hooks
Hot Glue
Toothpick/Pushpin
Optional: Marker, Newspaper/Table Cover,
The Steps


PREP
Fold the paper in half and glue.
Trace enough K-cup circles for each ornament.
Cut out the circles and set them aside.
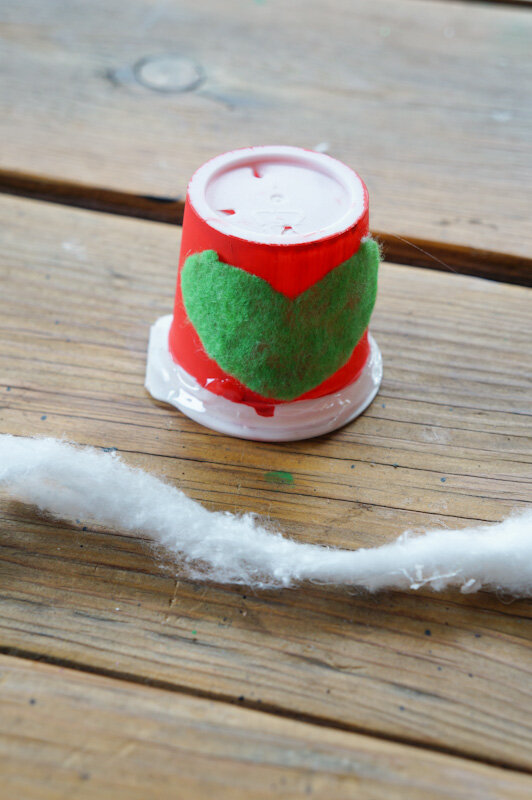
Paint the cups red, let them dry, and paint a second time.


FACES
Fold the green felt over about 1 inch and cut about 1-inch x 1-inch squares, enough for each ornament.
While folded, cut out heart shapes. We made wide hearts.

SANTA HATS
Fold the red felt over about 2 inches and cut 2-inch x 2-inch squares.
BODY
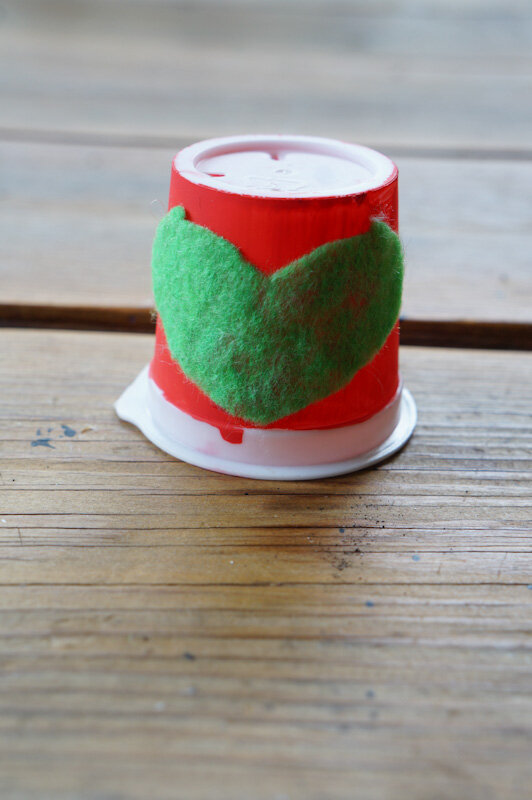
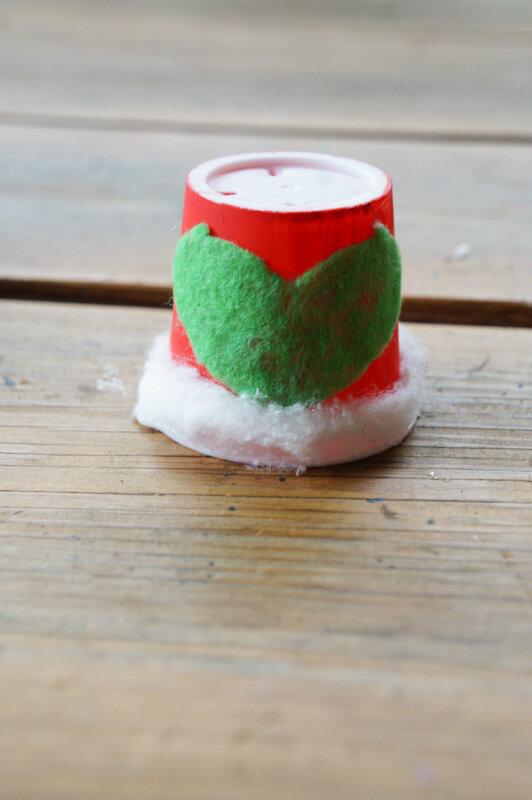
Glue the green hearts(face) onto the cups, cups facing down.
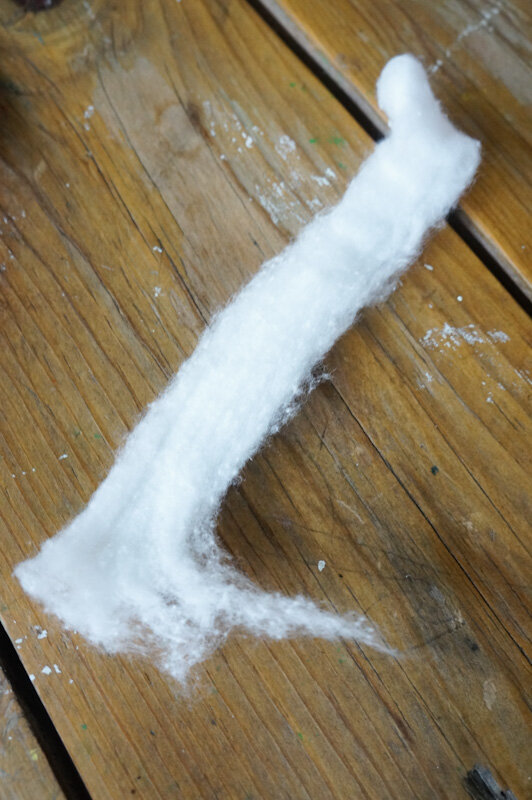
Unroll the cotton balls and split them in half, lengthwise.
Glue one half strip to the bottom edge of each cup, save the excess.


FEATURES
Cut 2 inches of black pipe cleaner per mouth and (2) 1/2 inch pieces for the eyebrows.
Cut tiny pieces of yellow pipe cleaner for the eyes.
Fold the 2-inch piece in half, spread apart, and curl in the ends before gluing on, along with the eyes and eyebrows.
Scowling Grinch- Place the eyebrows in a V shape between the eyes
Smiling Grinch- Place the eyebrows on the outside or above the eyes. You may curve them a bit or leave them straight.


SANTA HATS
2. Poke a hole near the original hole, feed an open hook through the large hole, and out the small hole. Pinch the pieces together. We added a bit of glue there to keep them secure.
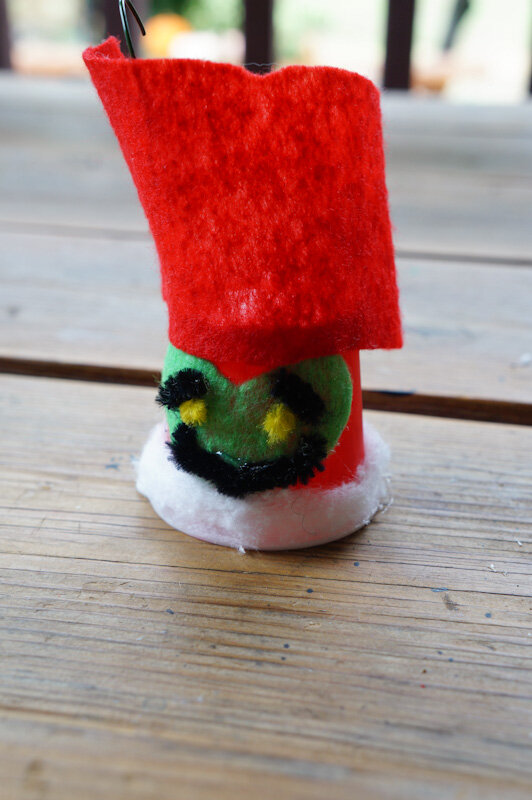


3. Add glue to the top of the ornament and wrap the red felt around (hat). Secure the edges.
4. Add glue to the inside of the red tube and scrunch it down.
5. Line the edge of the hat with the other thin strip of cotton and the top with a tiny bit of cotton.


LABELING
Lastly, glue the circles to the bottom of the K-Cup and add the year/name.
That’s it!!


Aren’t these cute?!
They’re displayed here on a tiny Xmas tree but will permanently go on the kid’s red-foil pop-up tree. That tree proudly displays a rotation of their school ornaments from the past and new ones they make. These make a great addition!
They work great as place settings too!
Happy crafting,
Amanda and Naomi
To share: take a photo of your craft and let us see it! Click on photo submission and submit the photo.


