

Hi friends,
We’re busting out with some spring fun and sharing these adorable handprint bunnies. We chose bunny colors to match our eye color & skin tone, added the details, and colored the outdoor setting. For an added silly element, the kiddos could draw some hair on the bunny heads. Check out these simple handprint bunnies below.
*Click on photos for a closer look
What You'll Need
White Paper
Glue Stick
Craft Paint & Brush
Colored Pencils
Optional: Table Cover, Whole Punch, String, Scissors
The Steps


BASE
Fold your paper in half and glue the inside together.


BUNNY
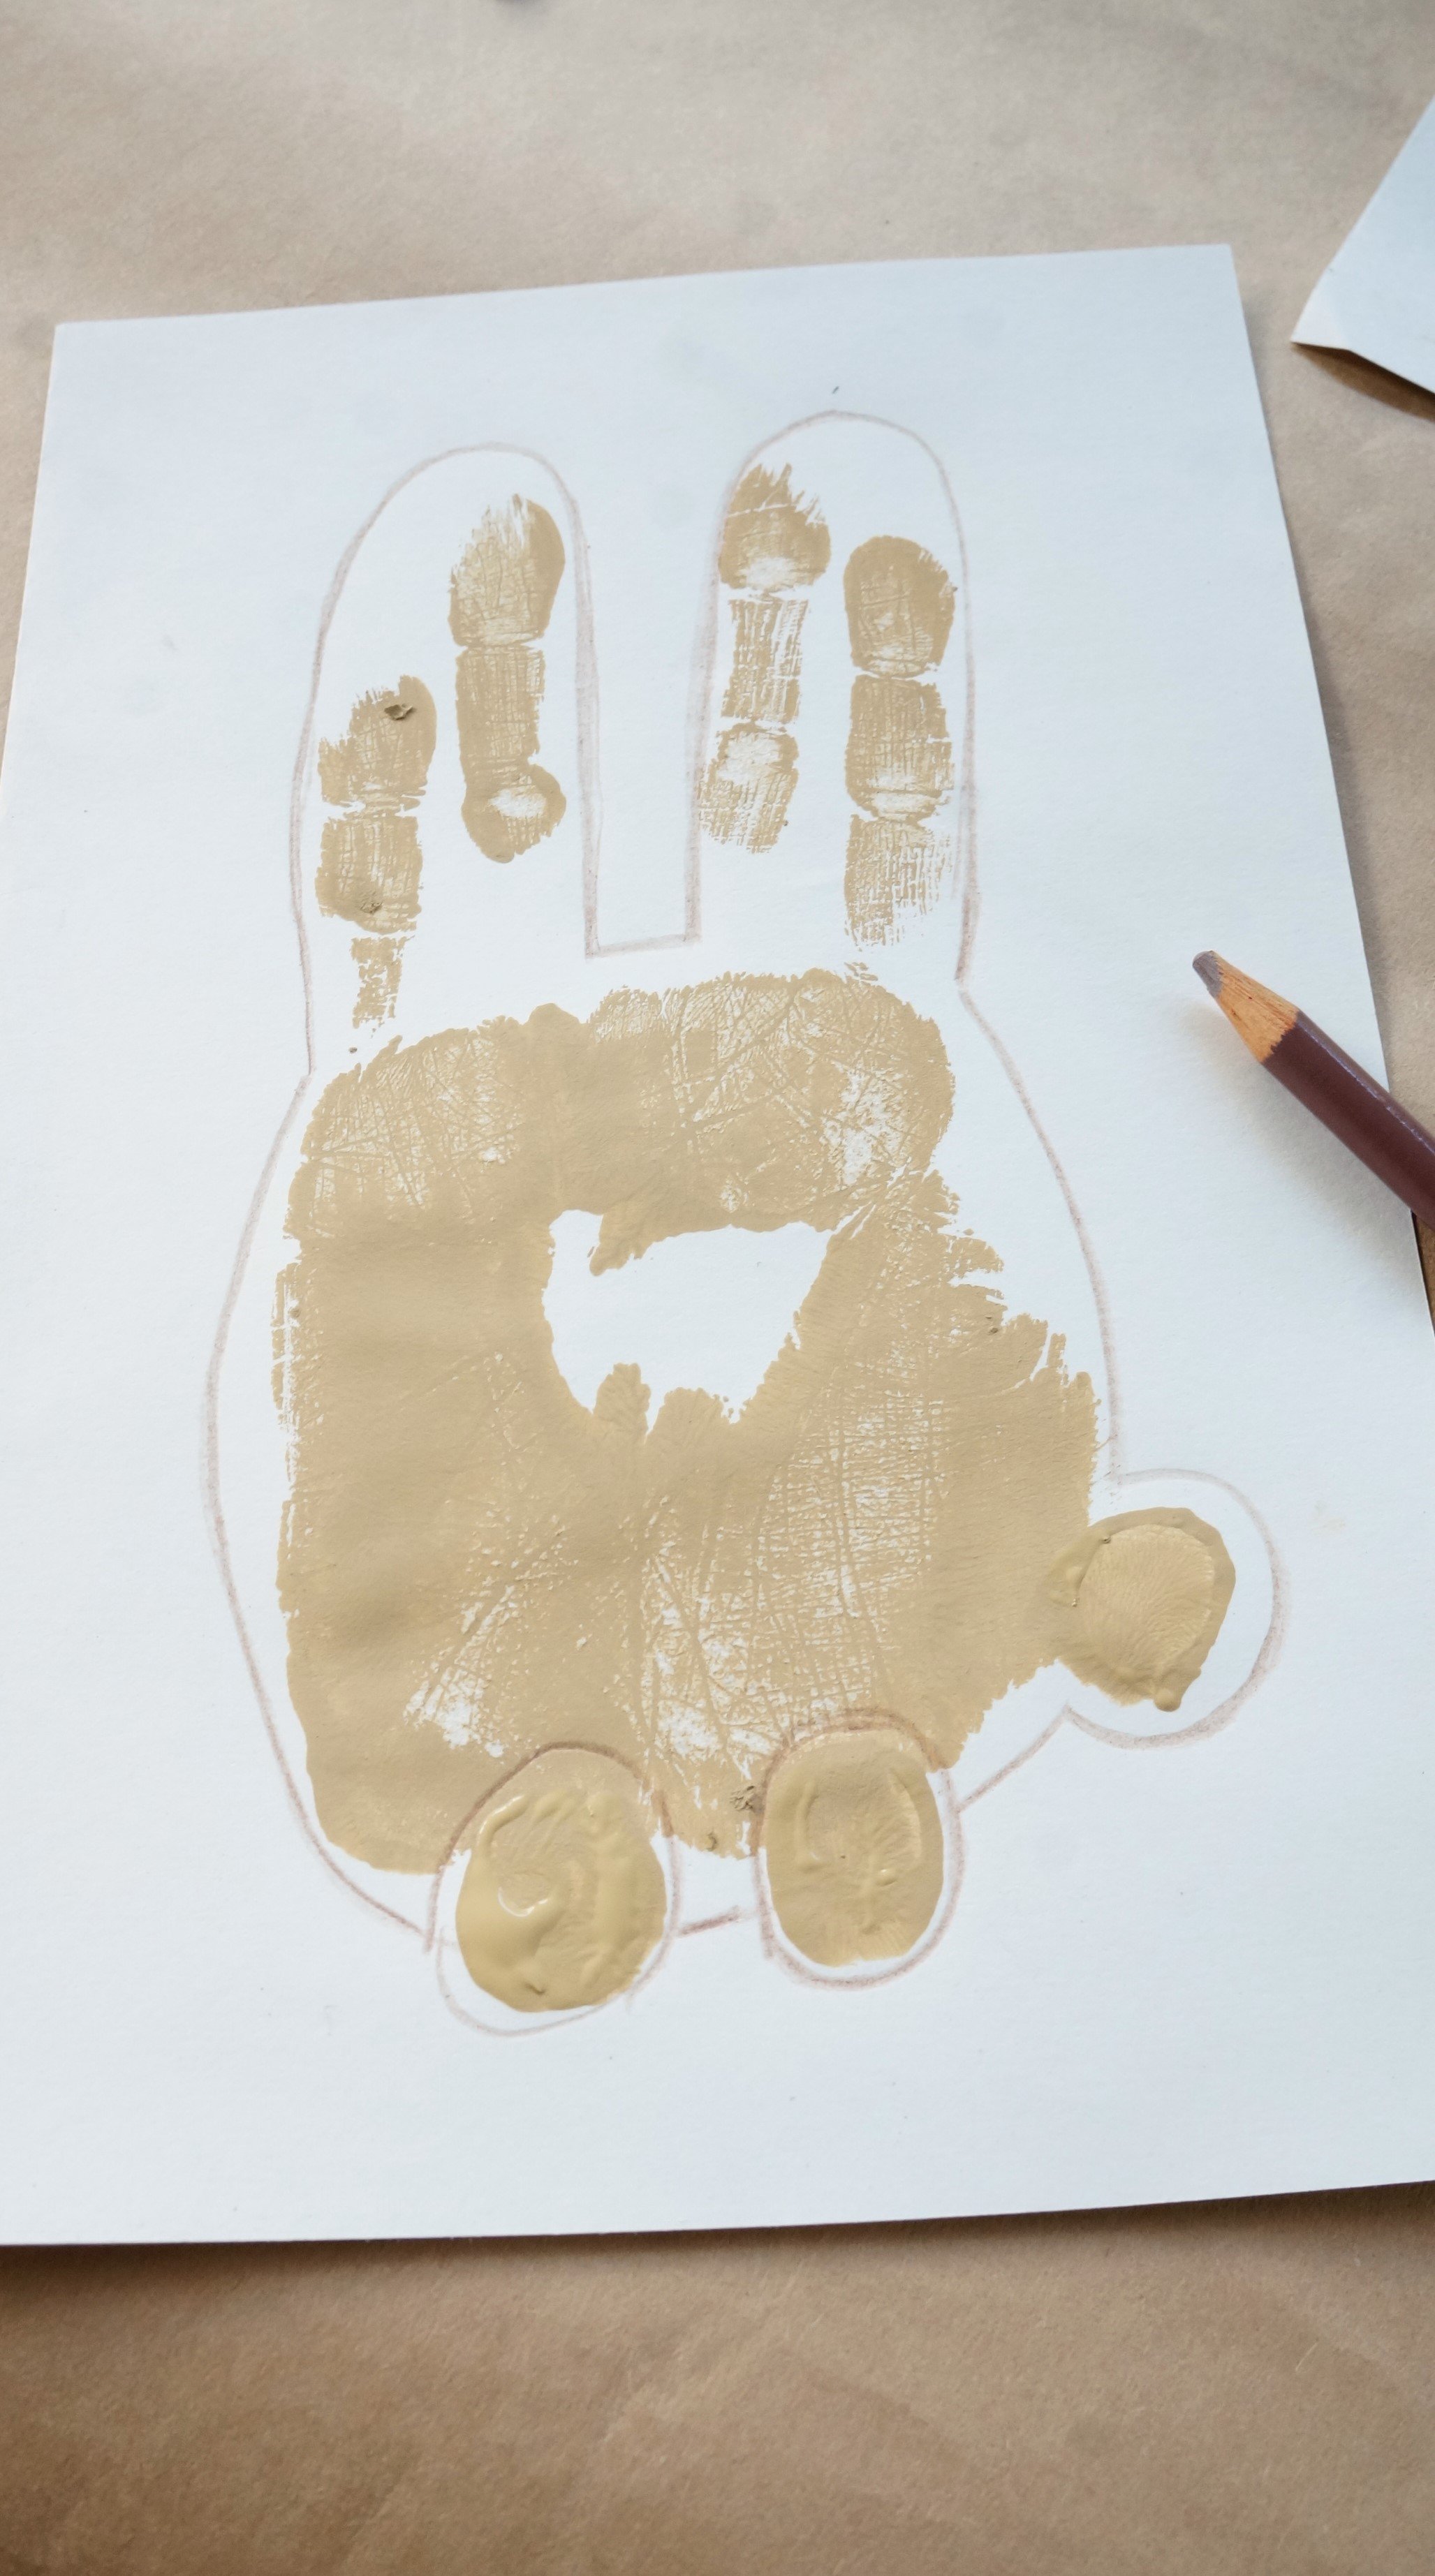
1. Blend paint colors if necessary and then brush it onto the palm and fingers. Skip the thumb.
2. Spread your four fingers into a V if possible and press down firmly.
3. Add paint to the thumb and press 3 times, once for the bunny tail and twice for the feet. Wash your hands before proceeding to the next step.
4. Once it’s dry, use a similar colored pencil and outline the bunny ears, body, bunny tail, and feet.


DETAILS
Color between each set of fingers with pink, including the nose, and pads of the feet/toes. Use a darker pink or red for darker-colored bunnies.
Match the eye color with your own, then add the mouth and whiskers.
Color in the background with grass, clouds, sun, and anything else you’d like.
That’s it!
OPTIONAL:
Punch a hole at the top, cut some string, and loop it through to hang.


My bunny, Naomi’s, Matthias’s (5yr), and Micah’s(9yr) = )
When it comes to having the littles help me with a potentially messy project like this, I take one child at a time or have Naomi help us as well. It works so much better.
Happy crafting!
Amanda and Naomi
To share: take a photo of your craft and let us see it! Click on photo submission and submit.


