

Hi friends,
Bring out your Q-tips/cotton swabs and a variety of paint colors for our easy-to-make Q-tip Hydrangeas.
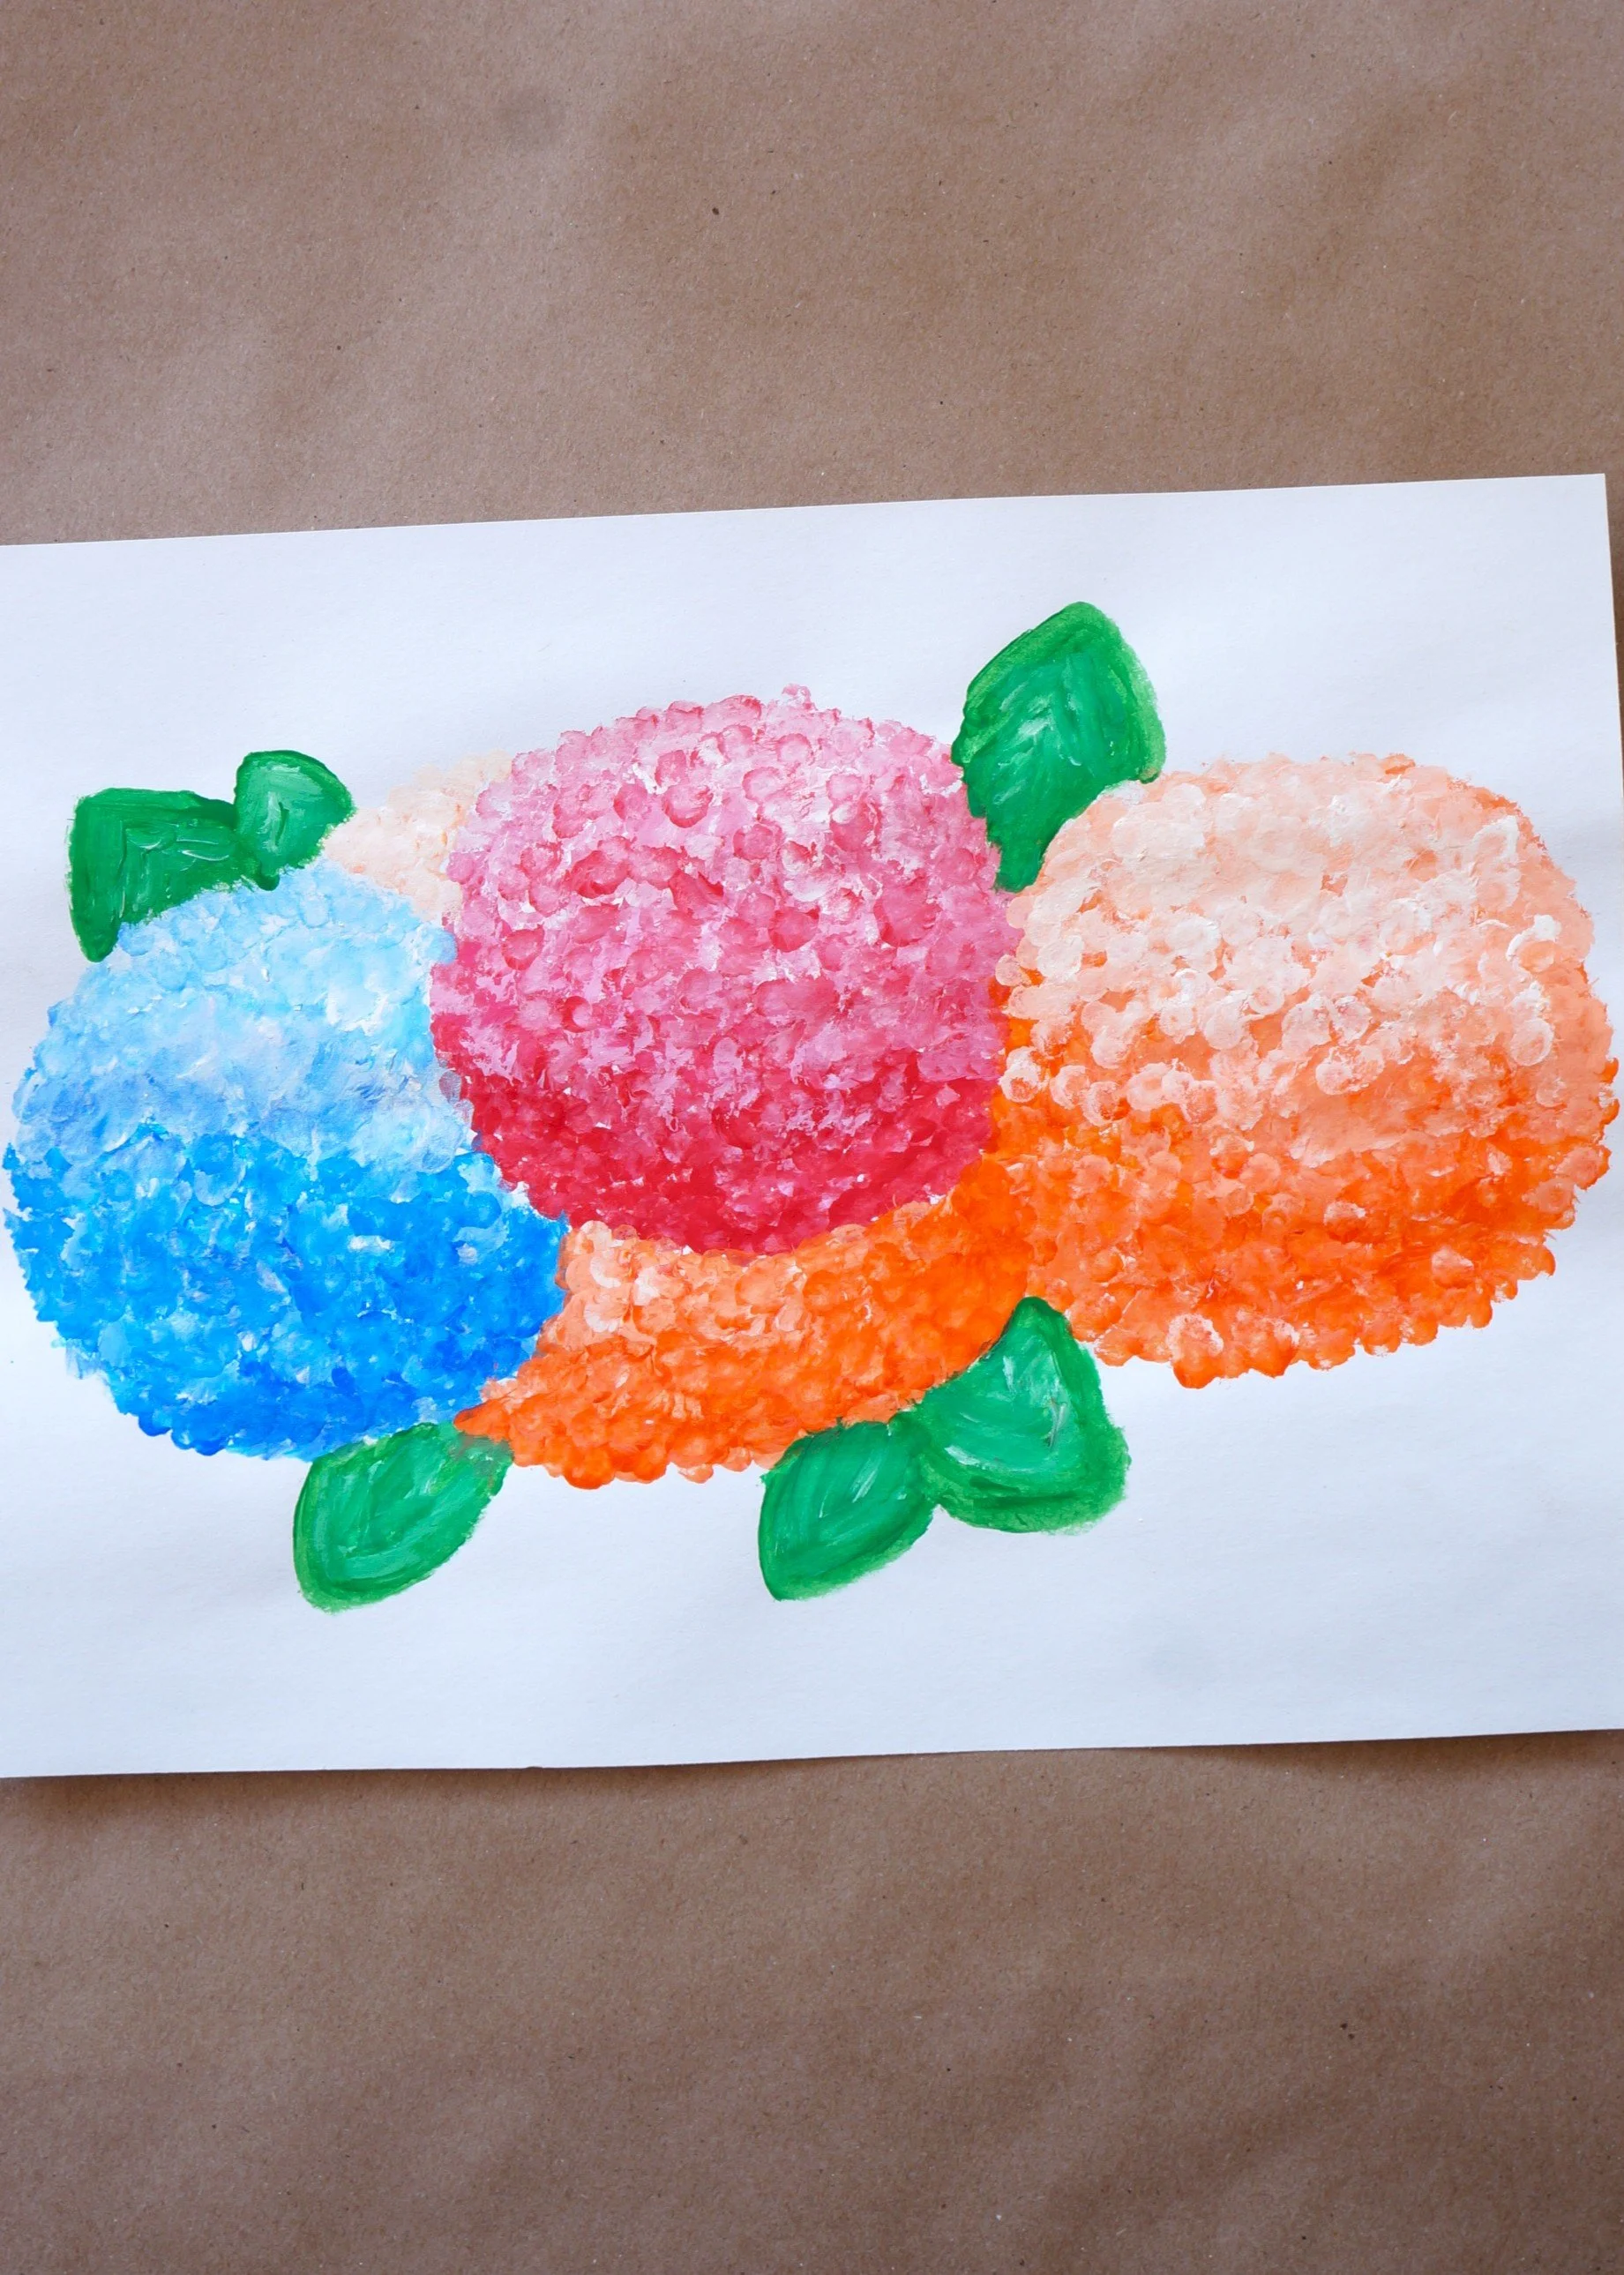
We’ve tried to grow Hydrangeas a few times, but have yet to have success. For now, I’ll enjoy them in bouquets. Create your own beautiful blooms with 3-4 different colors and lots of dabbing. Check it out below.
*Click on photos for a closer look
What You'll Need
White/Black Construction Paper
(3-4) Paints for the flowers
(2) Greens
Paint Palette
Q tips
The Steps
We want to see your craft! Click on PHOTO SUBMISSION and submit
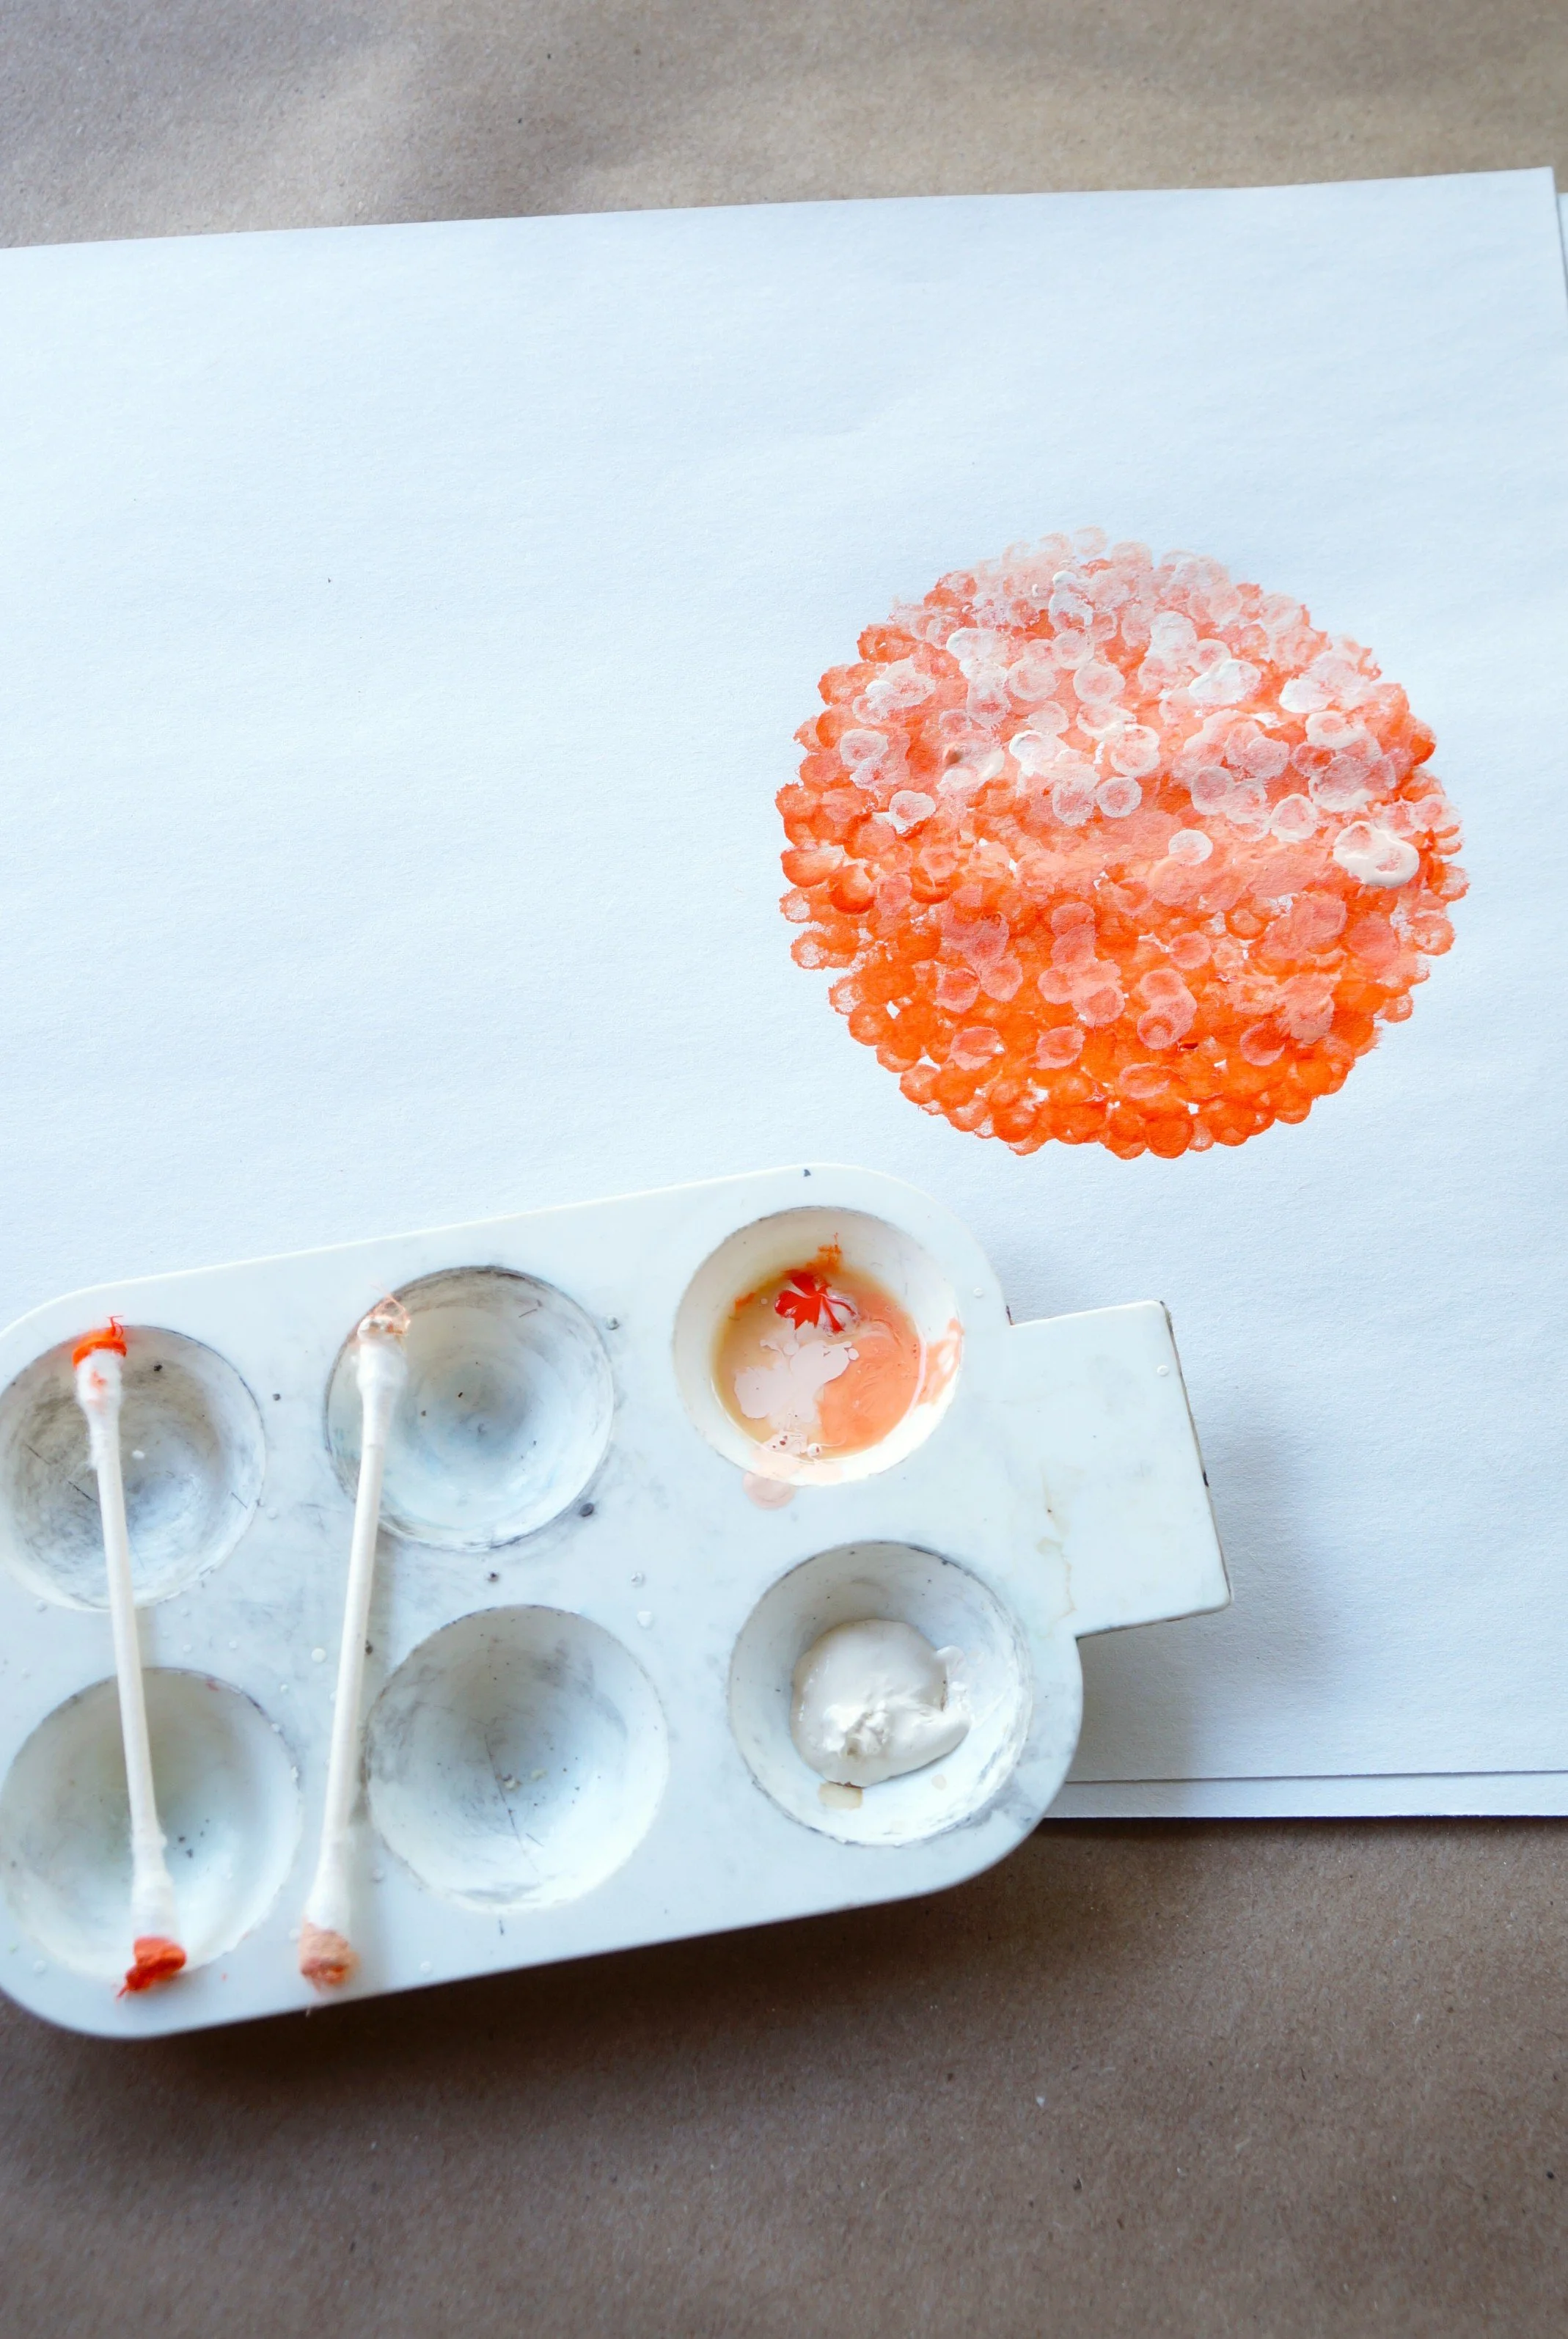
PREP
Squirt your different paints into one well so that you can mix a few of them when dabbing.
FLOWERS
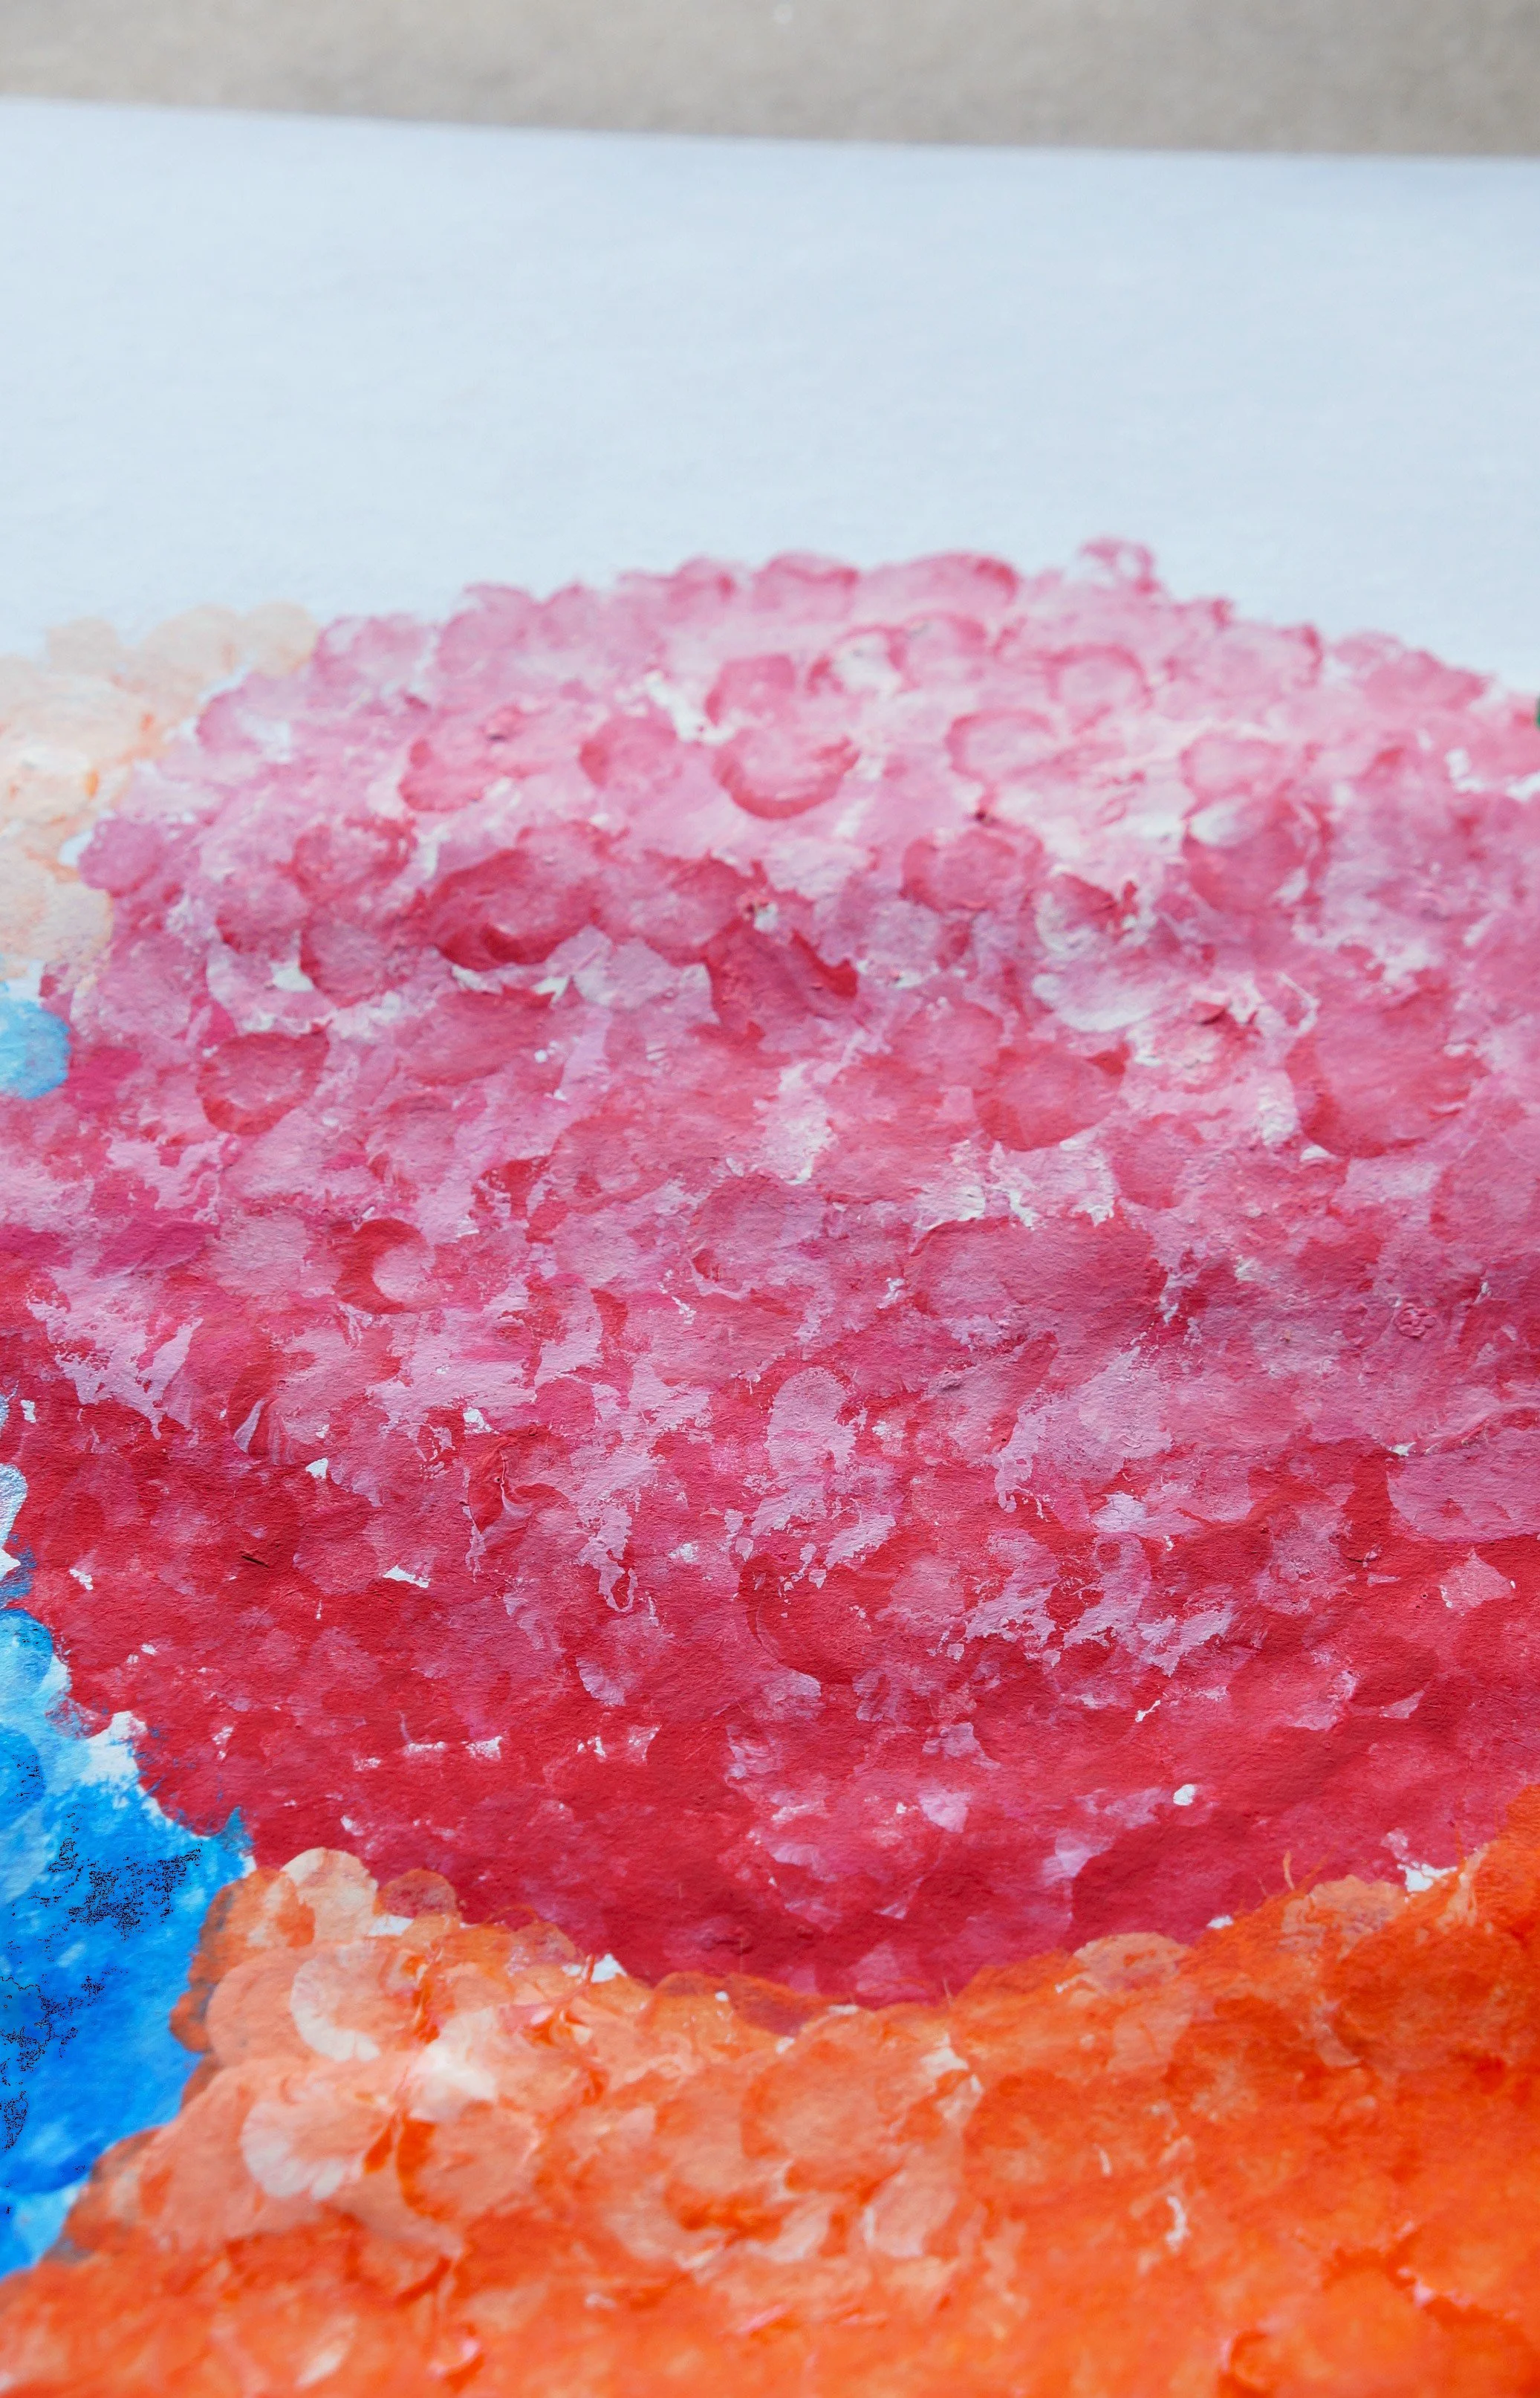
Start with your darkest color/combo on the Q-tip and dab the paint on the lower 2/3 of the flower ball.
Begin dabbing the lighter colors/combos with the opposite end of the Q-tip in the center and the lightest color at the top.
Repeat the process with multiple colors or make a single larger flower.

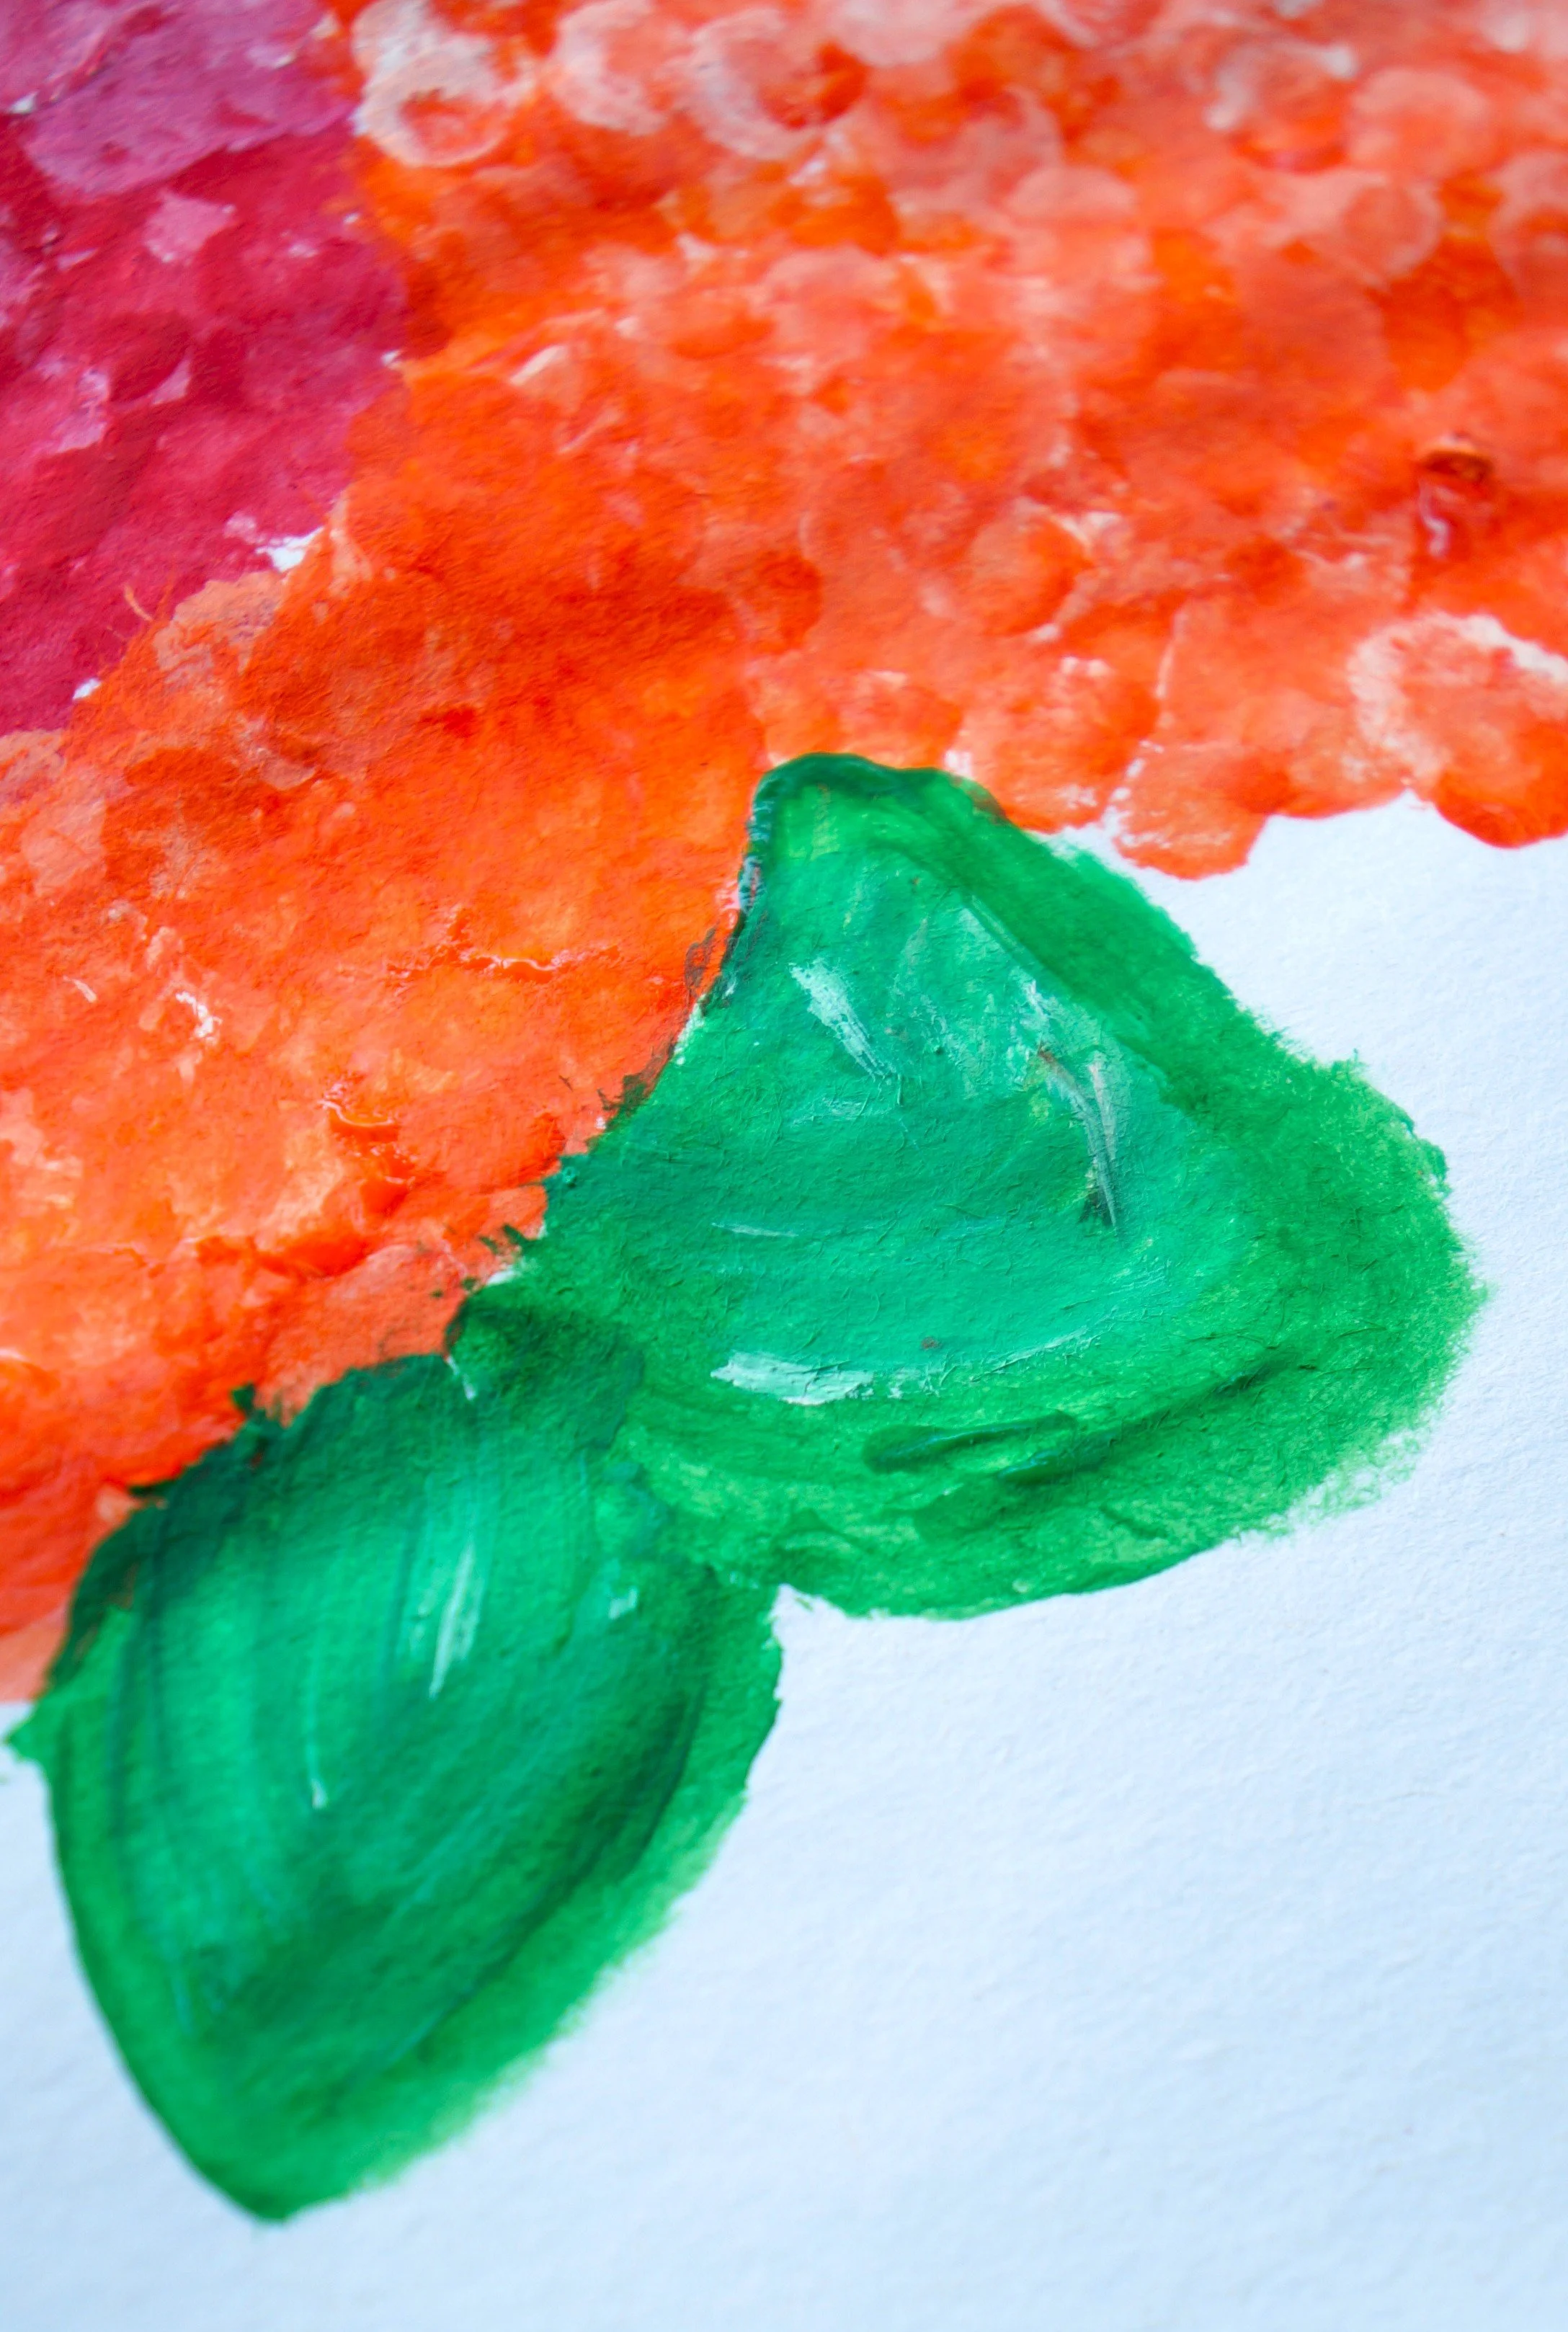
LEAVES
Use a clean Q-tip and outline the leaves in the darker color, filling in the inside with the lighter shade, and a dab of ivory/white smeared on.
Repeat the steps for multiple leaves and/or create large stems.
Let the painting dry for about 10- 15 minutes.
That’s it!
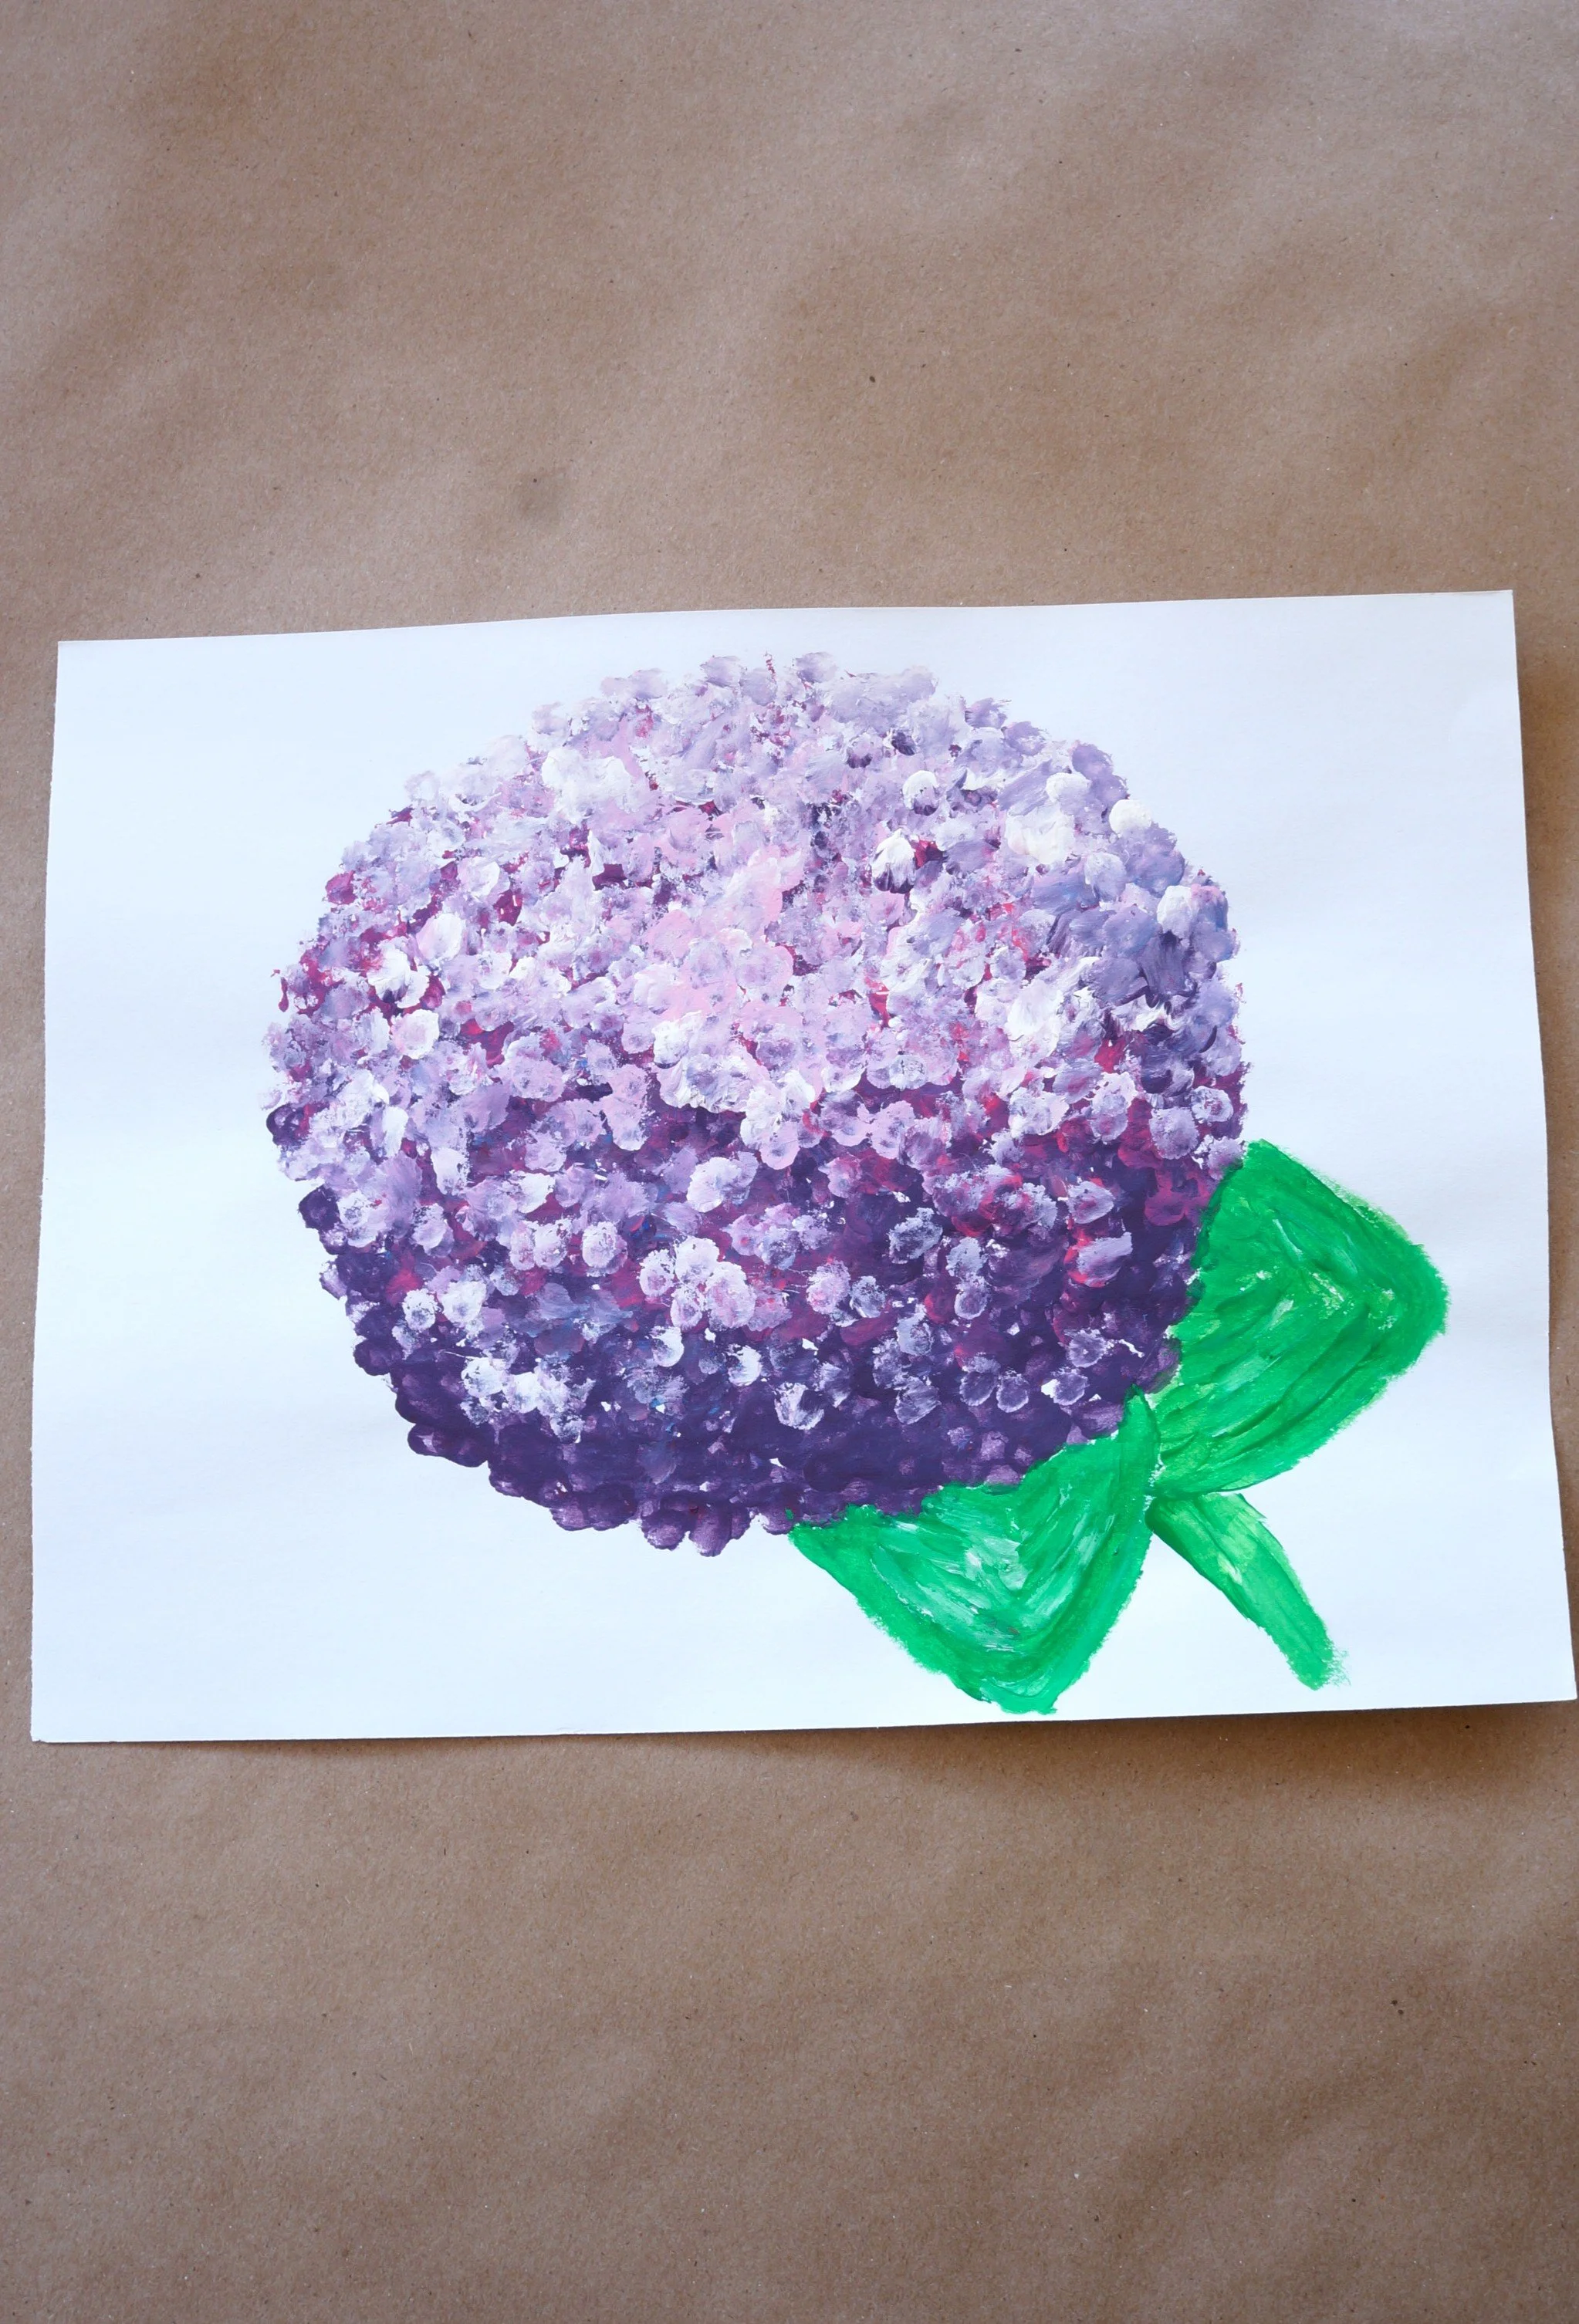
Beautiful blooms
Happy crafting
Amanda and Naomi
To share: take a photo of your craft, click on PHOTO SUBMISSION on the upper right, and submit.
We’ll share it with everyone here!


