

Hi friends,
Micah is turning TEN soon = [], for his birthday this year he decided on a Wall-E theme. Each year we’re faced with creating fun, festive, and inexpensive party ideas, as his birthday is after two big celebrations. So here we are again, sharing our themed craft, perfect for party decor, room decor, or as a photo booth prop. Check out our DIY Wall-E character below, then next week come back for EVE!
*Click on photos for a closer look
What You'll Need
(2) Yellow, (1) Gray, (1) Black Construction Papers
White Scrap Paper
Small Round Container
Pencil
Scissors
Red, Black, White Felt Tip Pens
Glue Stick
The Steps


BODY
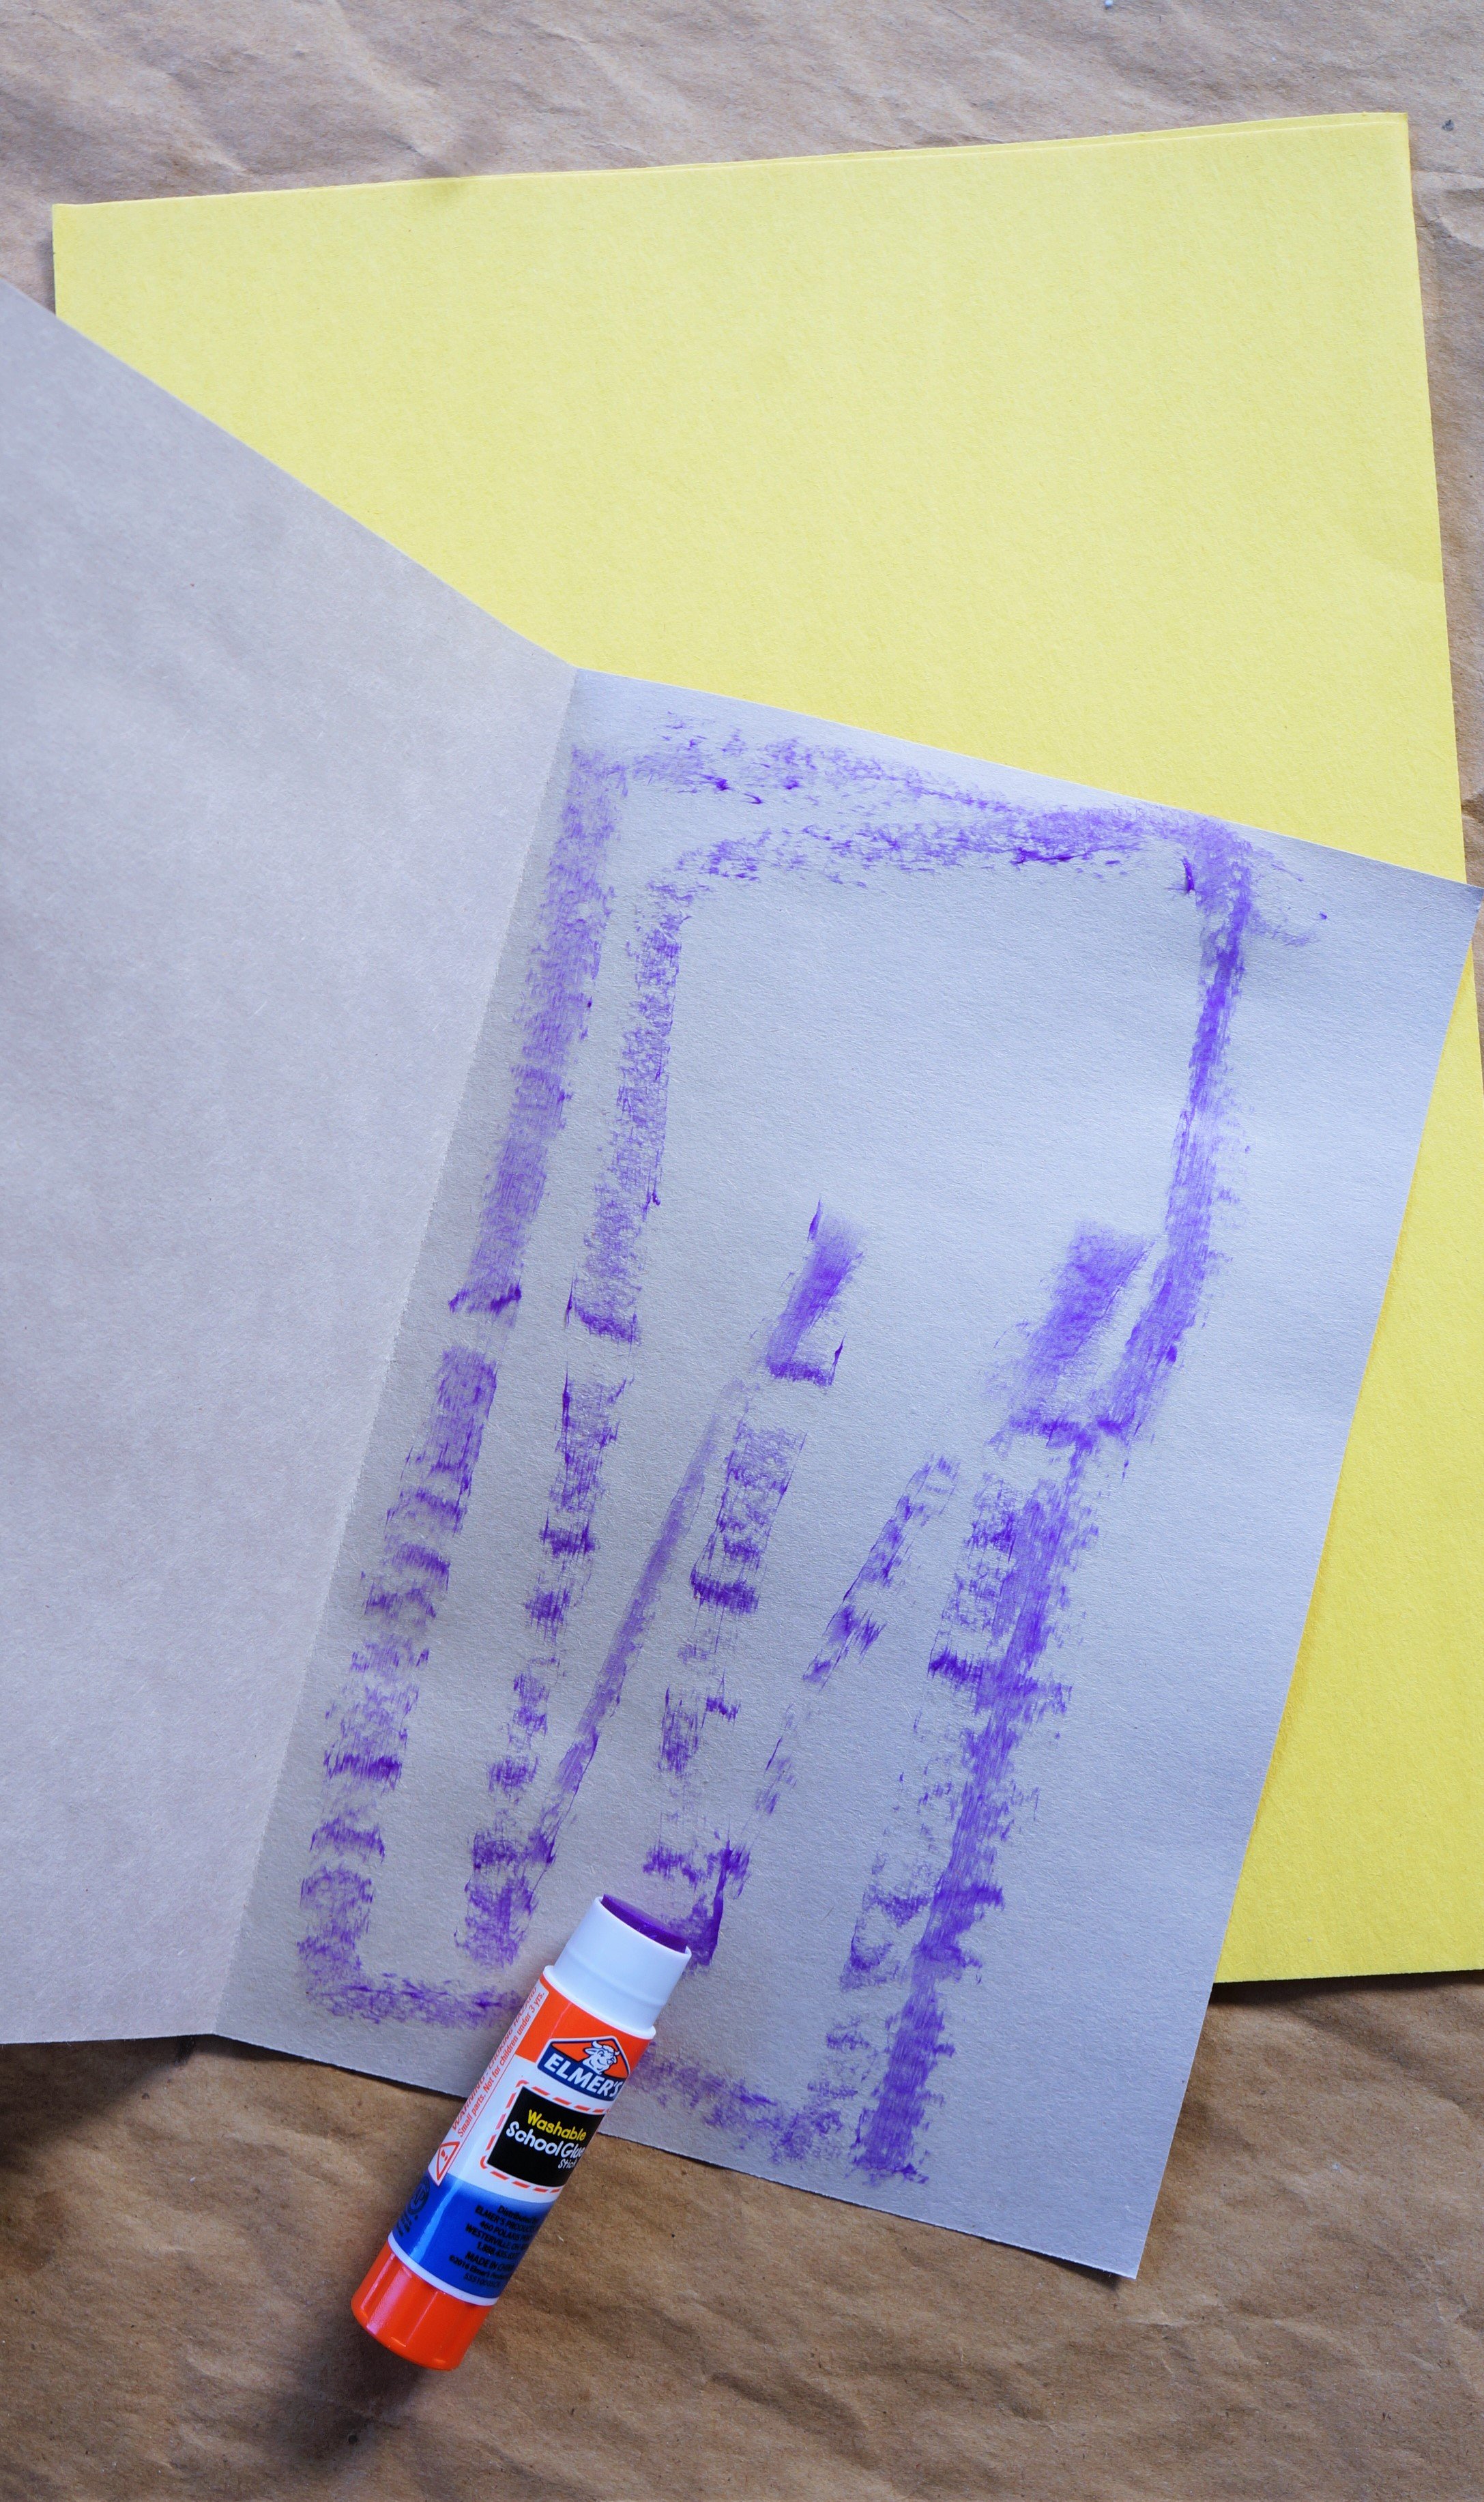
Turn your gray paper horizontally, fold it in half, add glue to the inside leaving 1.25 inches unglued, and press together.
Cut a 1.25-inch strip of paper from the long side of the gray folded paper(unglued edge), for 2 narrow strips. Set the larger gray section aside.
Turn the yellow papers vertically, glue them together, and cut 2.5 to 3 inches from the top.
Face your yellow paper with the cut side up, then glue 1 gray strip to the top.
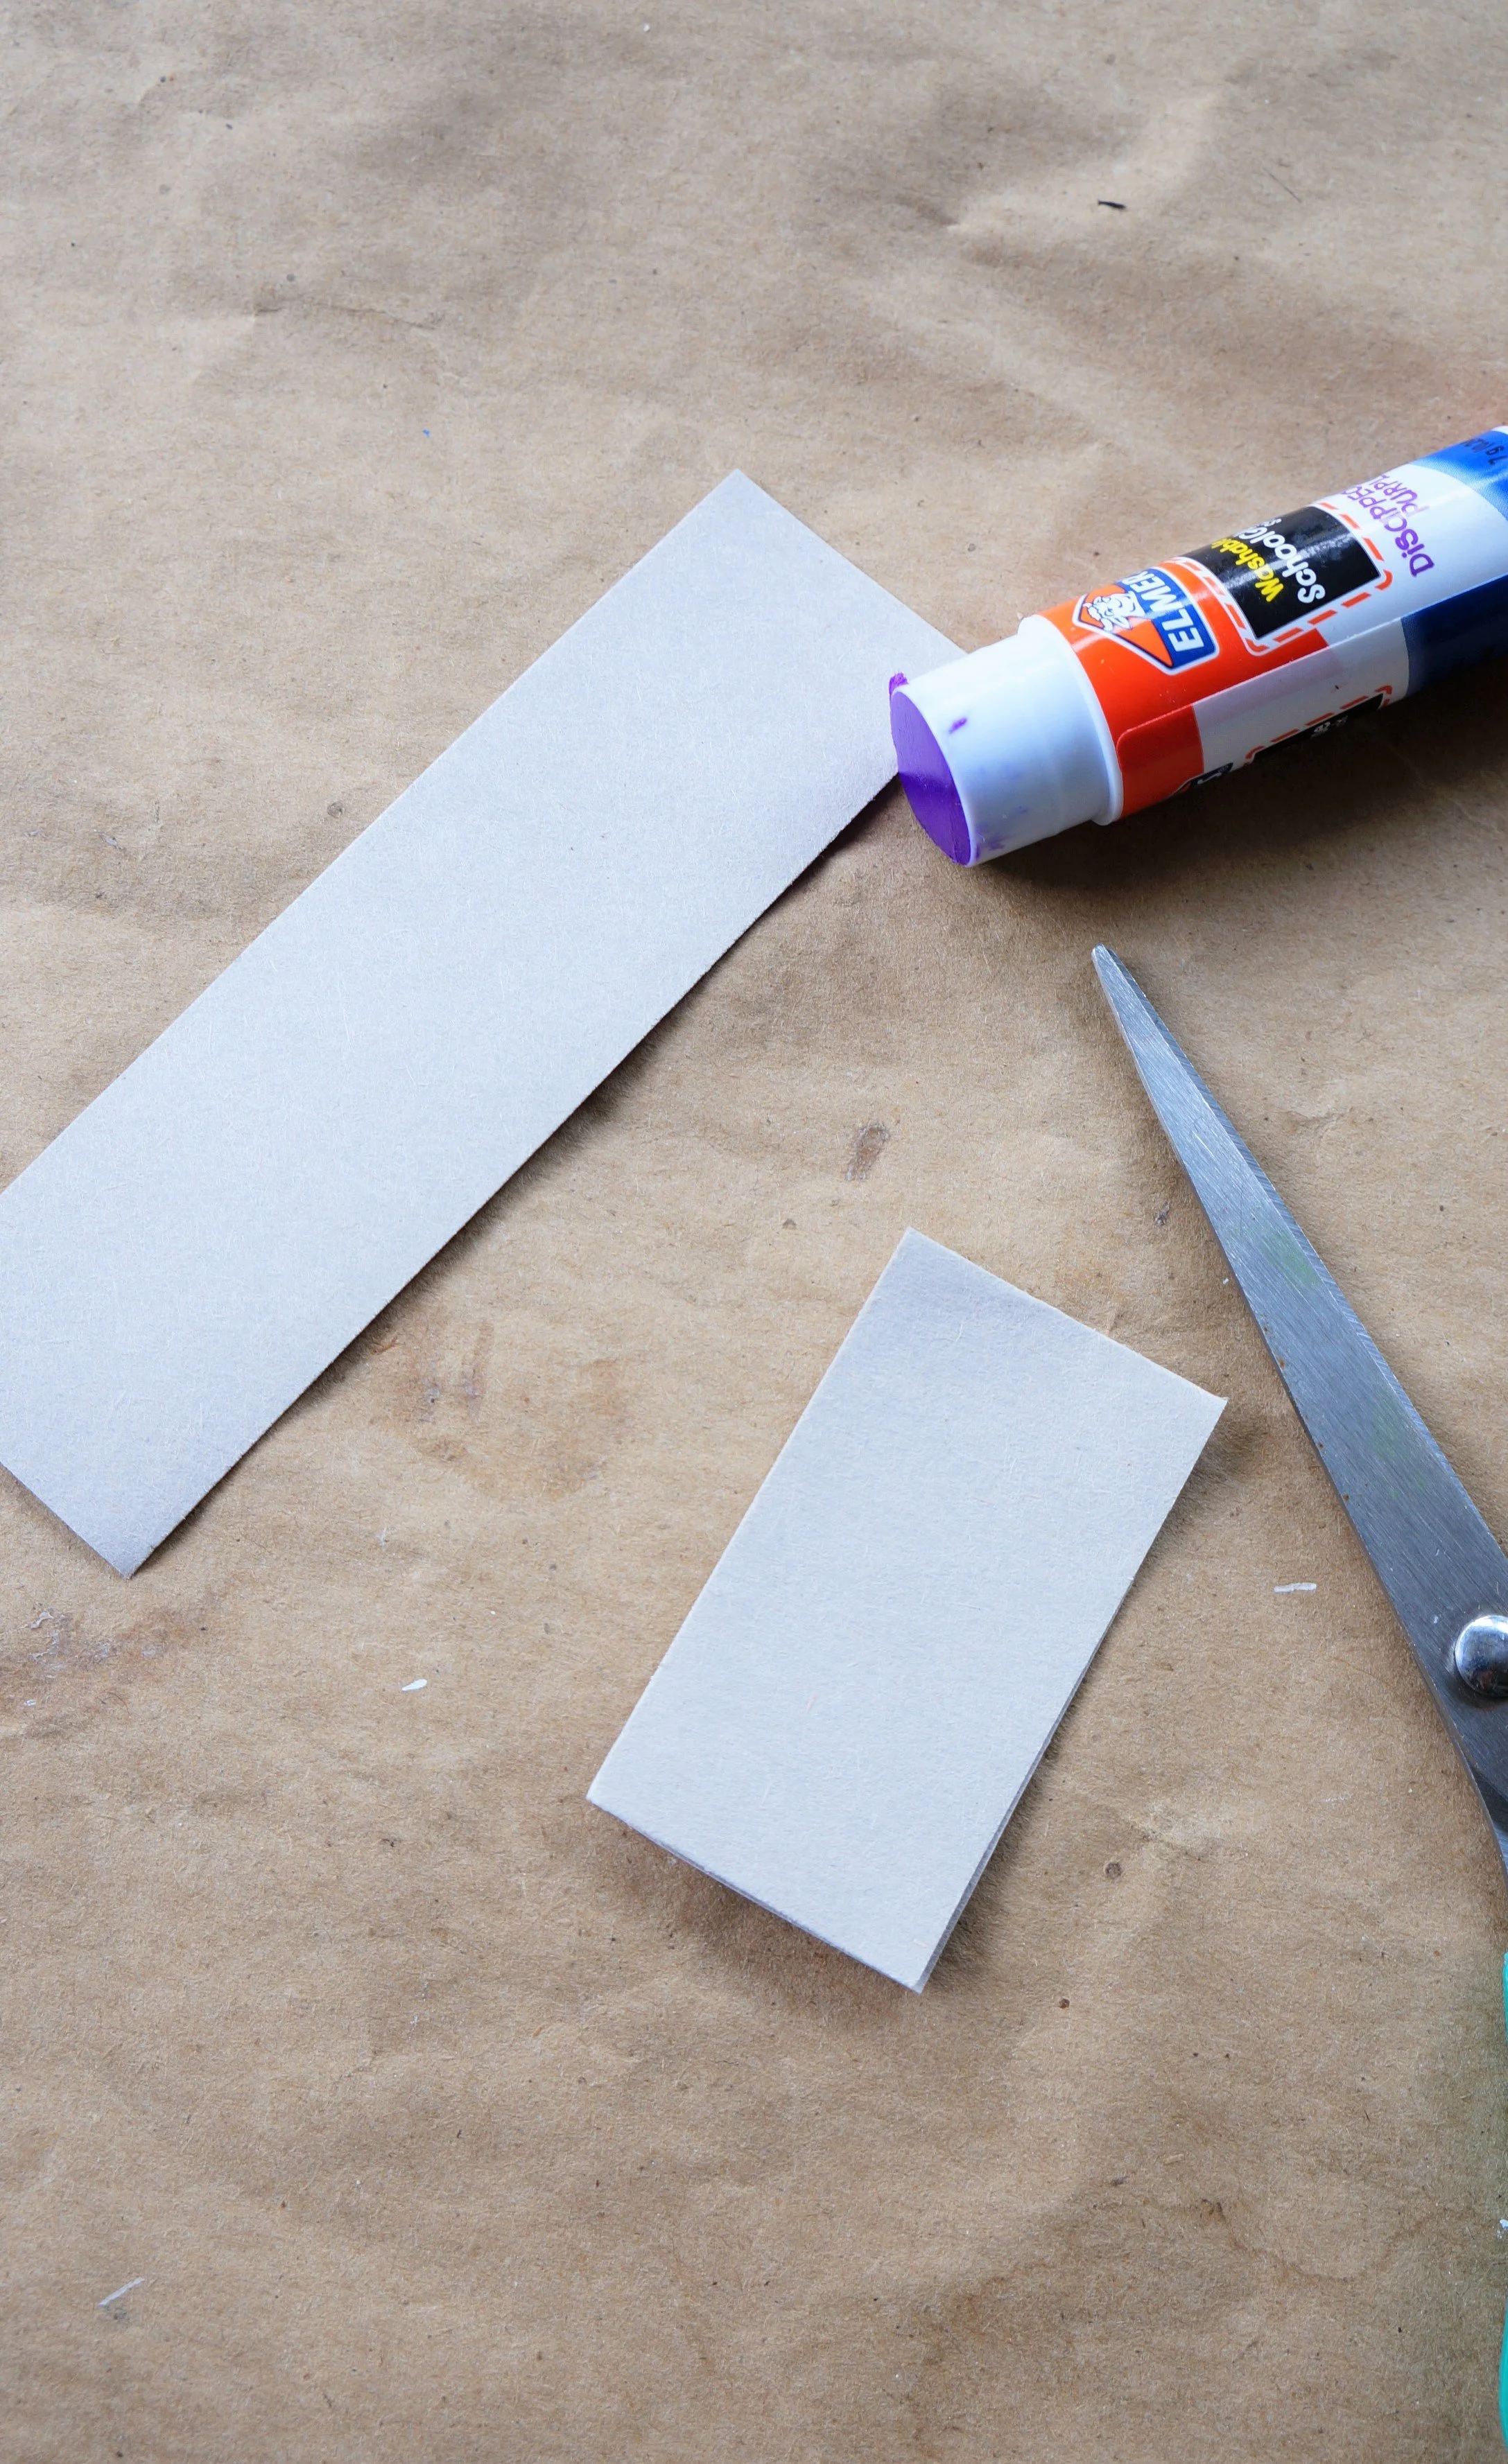

HANDS: Cut the 2nd gray strip in half, fold each smaller piece in half, glue shut, and then cut each half into narrow strips(4 total). Glue 2 narrow strips on the right & left side of the body, with space in between them, and below the long gray strip.
NECK: Fold the wide yellow strip in half, glue it together, and then glue it to the back of the body.


HEAD/EYES
Fold the gray piece of paper in half for a larger head or fold it a bit smaller with a 1-inch section left out, draw a rounded right-angle triangle, and then cut through both layers.
Fold your black paper in half and then into 4 sections, you’ll only use 3 sections.
Trace the small container onto 1 section, cut through both layers, and then glue them onto the 2 gray head pieces.
With the pencil/pen create a border around each head piece and 3 black bolts.


5. Trace the glue stick with the pencil/white pen, then create a white border around the eye and 7 white dots.
6. Face your narrow sections of the head/eyes inward and glue them onto the neck.
NAME
Draw a 1.5-inch circle onto the white paper, make a narrow letter E, and color everything red, minus the E. Then cut out the red circle.
Write in pencil/pen WALL - and then glue the red circle next to it.


TIRES
Cut between the last 2 sections of black paper, stack and cut rounded corners, then draw 7-9 white lines on each tire.
Open up each tire, add glue to both sides of the inside, slip around the sides of Wall-E’s body, and press firmly together.
That’s it!
Isn’t he cute?! Check out our other birthday ideas here.
Happy crafting
Amanda and Naomi
To share: take a photo of your craft and let us see it! Click on photo submission and submit.


