

Hi friends,
We’re bringing you some festive sounds with our DIY Christmas Bells, using recycled cardboard tubes.
This craft doesn’t take long, can be painted with bronze, silver, or gold paints, and creates cute, metallic-like bells. Check it out below.
*Click on the photos for a closer look
What You'll Need
(3)TP Rolls
Scissors
Wire/Thin Ribbon
Large Bells
Craft Paint: Gold, Black
Paint Brushes
Hole Punch
Christmas Ribbon
Optional: Christmas Pick
The Steps
We want to see your craft! Click PHOTO SUBMISSION, then submit the photo.


PREP
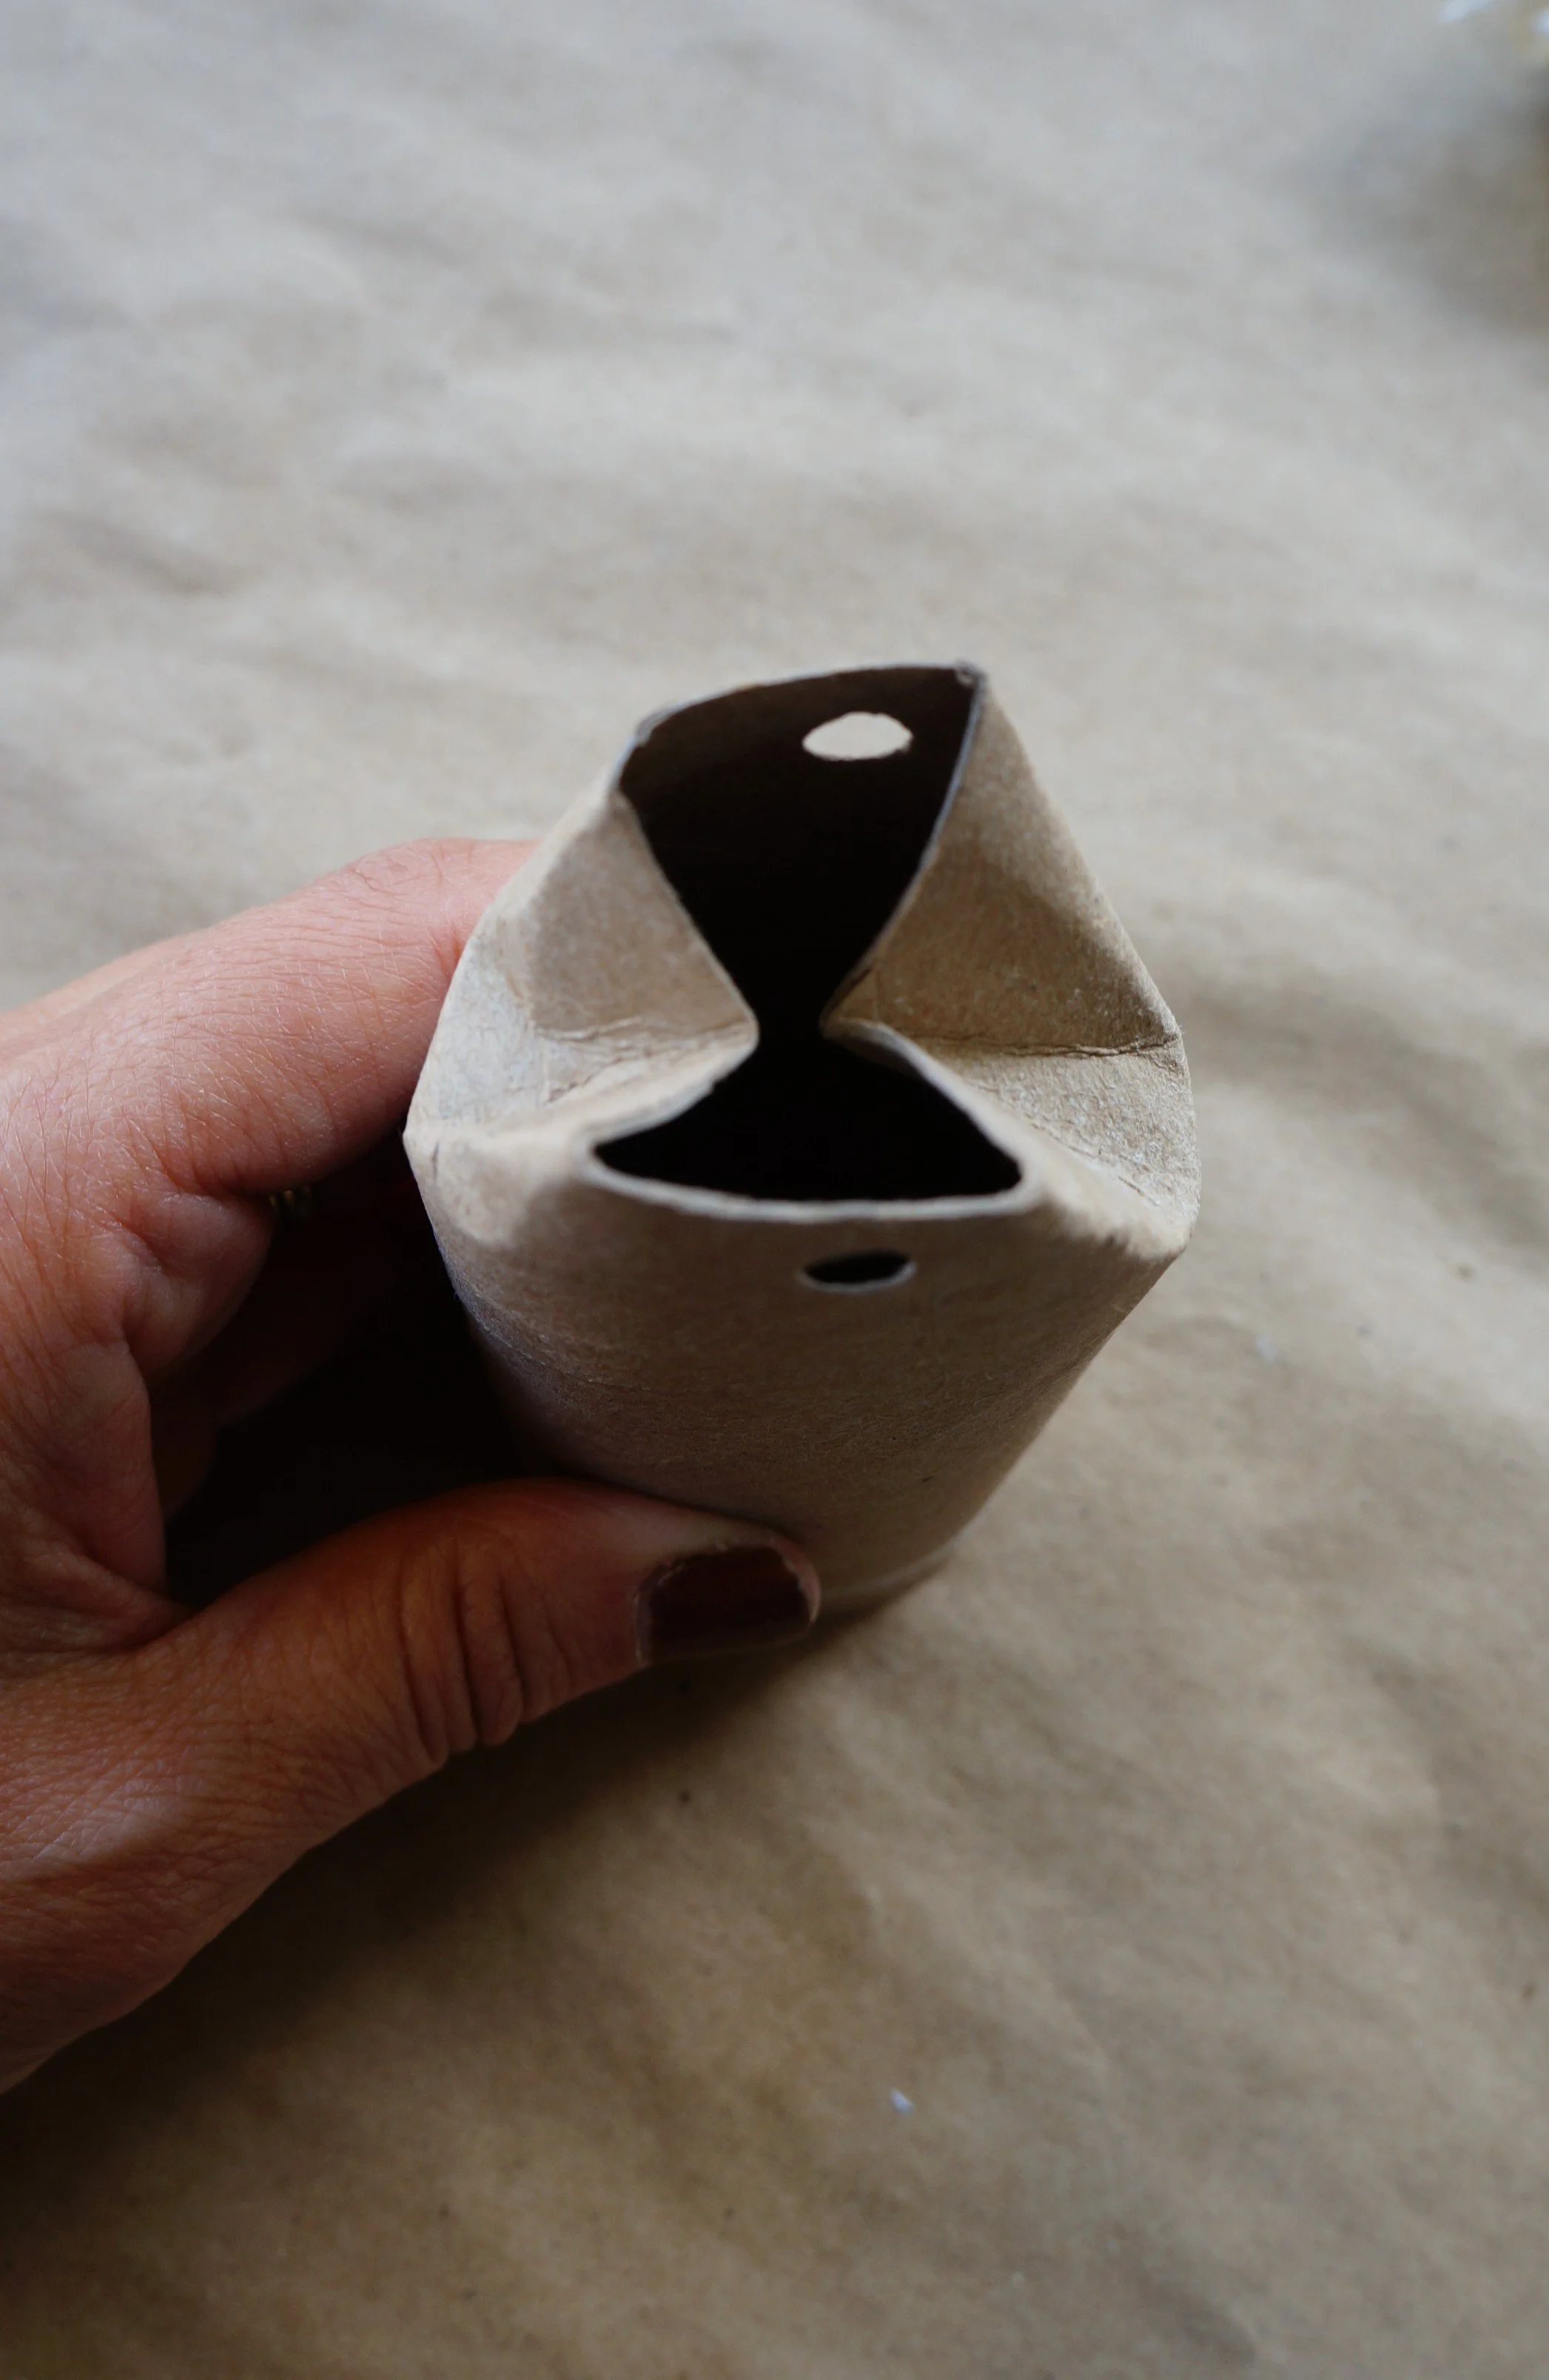
Pinch the top of each roll and punch a hole.
Fold in the opposite sides, making sure the holes are aligned.


PAINT
If your tubes are stamped with a logo, paint those areas with black first, and then let them dry.
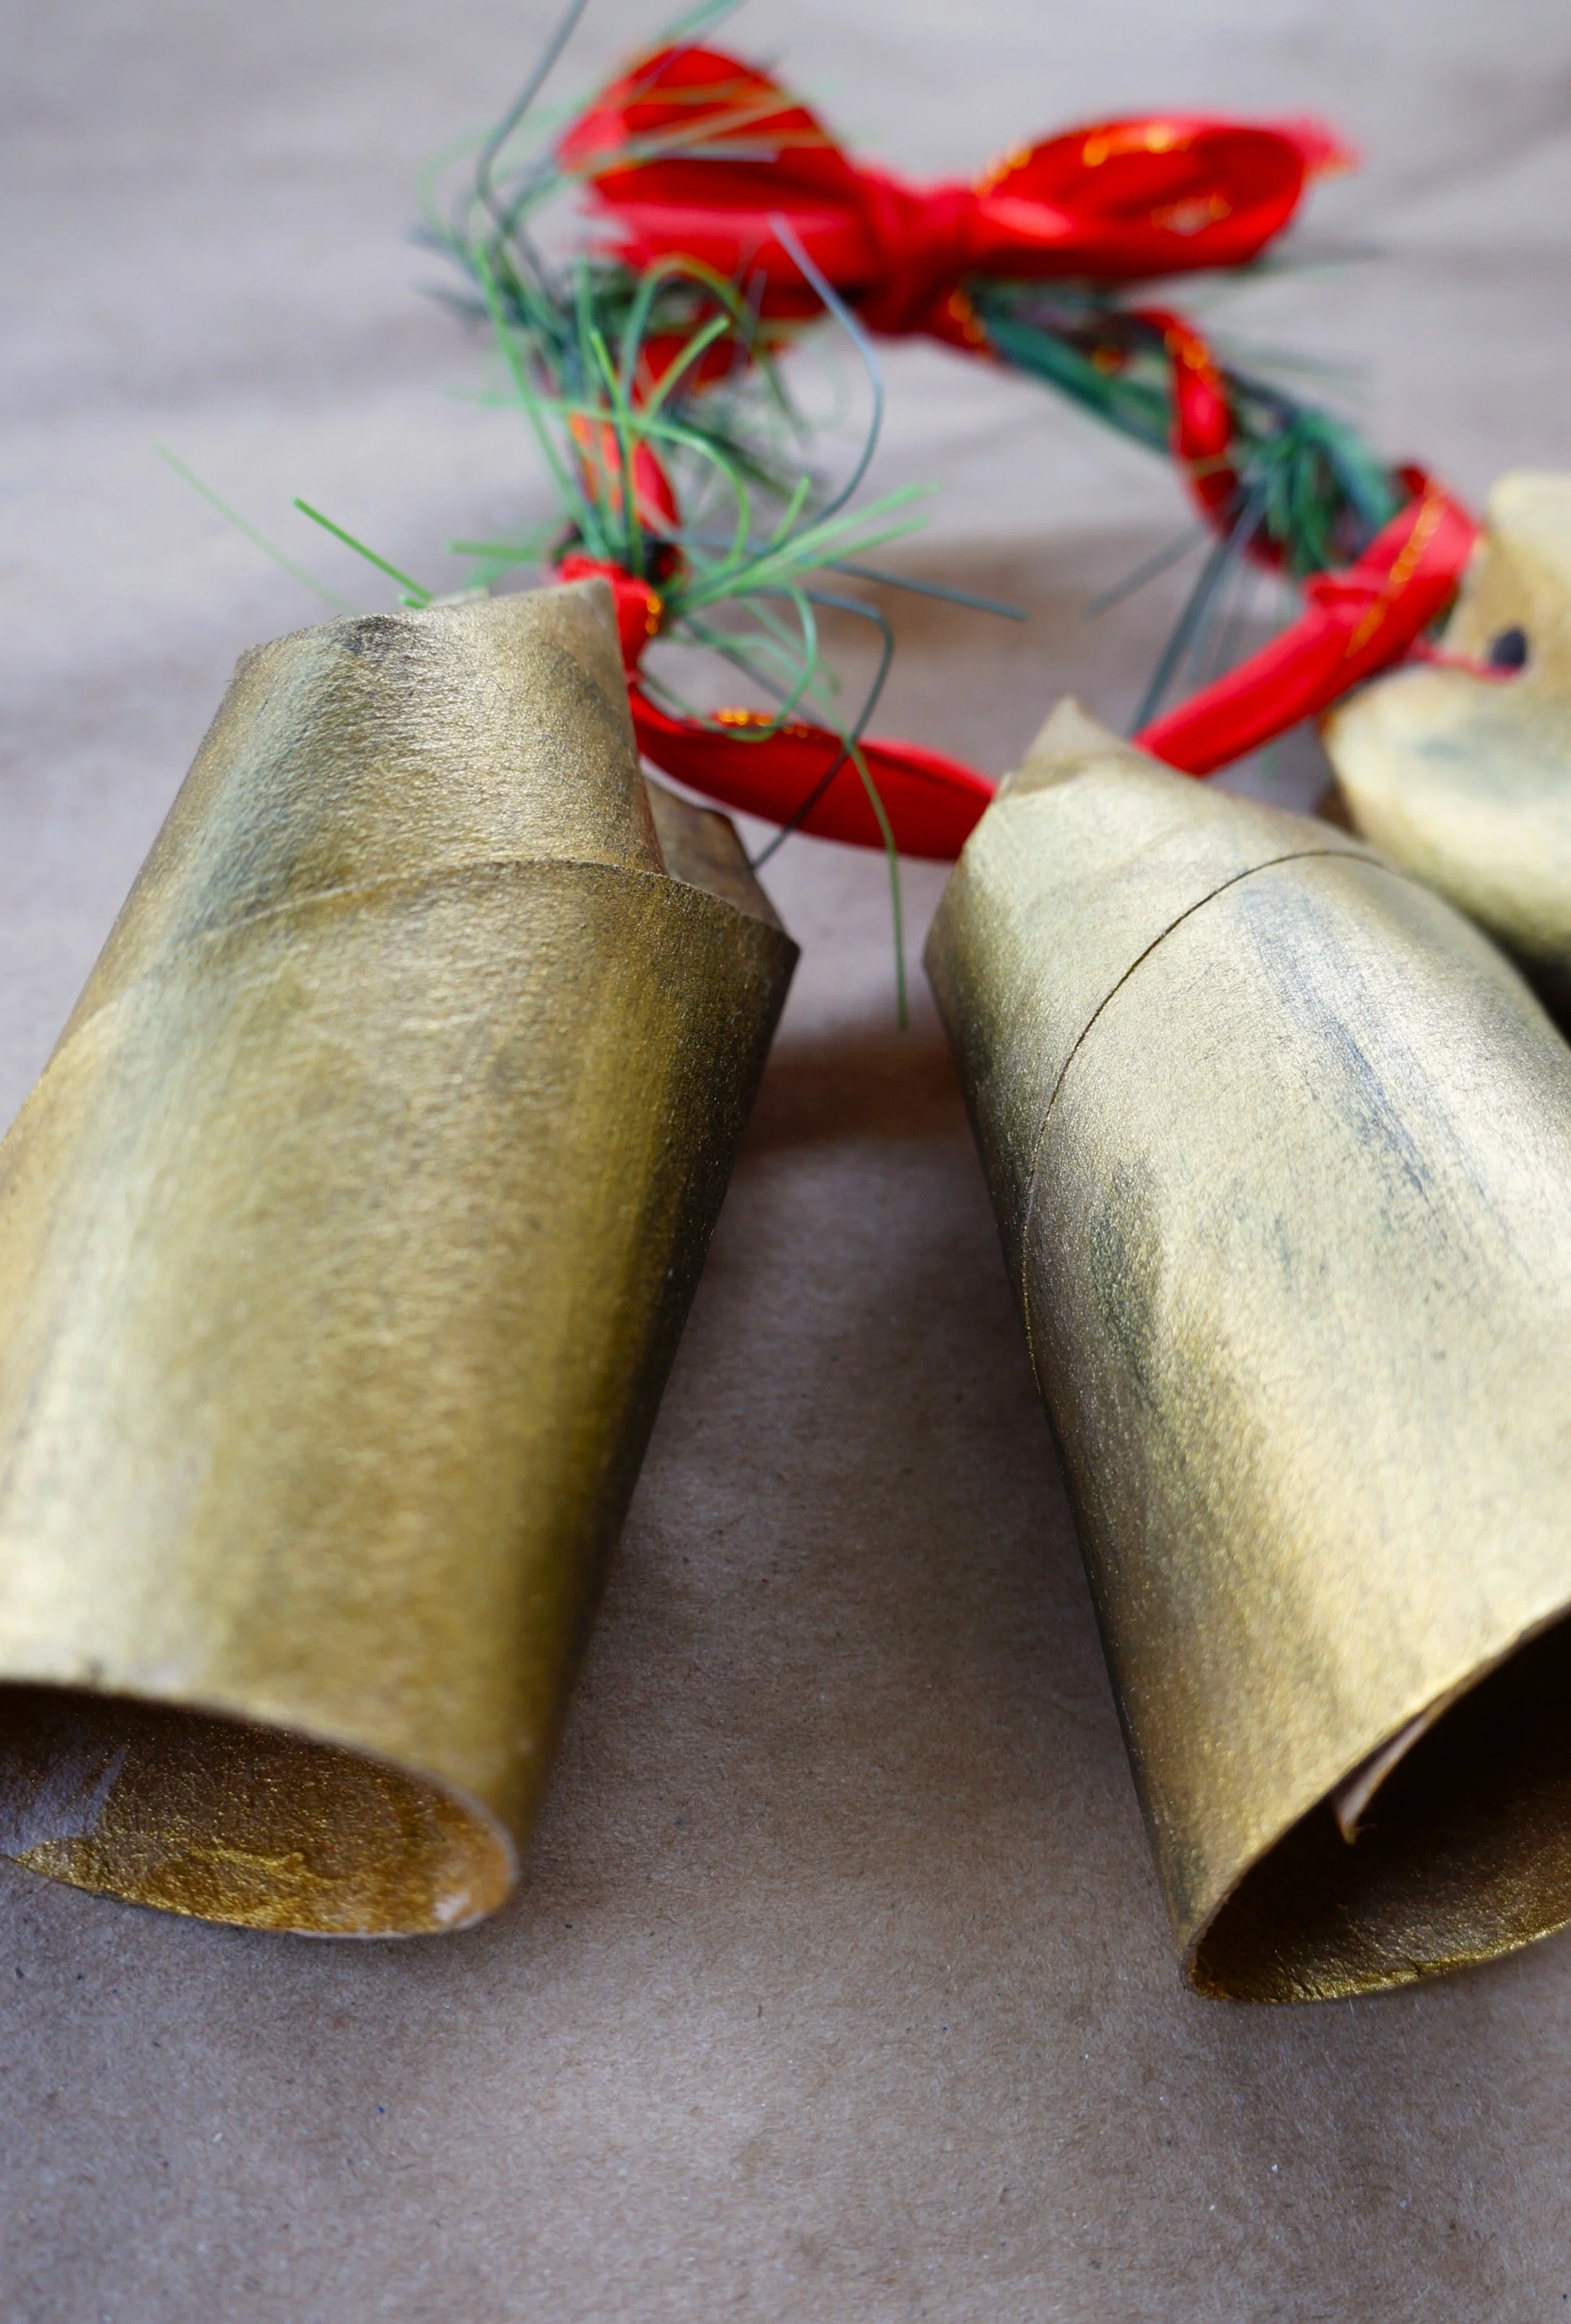
ANTIQUE BELLS: Paint different parts of the tube with black, and then immediately paint over everything with gold(or silver/brass), and blend the colors.
BRIGHT BELLS: Paint the tubes in one solid color, repeat if necessary.
Let the tubes dry for about 10 minutes.
Optional: Paint the lower halves of each tube, from the inside.


WIRE/NARROW RIBBON
Cut 4-5 inches of wire or narrow ribbon.
Feed the wire/ribbon through each bell and then twist/tie it.
Once the tubes are dry, place a bell inside, and feed the ends of the wire/ribbon into one of the holes.


ASSEMBLE
Close the top of the tubes and twist/tie the wire/ribbon to keep the tubes closed, then create a loop with the ends.
Cut 12 inches of Christmas ribbon and feed the ribbon through each bell loop, and tie a bow.
Lastly, hang these on your doorknob, on a wreath, or in a flower arrangement.
Optional: If you have a Christmas pick, remove a sprig from it, and wrap it with the ribbon.
That’s it!
Happy crafting,
Amanda and Naomi
To share: take a photo of your craft and let us see it! Click Photo Submission, then submit the photo.


