

Hi friends,
This week, we’re sharing how to make Minecraft Steve from the game with just a few supplies.
Micah, our third child, is about to have a birthday, and this year’s theme is Minecraft. We’ll share how we made this 25-inch version as part of the decor, but you can decide on the size you’d like and make the adjustments. As a fun addition, I plan on creating a larger 3D version in my son’s likeness, because he’s the character I want to highlight. Check out Steve below.
*Click on the photos for a closer look
What You'll Need
Construction Paper- Grey, Blue/Purple, Brown/Dk. Brown, (2)Tan, White, (2-3)Turquoise
Ruler
Pencil
Scissors
Glue
Optional: Wrapping Paper or Cardstock
The Steps
We want to see your craft! Click PHOTO SUBMISSION, then submit the photo.
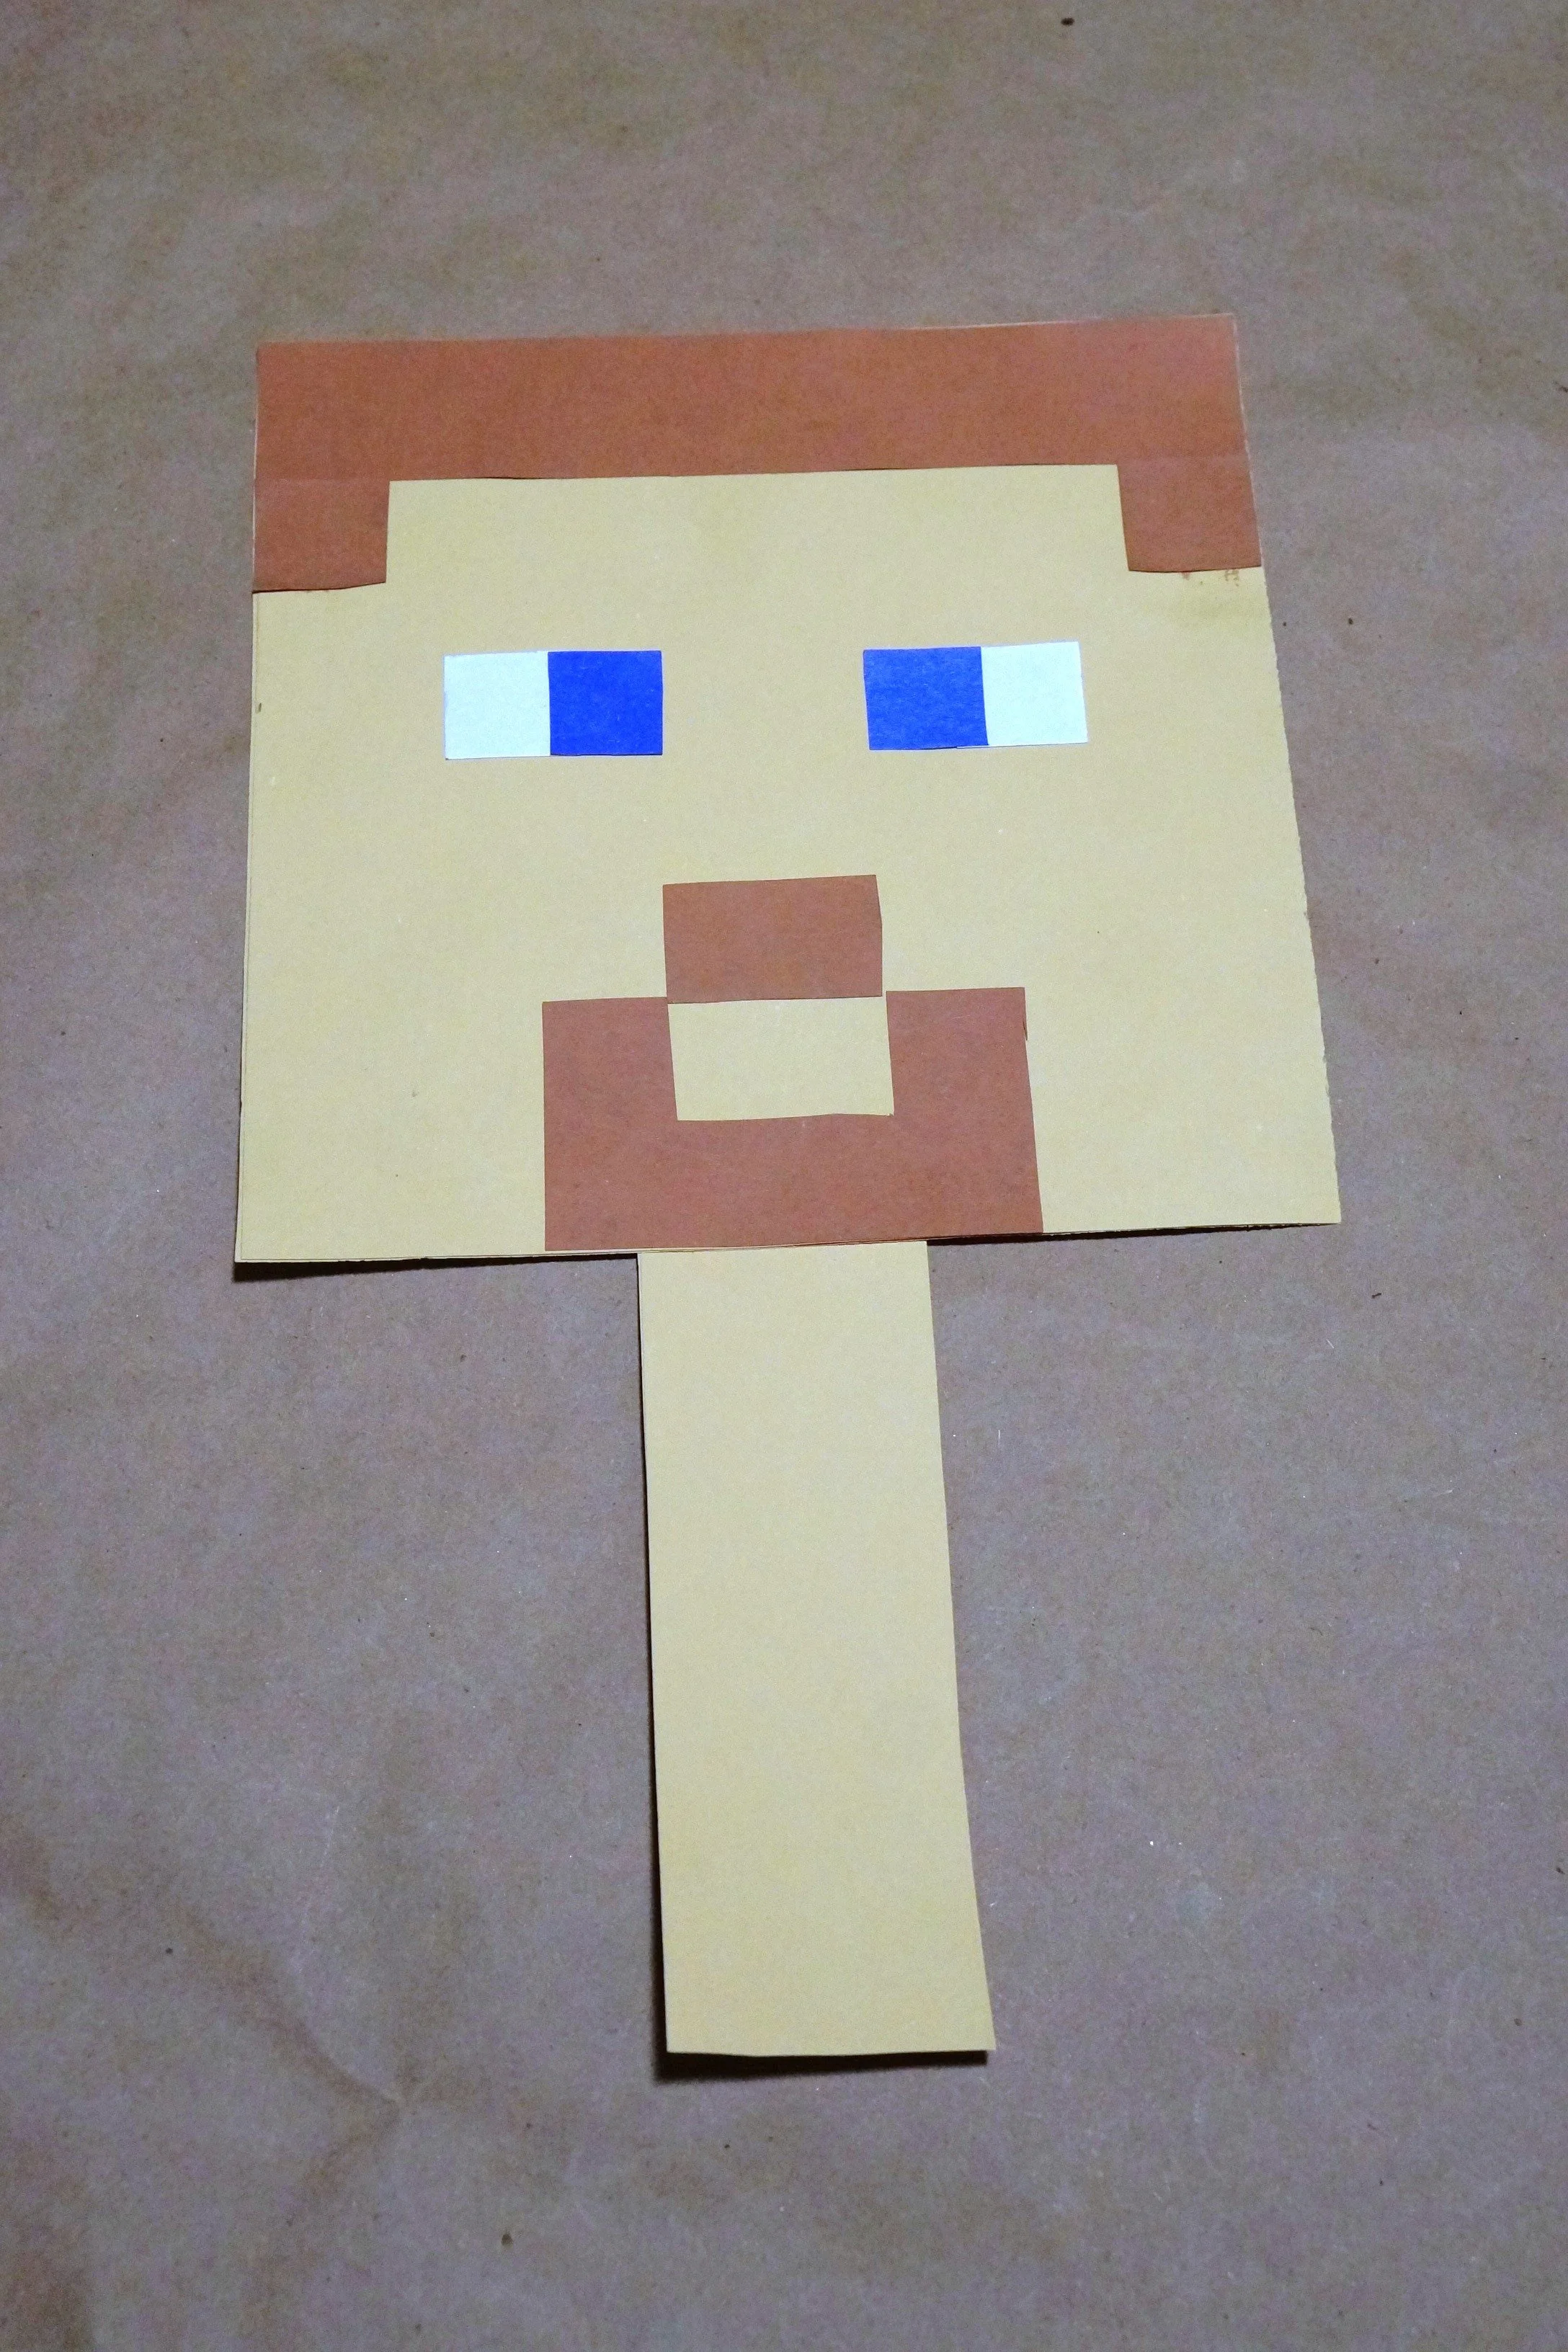
HEAD
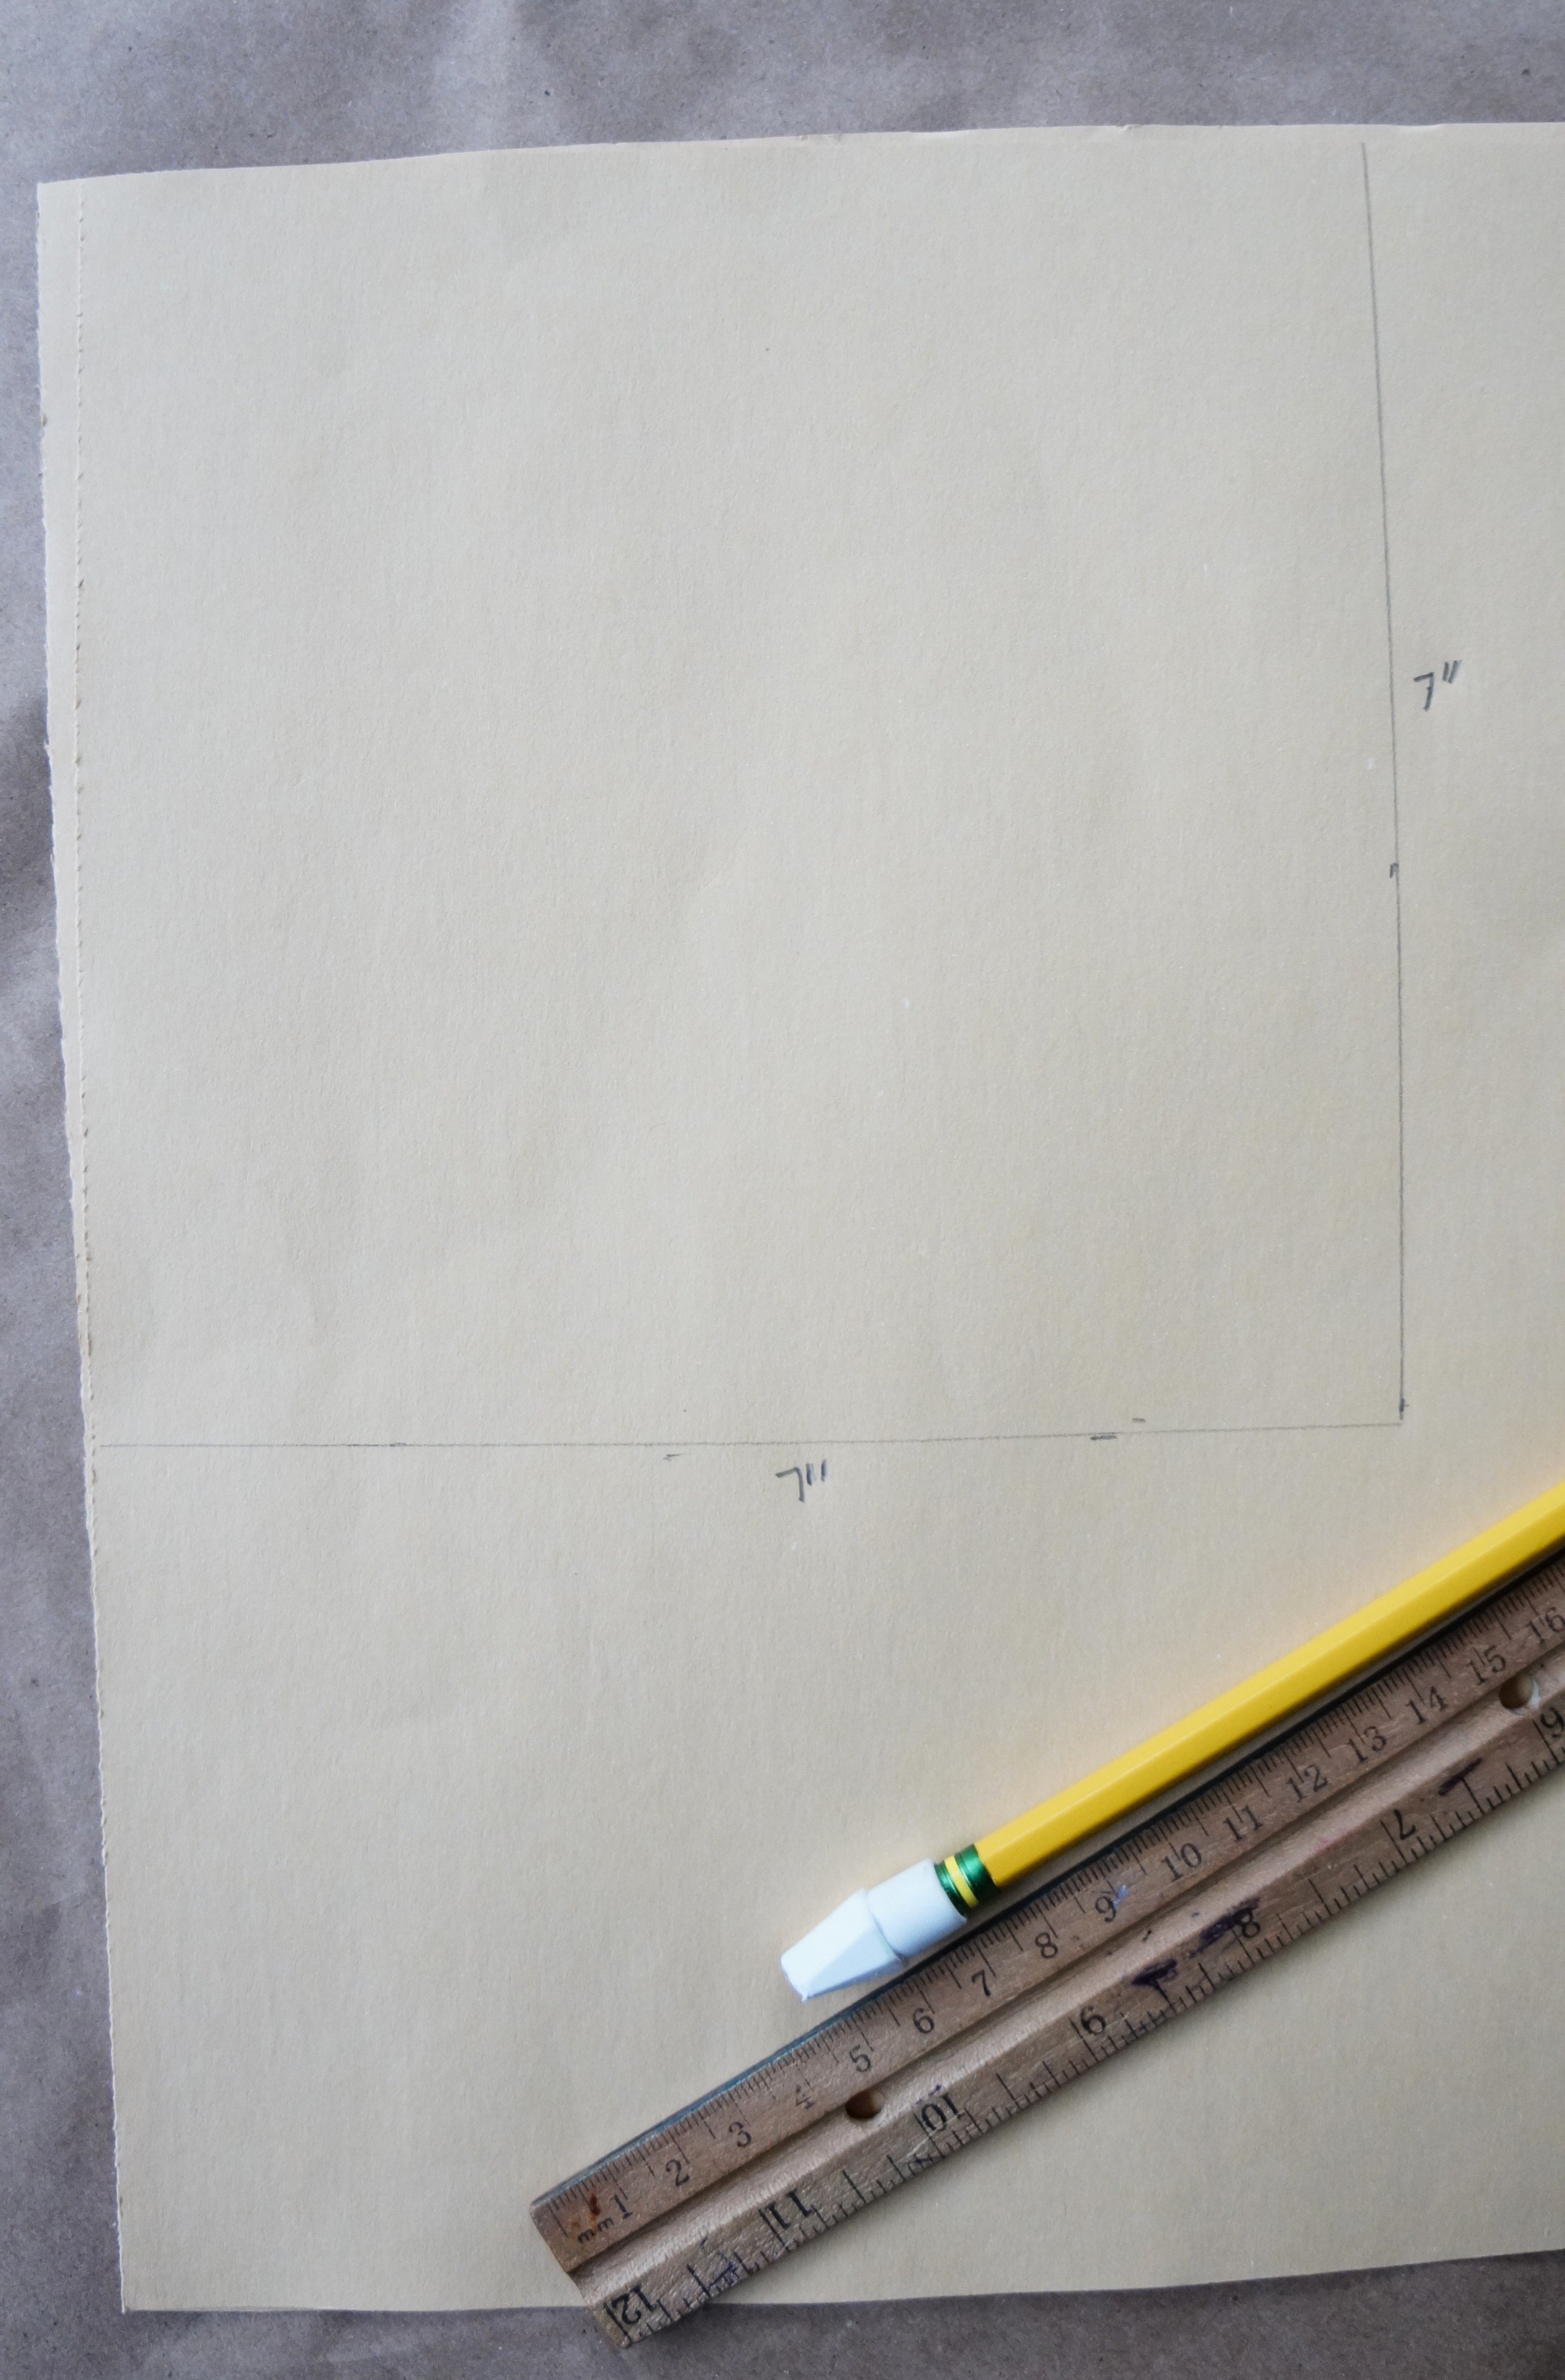
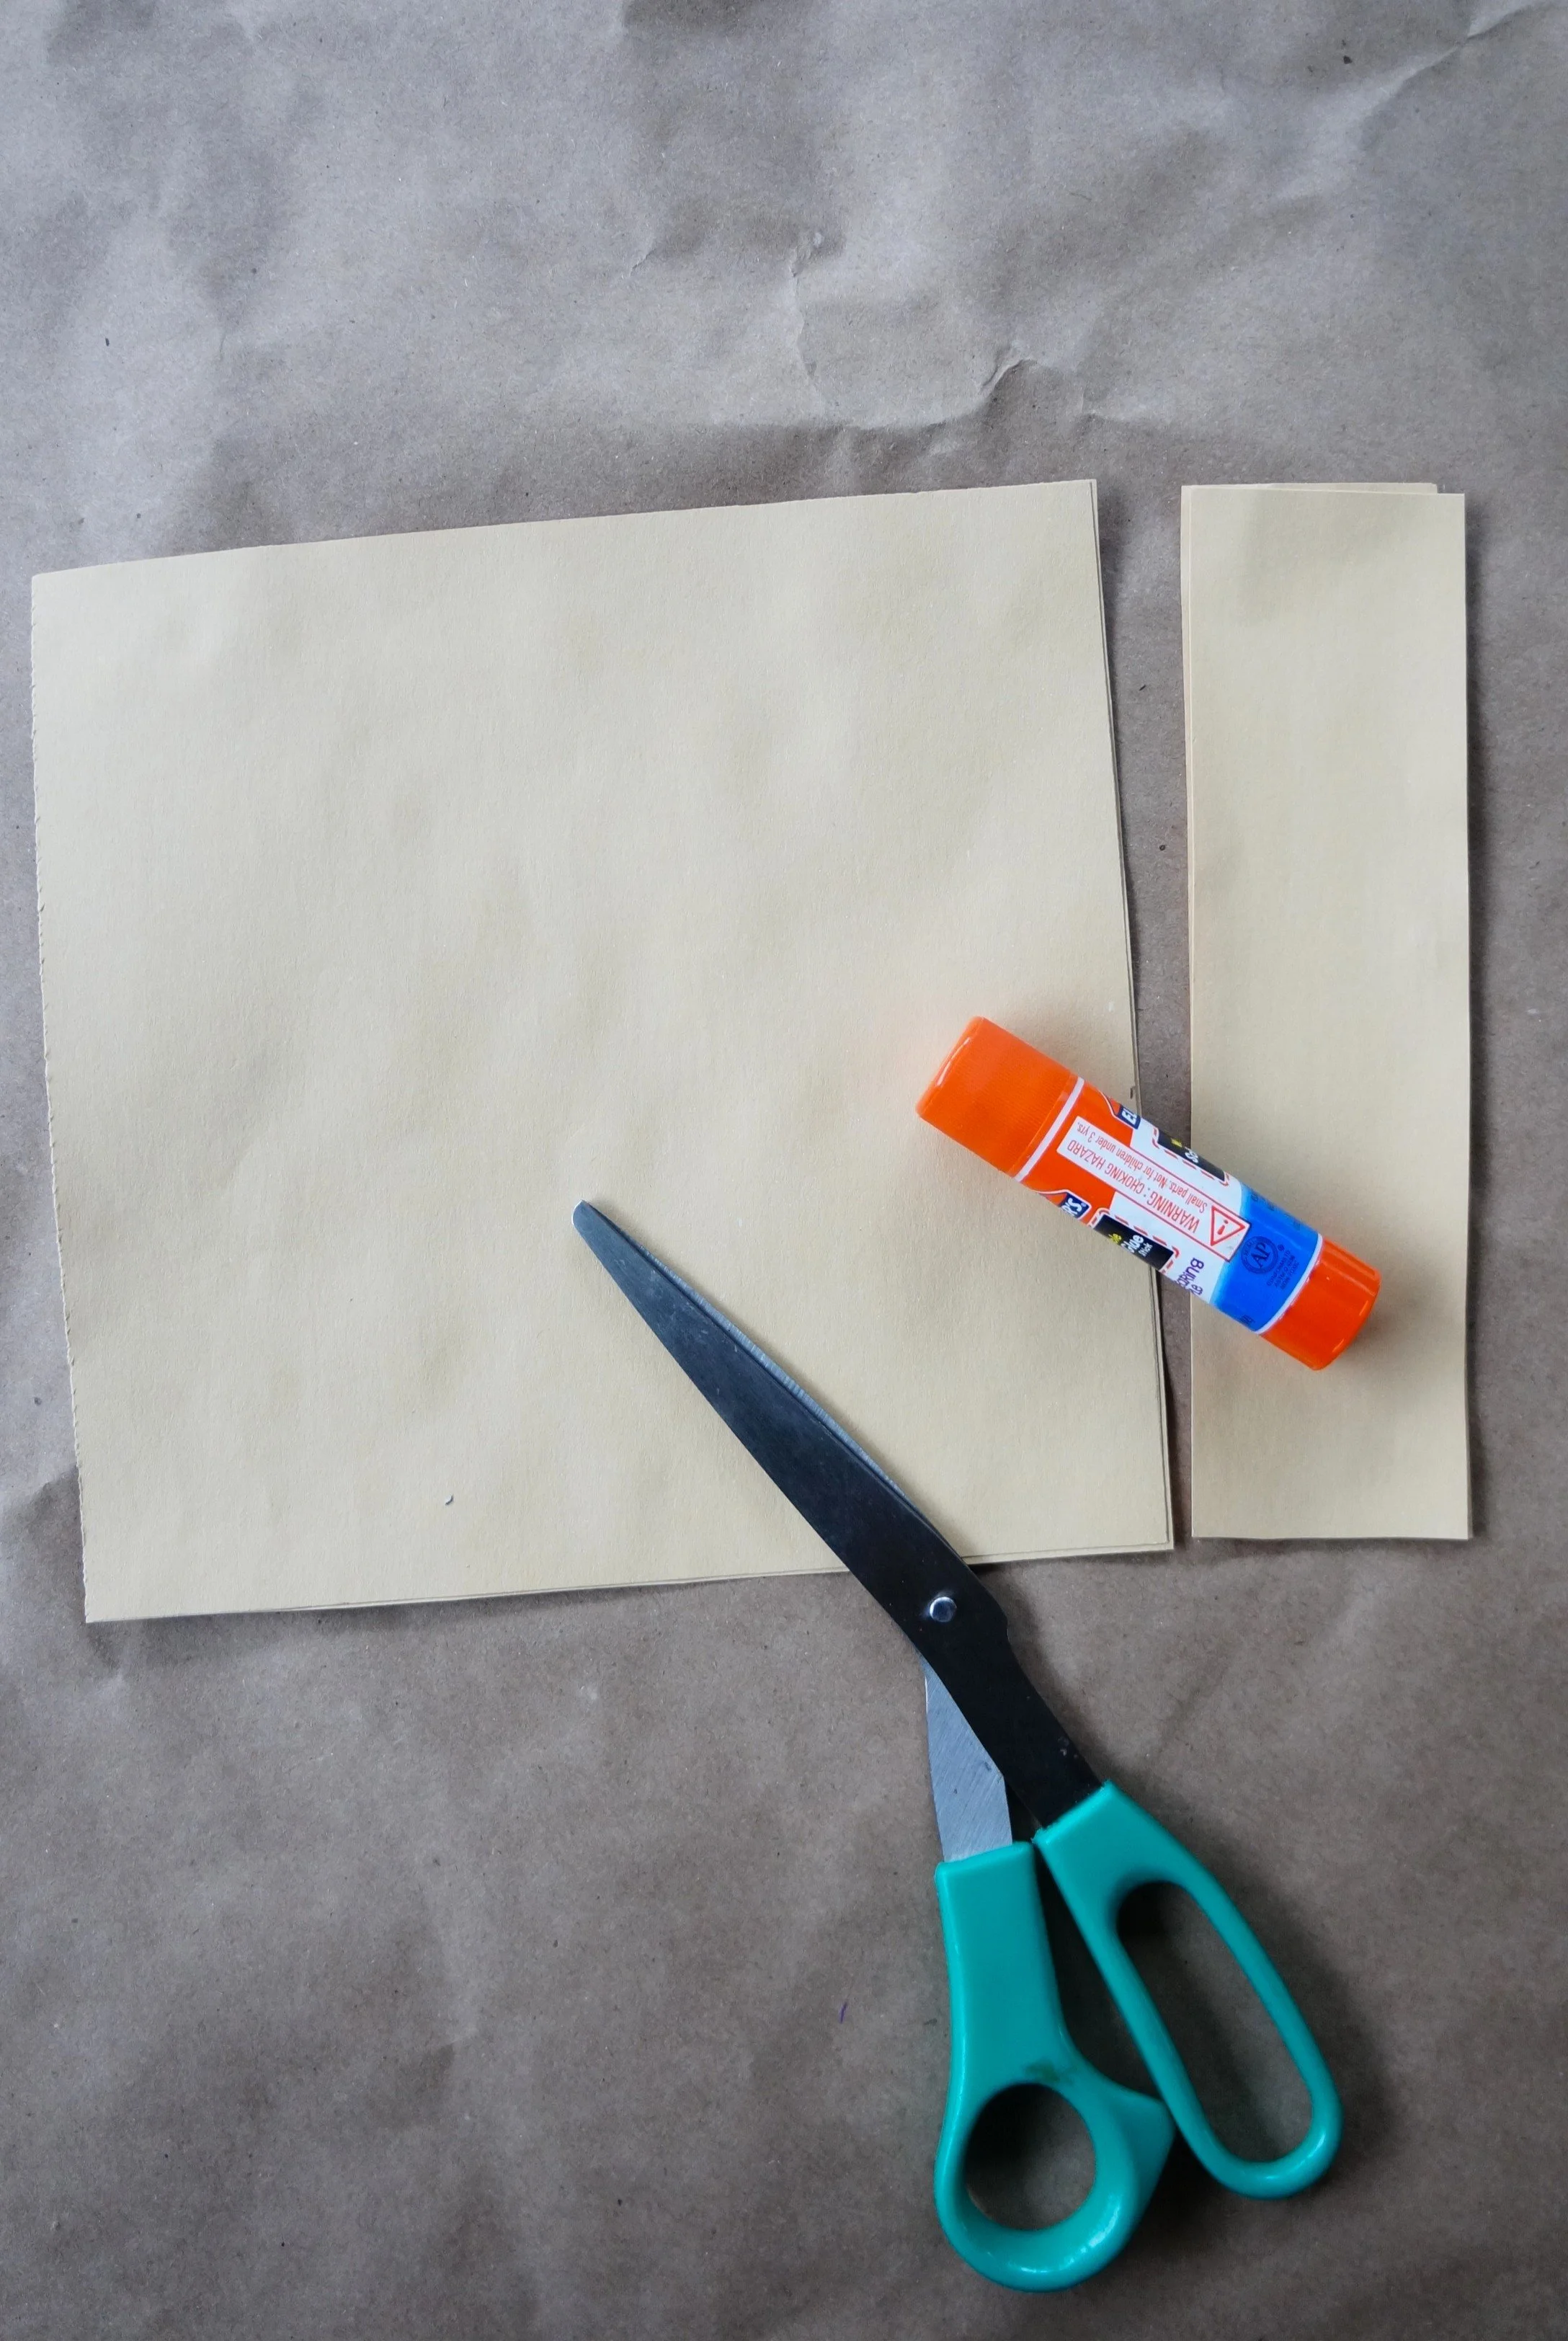
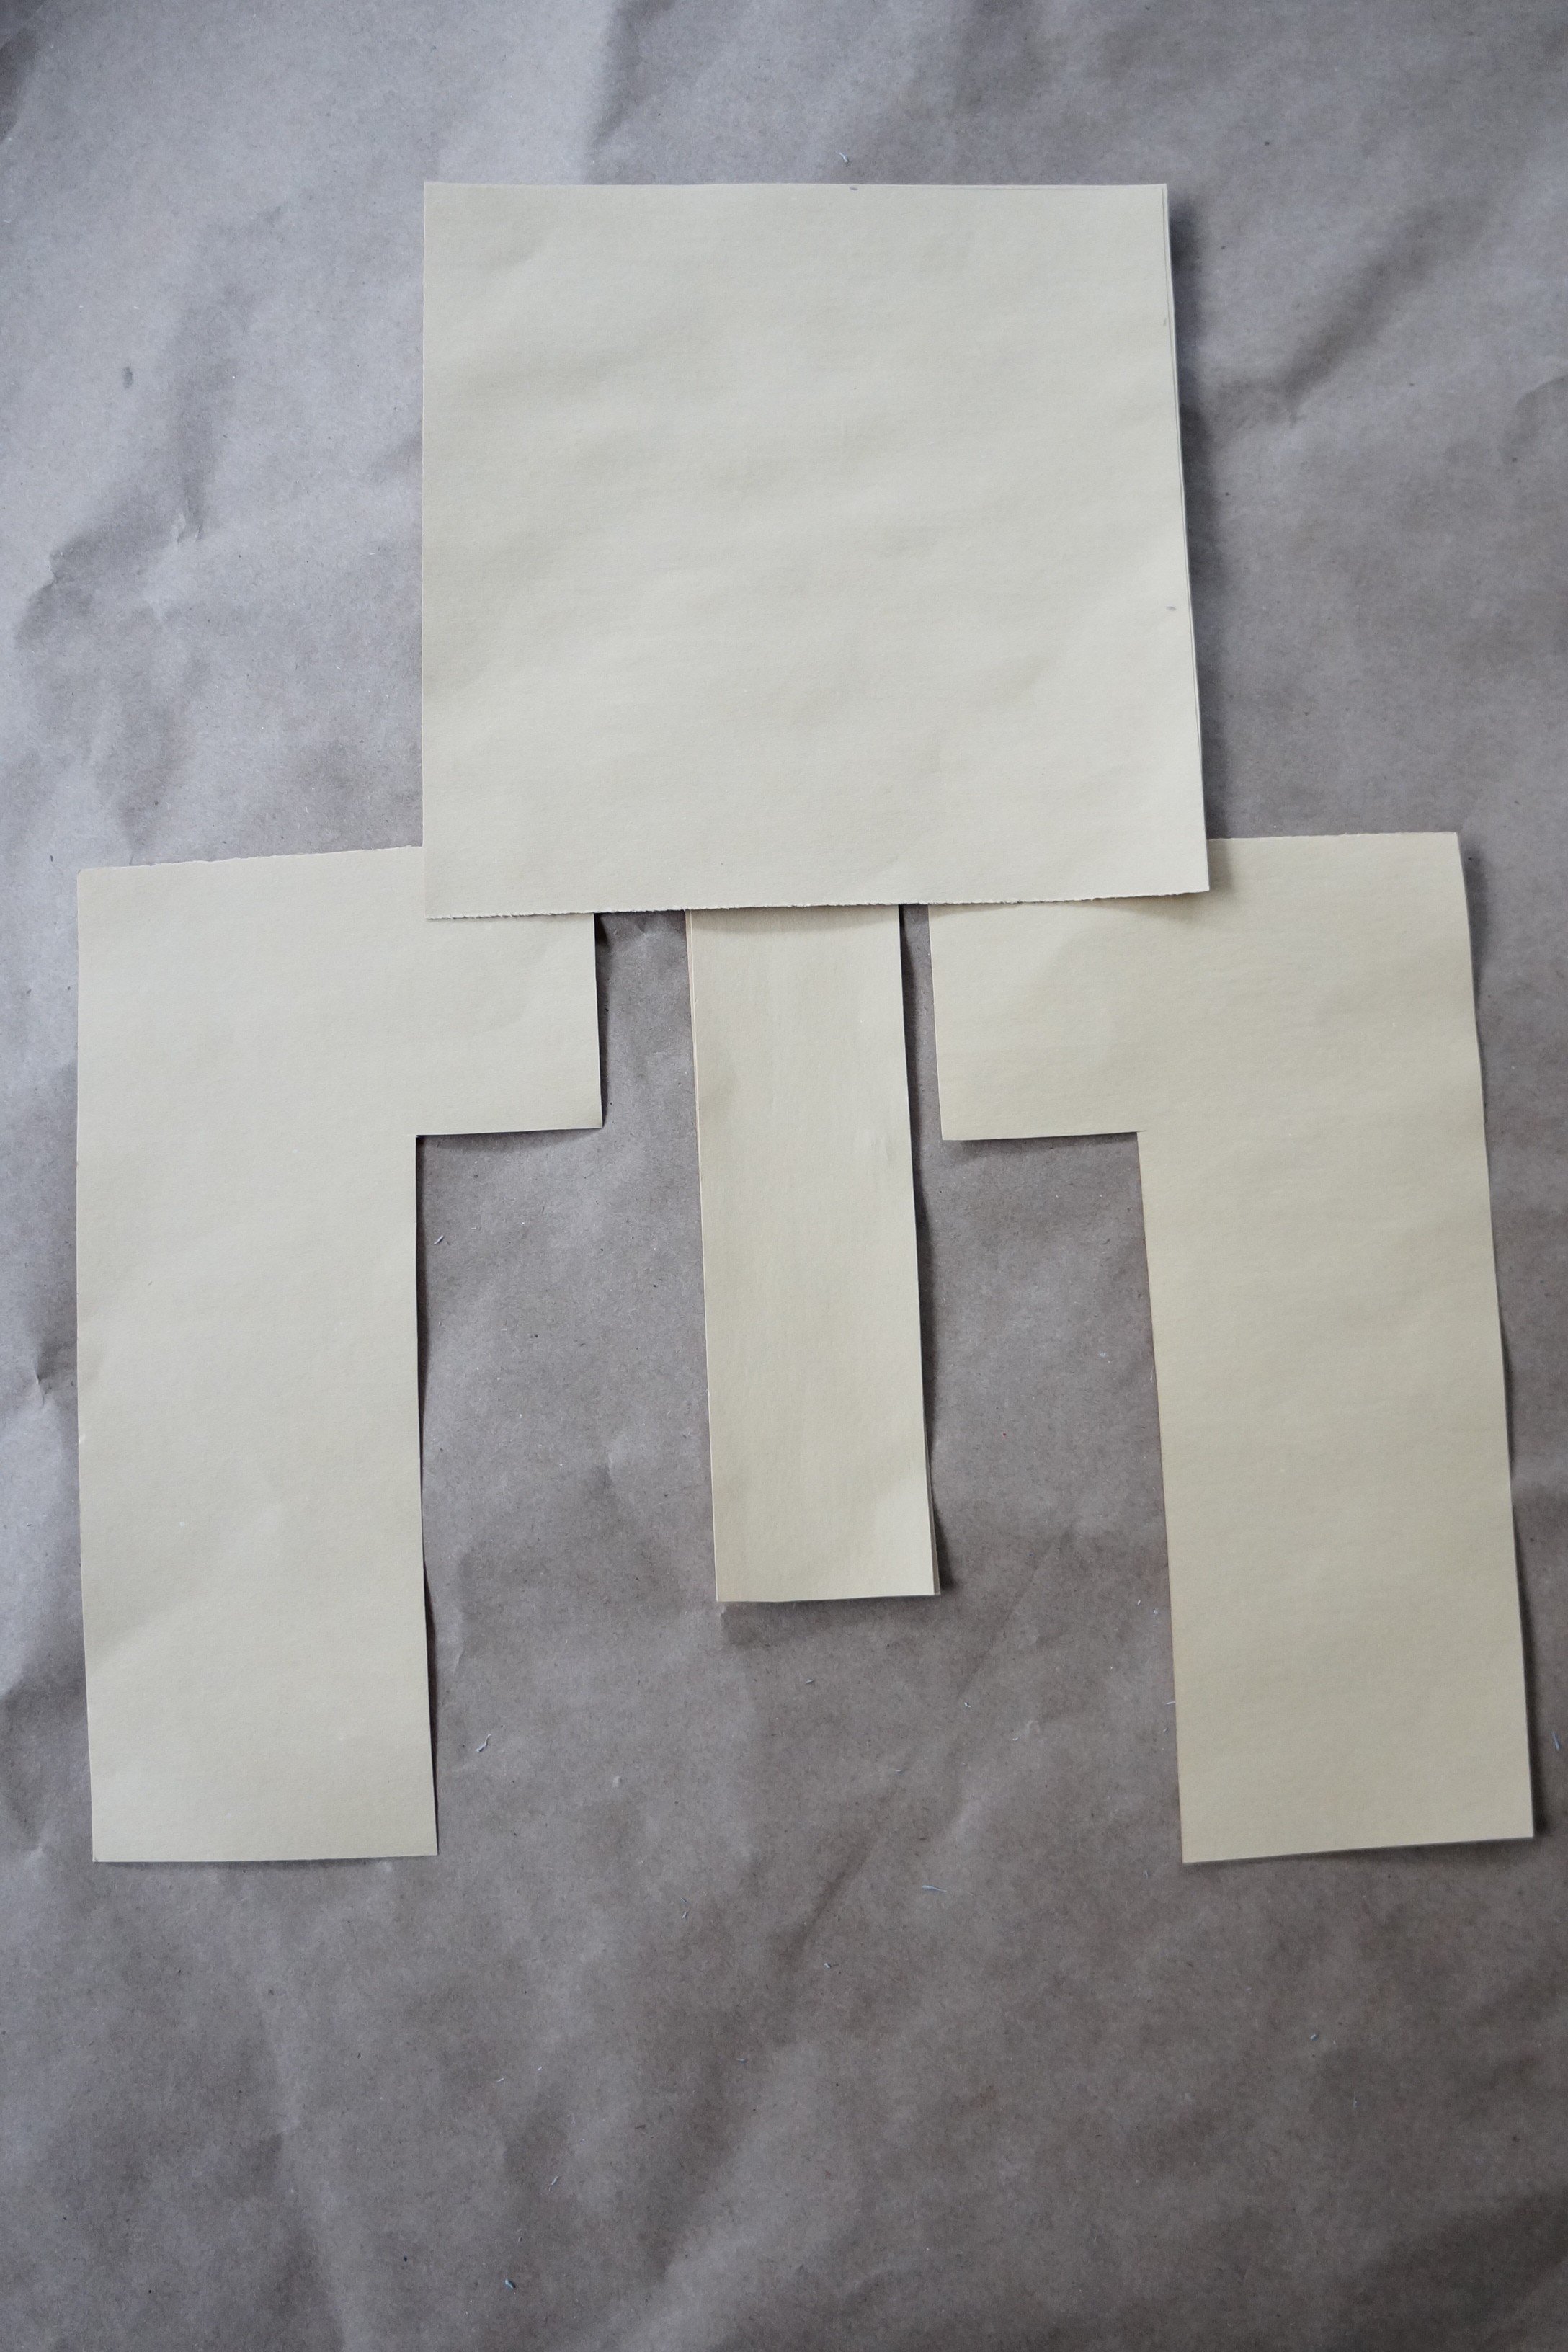
Stack your tan papers vertically and measure a 7-inch x 7-inch square on the upper left corner.
Cut through both layers and glue the squares together.
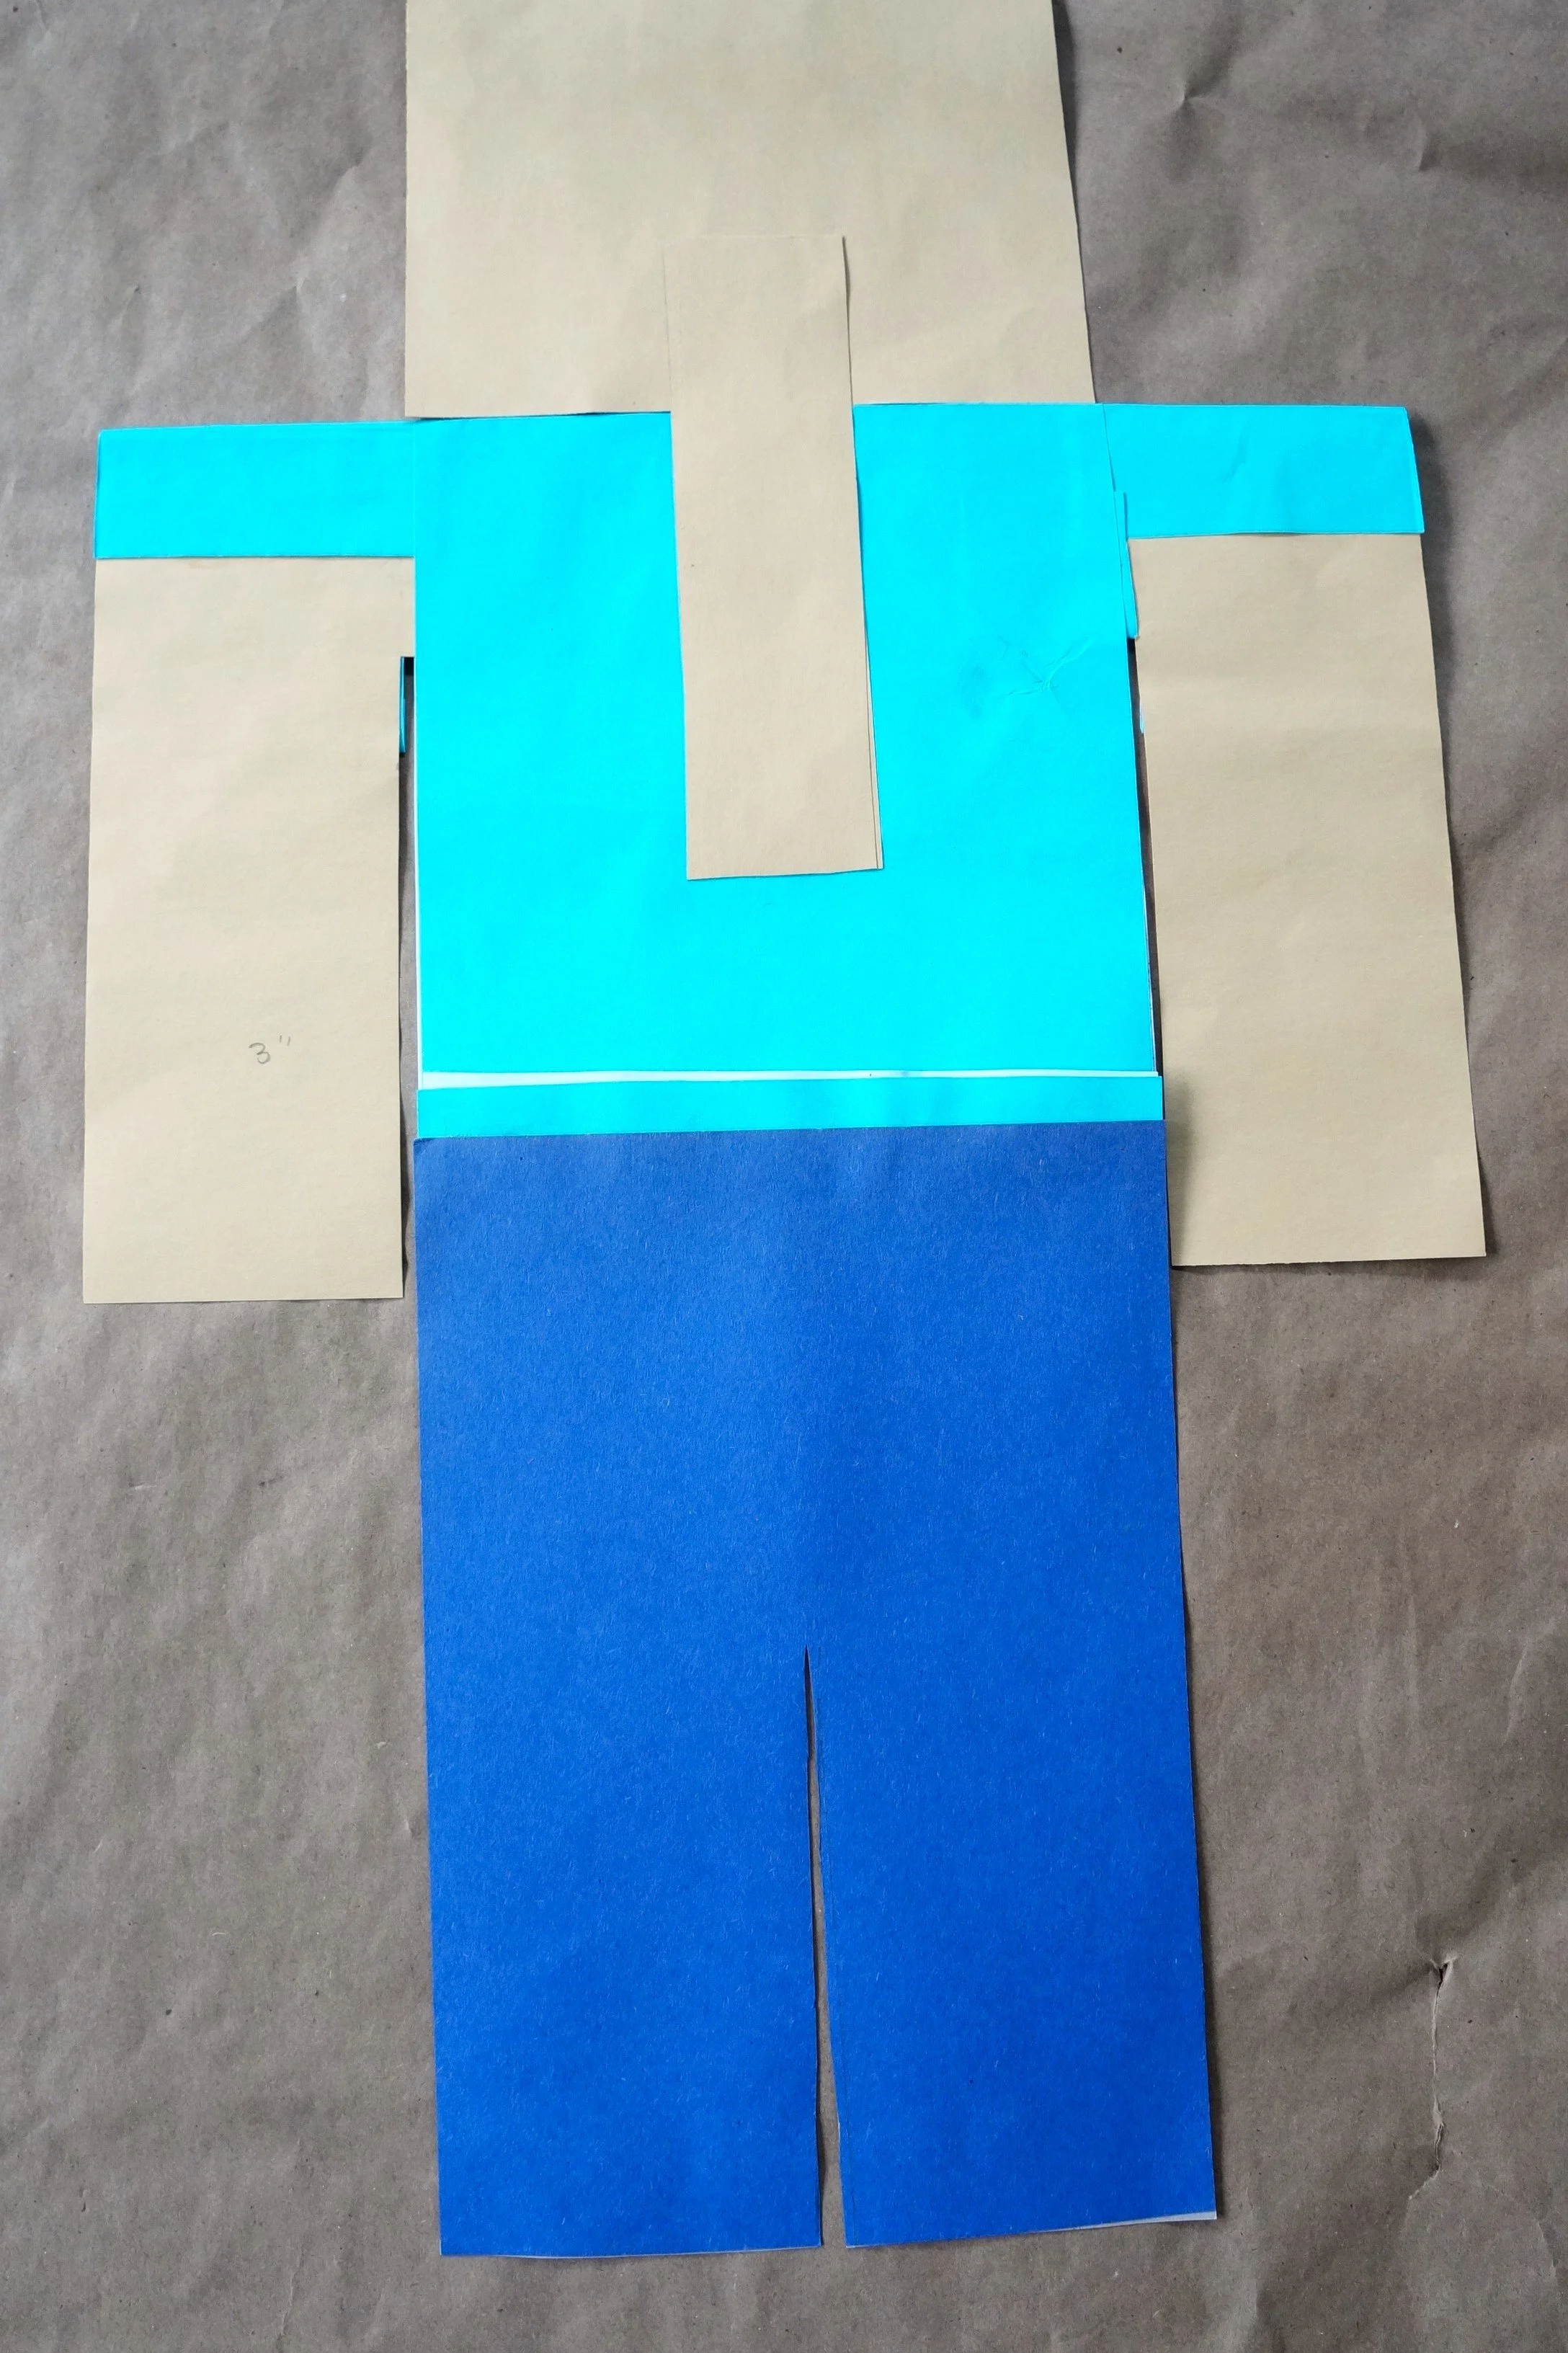
ARMS & NECK
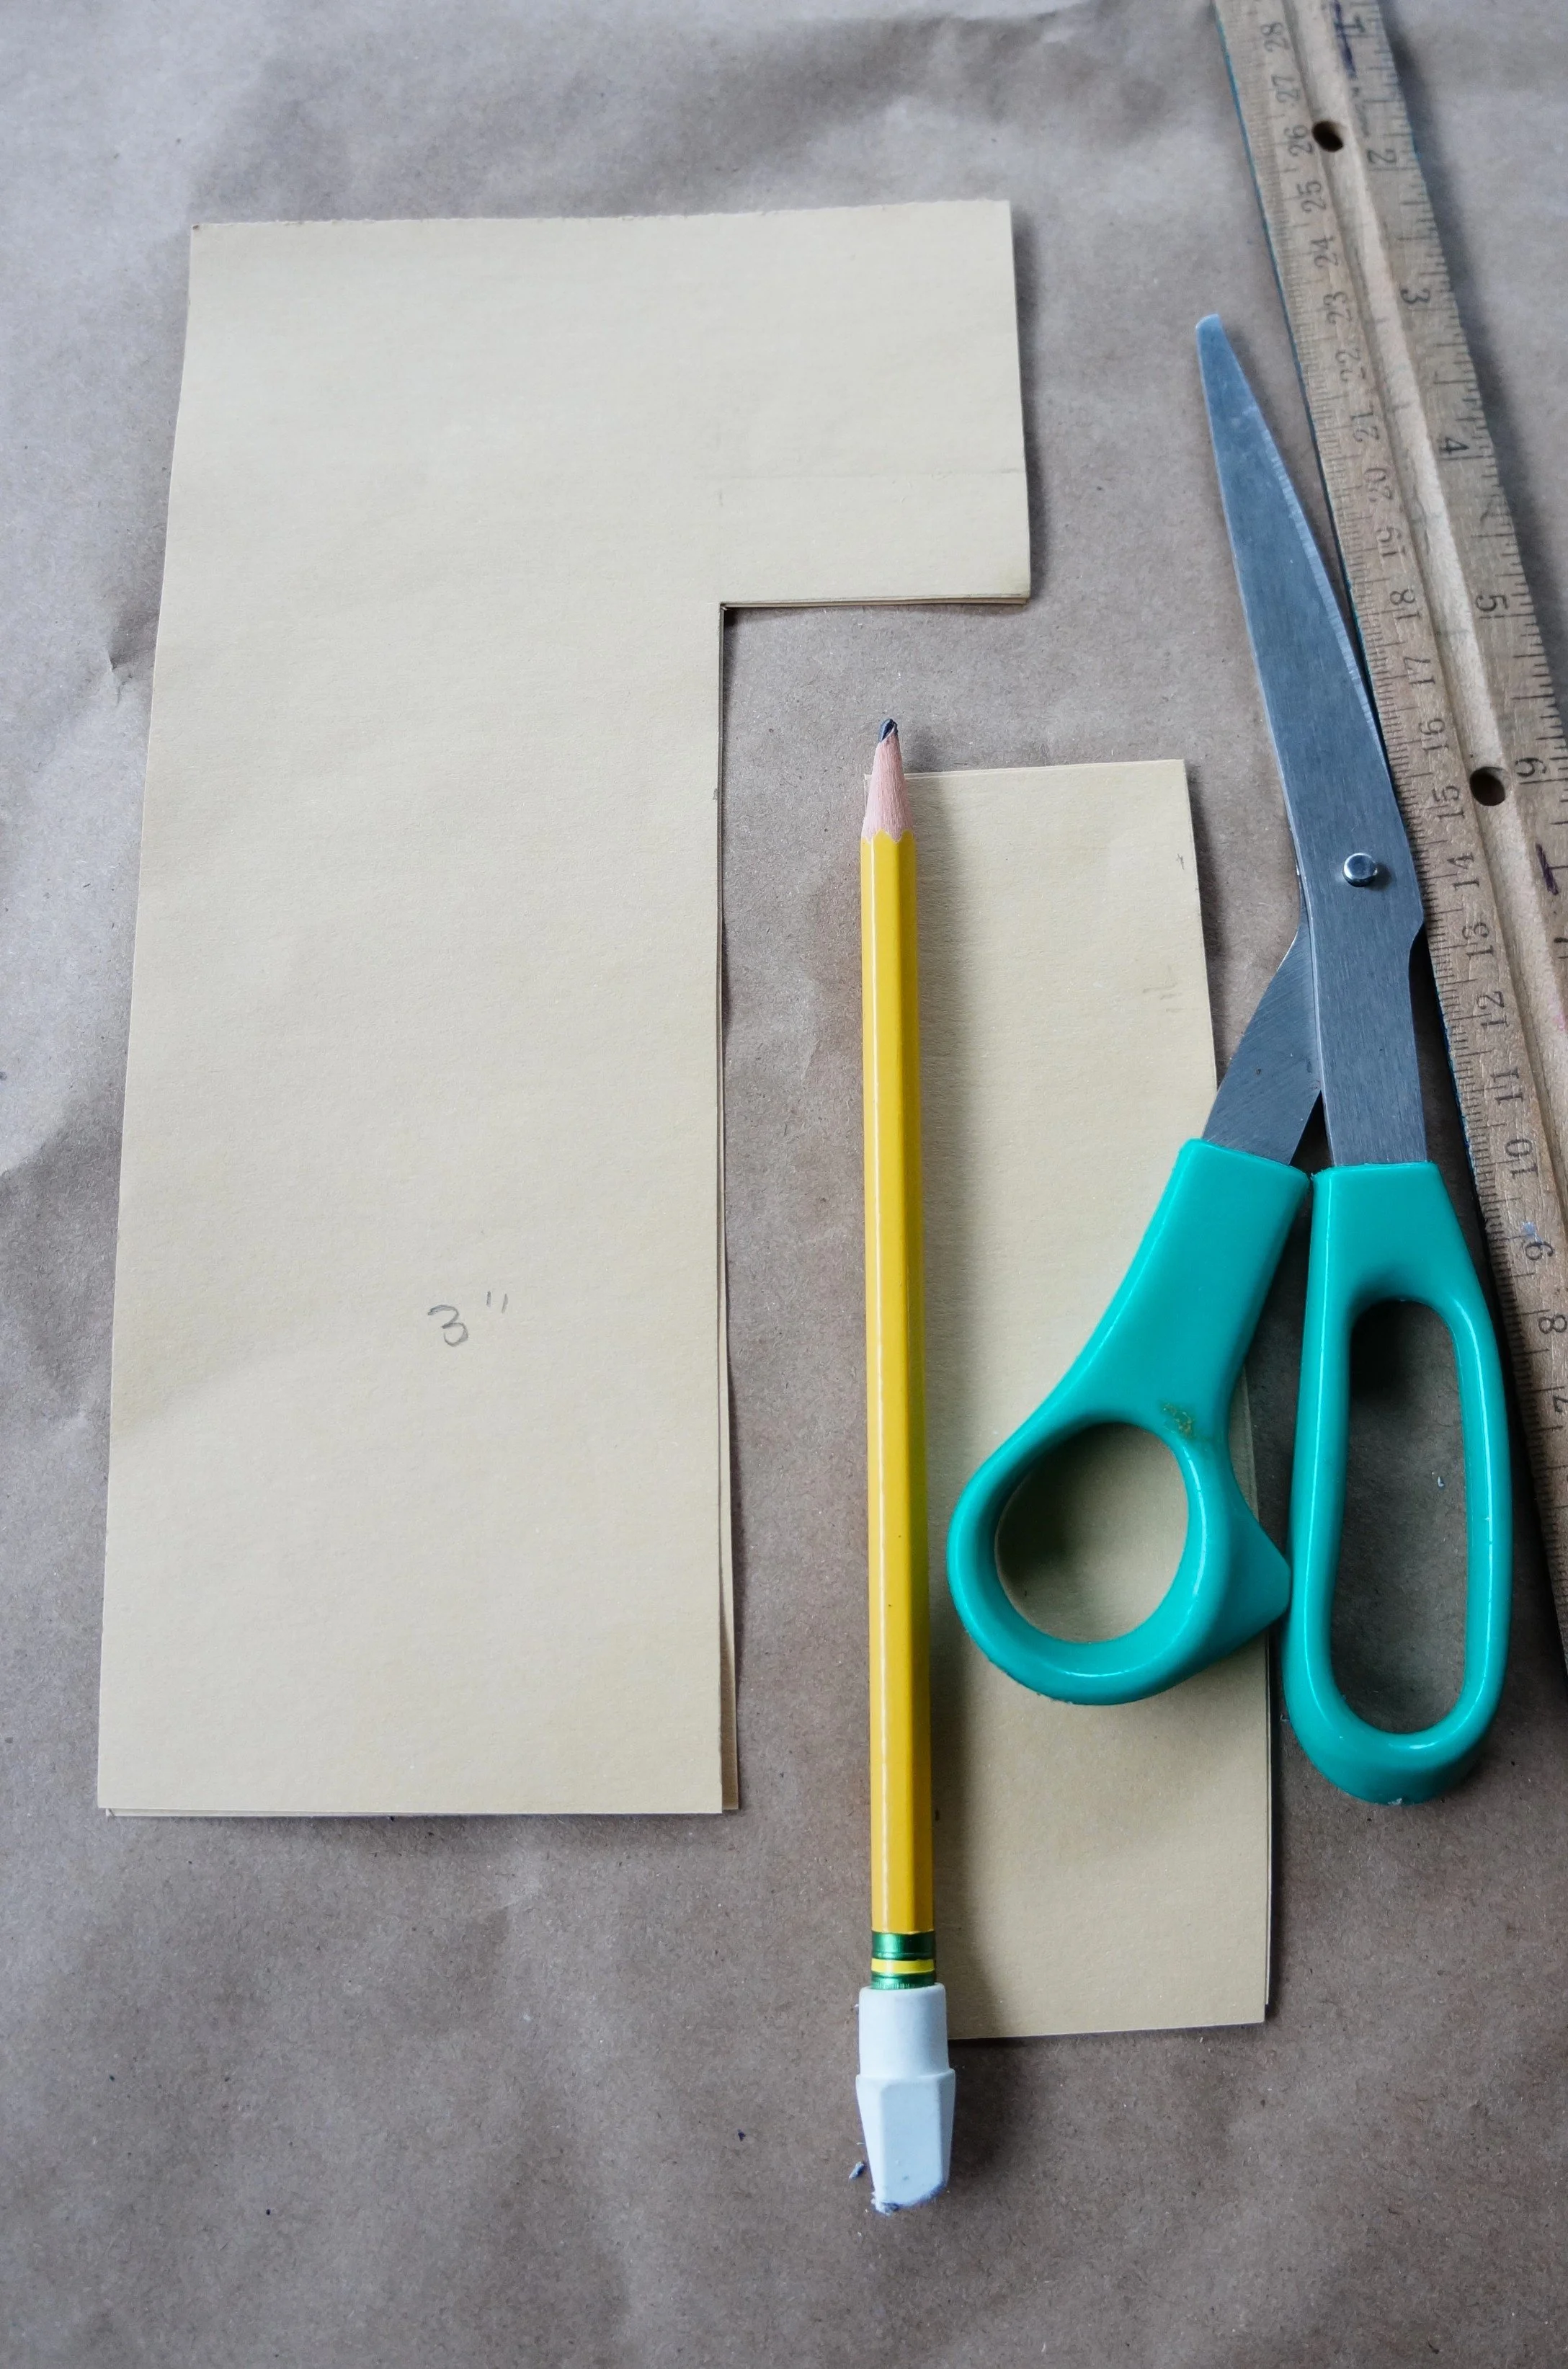
Turn the bottom leftover section vertically, measure out a 2-inch x 6.5-inch strip, and cut it out.
Separate the arms and glue the 2-inch strips together.
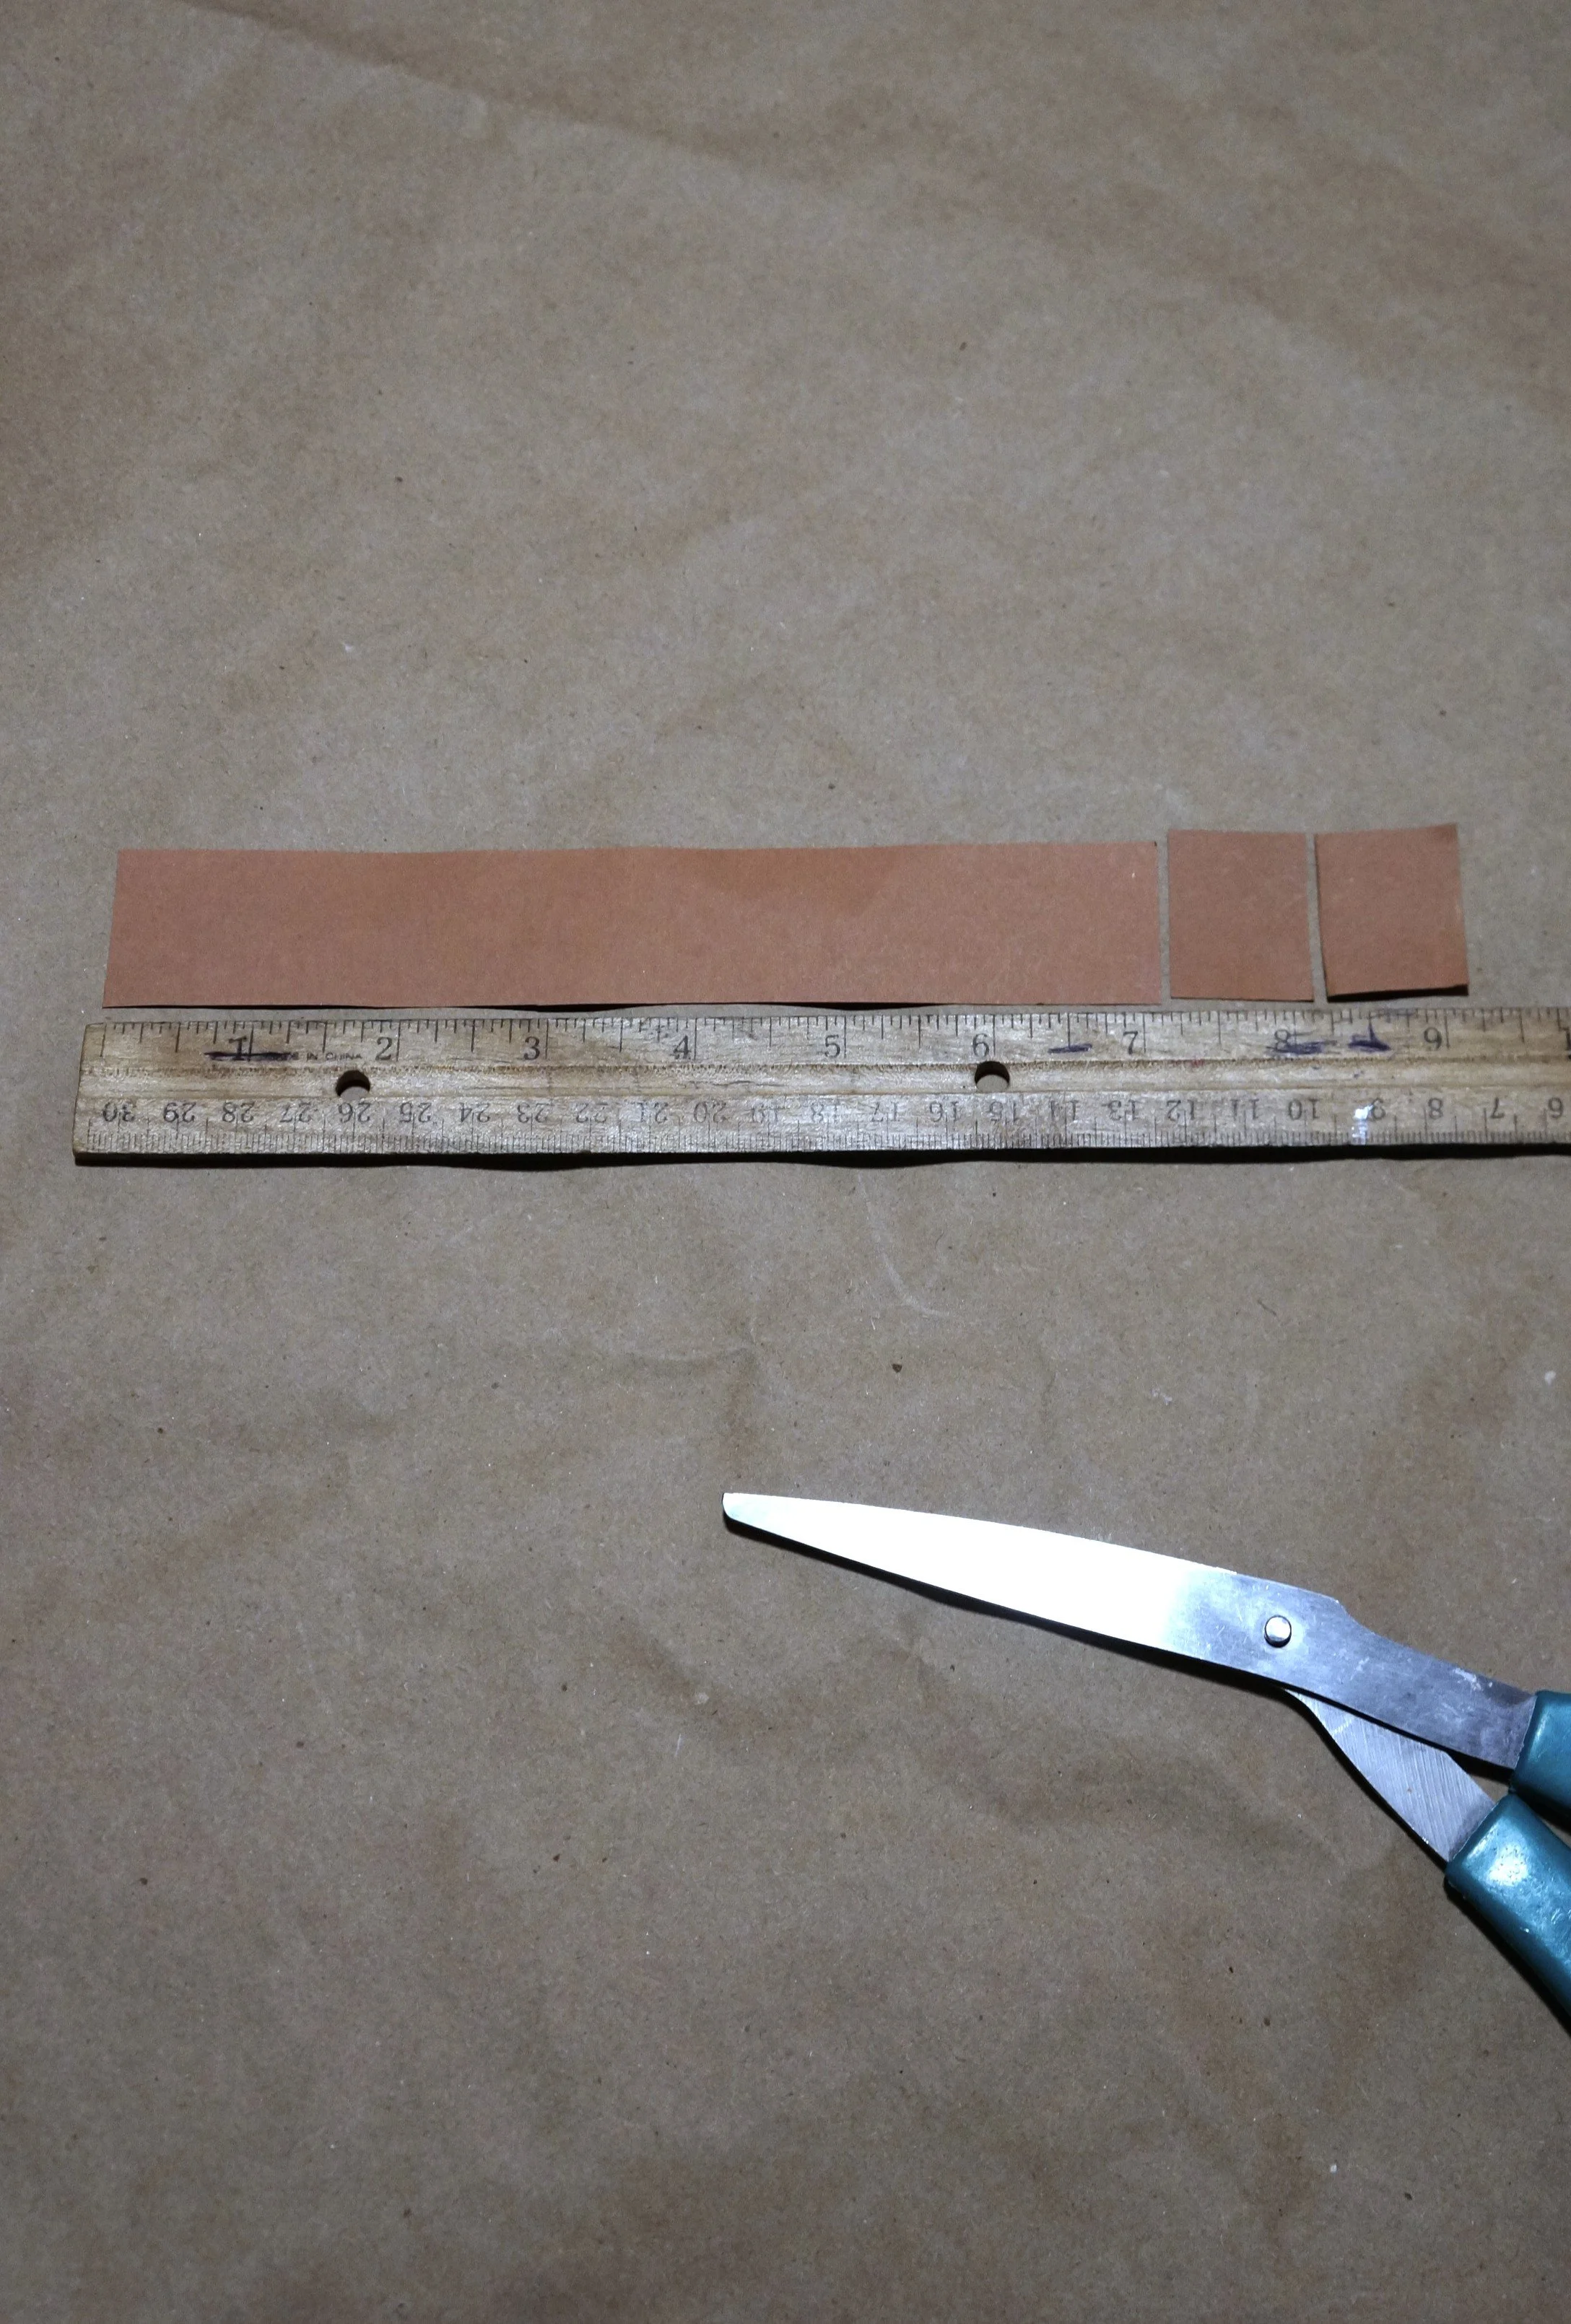
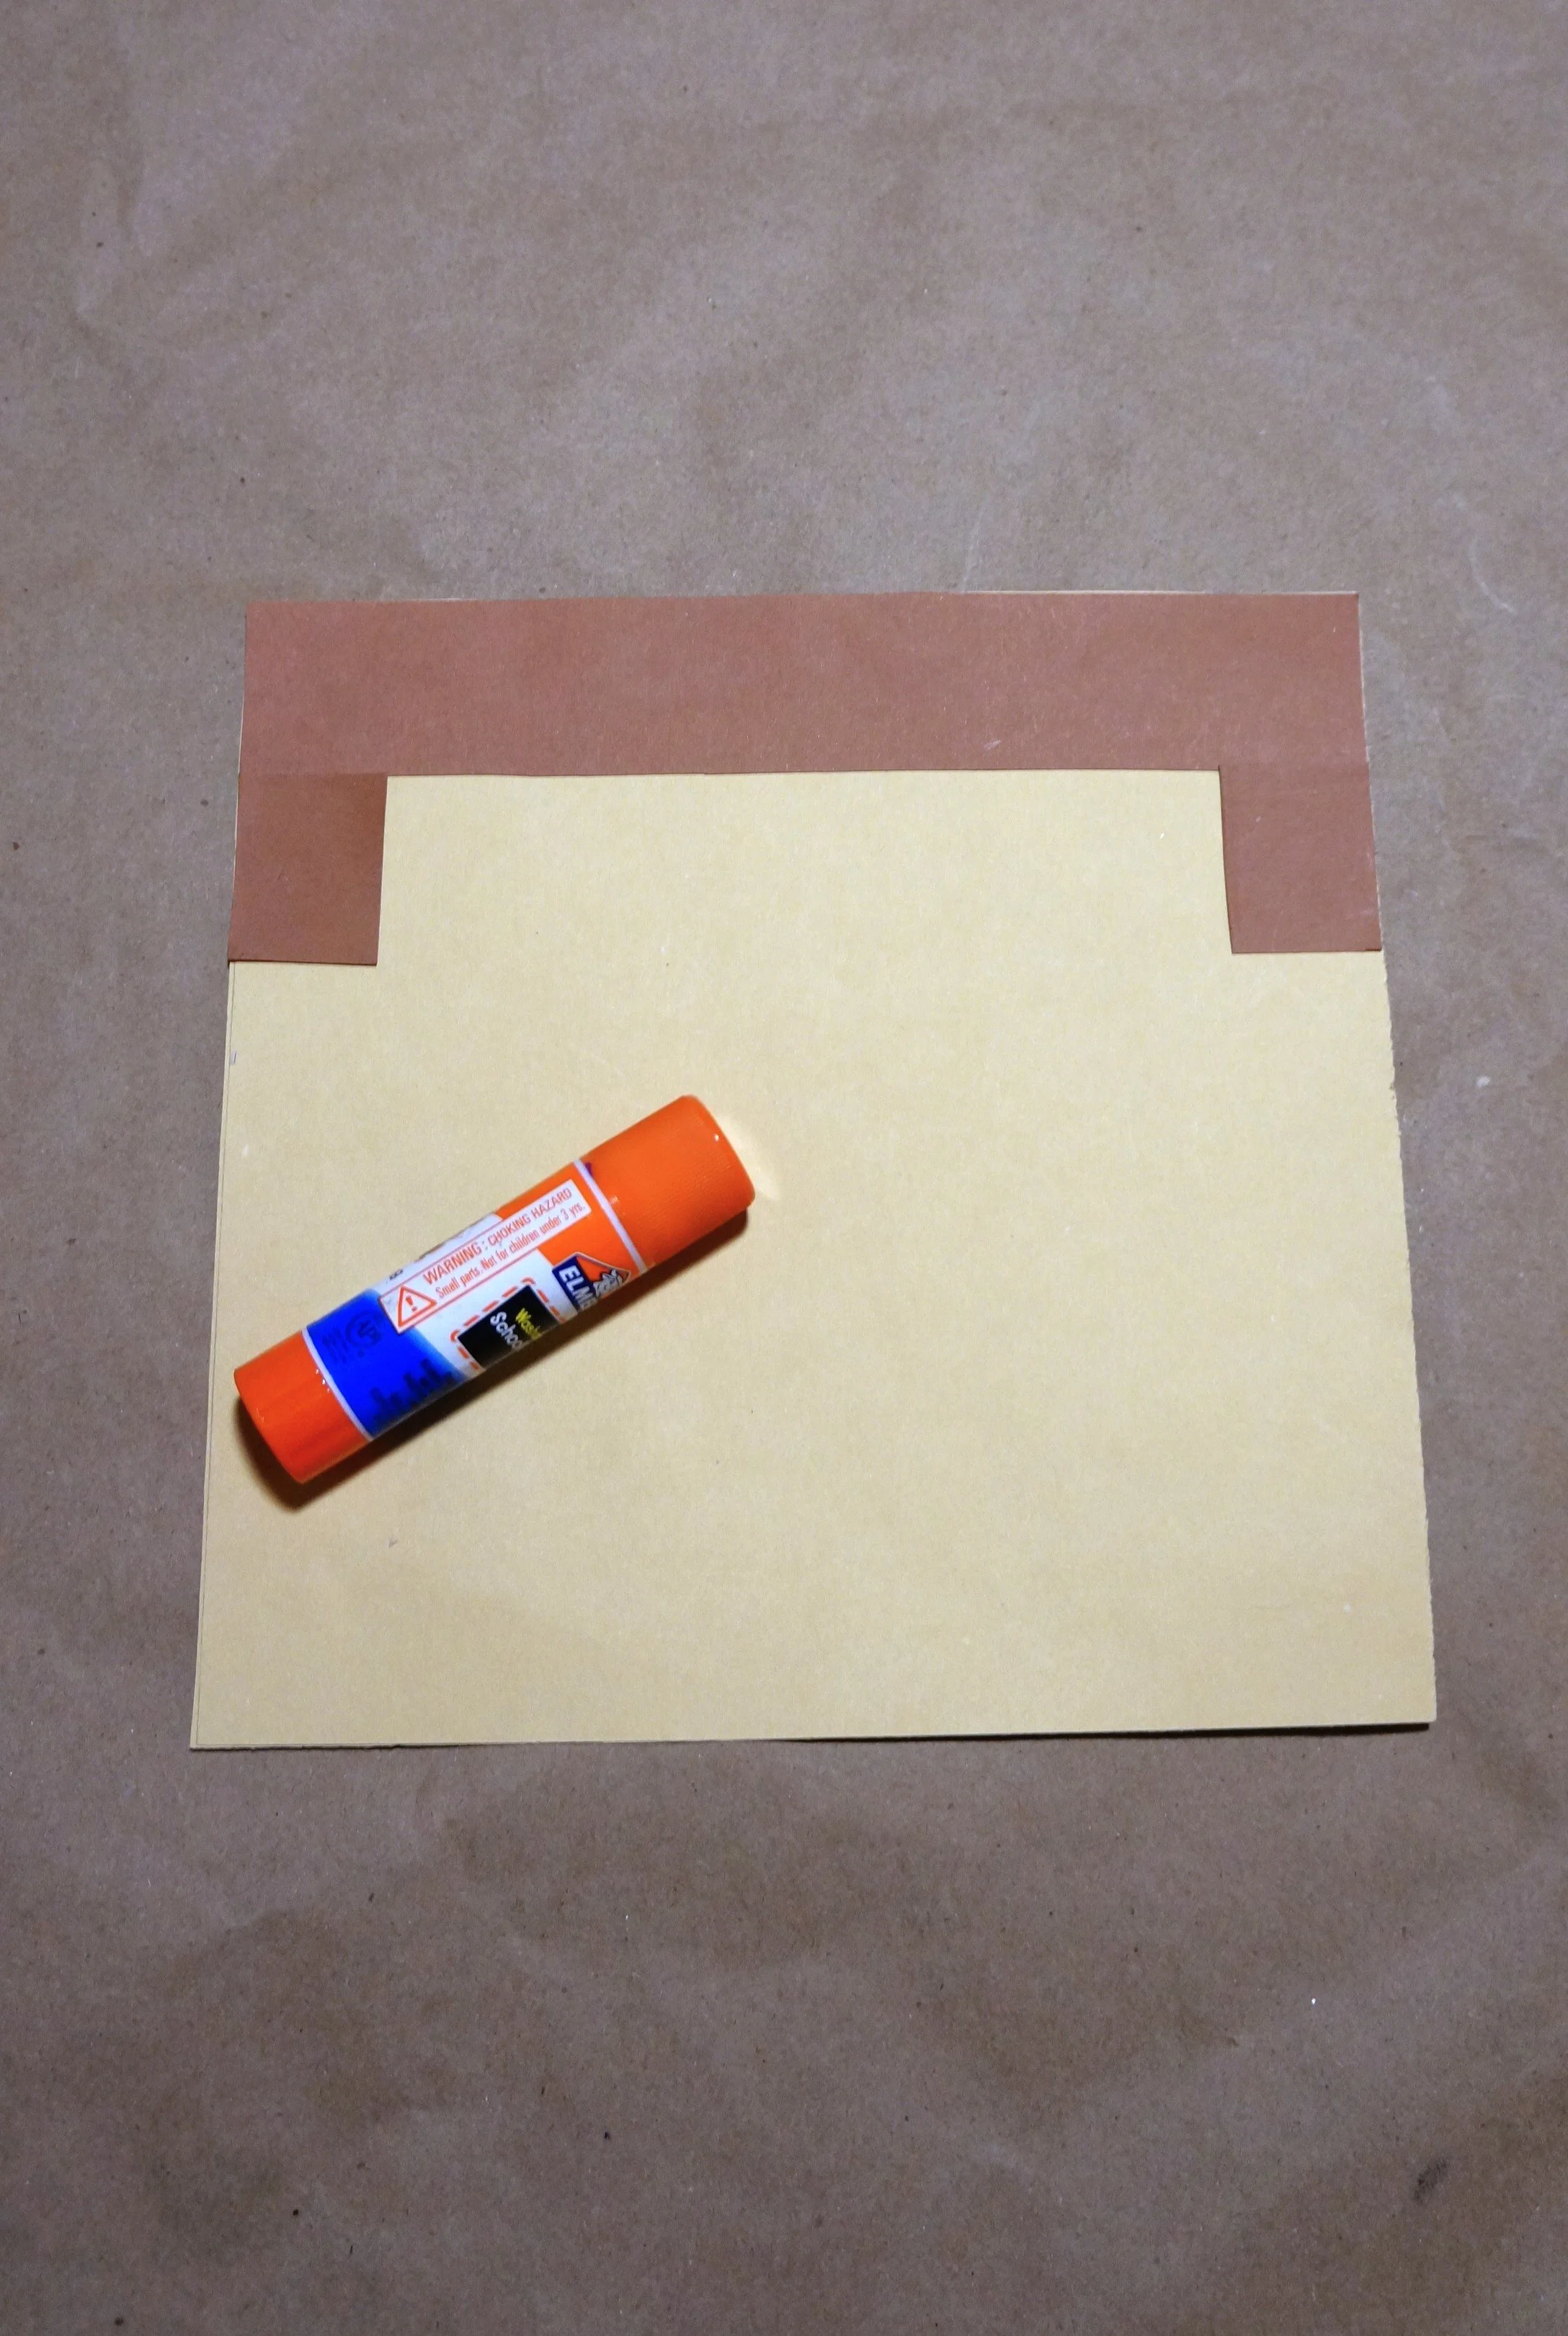

HAIR
Turn your brown/dk. brown paper vertically, cut one 7-inch strip and two small sections.
Glue the hair and side sections to the head.
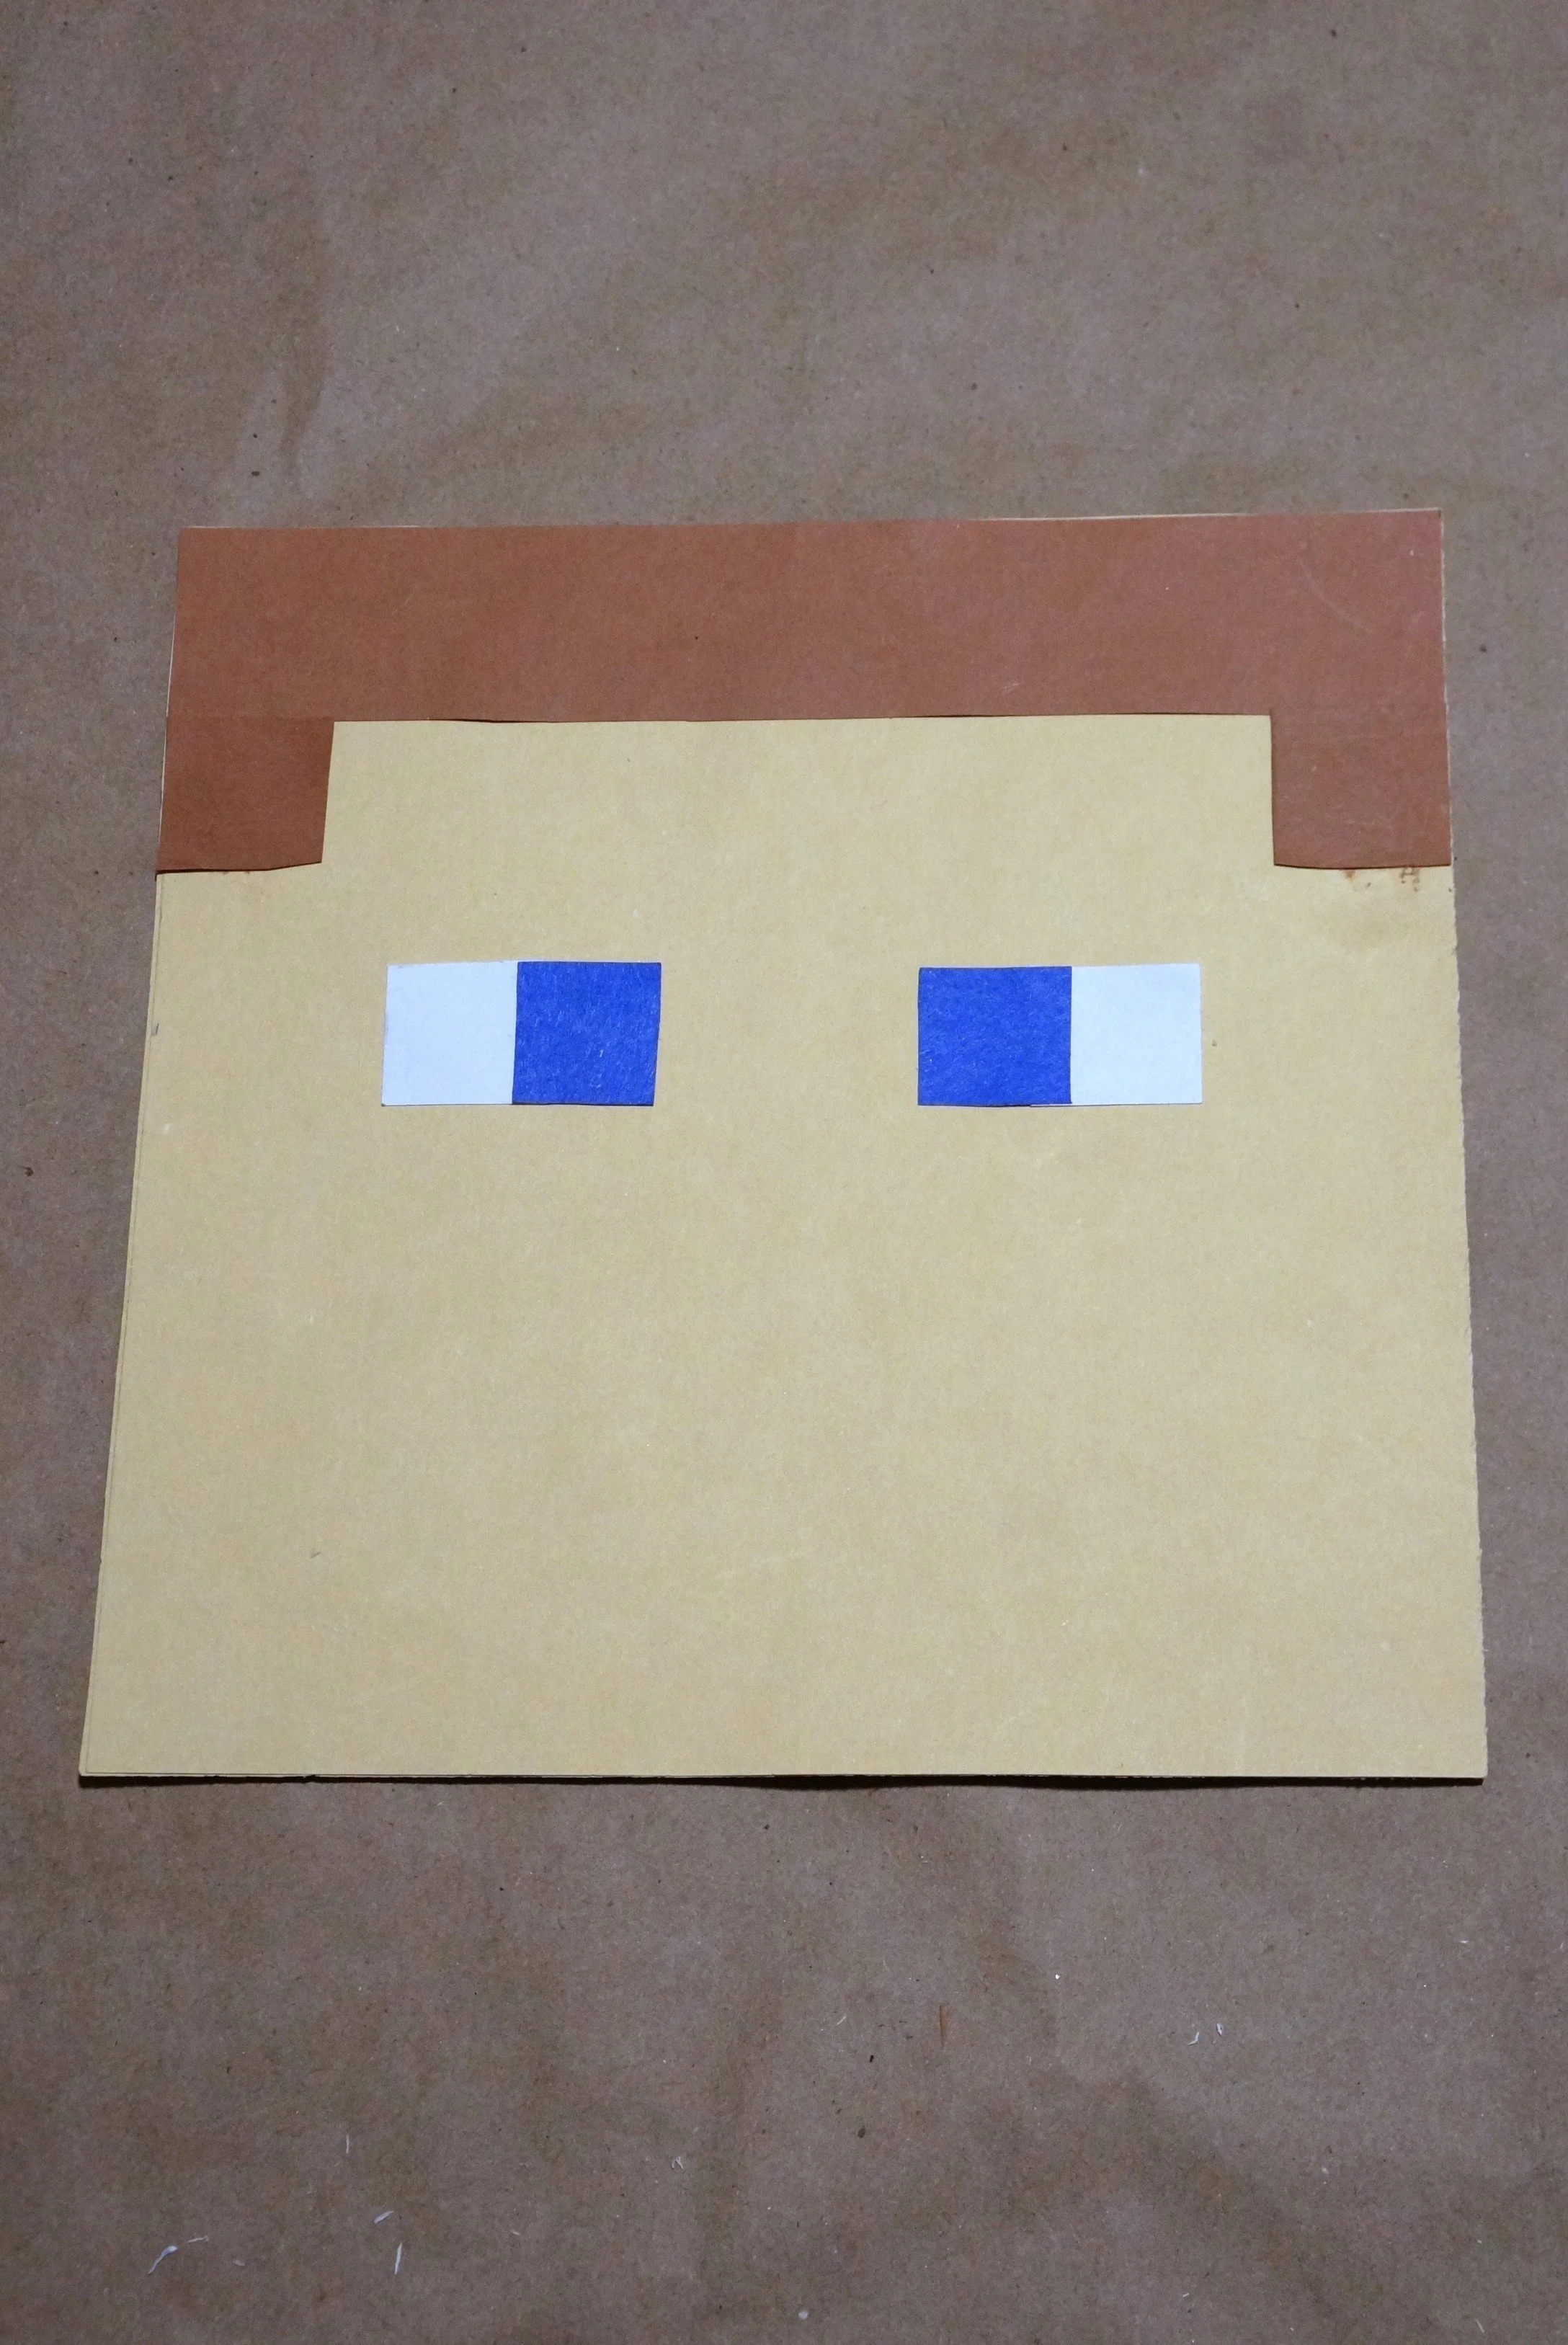
EYES
Measure two 1.5-inch x .75-inch rectangles on the white paper and cut them out.
Cut two blue/purple .75-inch x .75-inch squares, glue them to the white strips, and then glue them to the face with the blue/purple on the inside.
BEARD & NOSE
From the brown paper, cut out a 2-inch x 3.25-inch rectangle.
From that rectangle, cut out a .75-inch x 1.5-inch rectangle, then glue the mustache at the bottom of the face, and the nose hovering right above it.
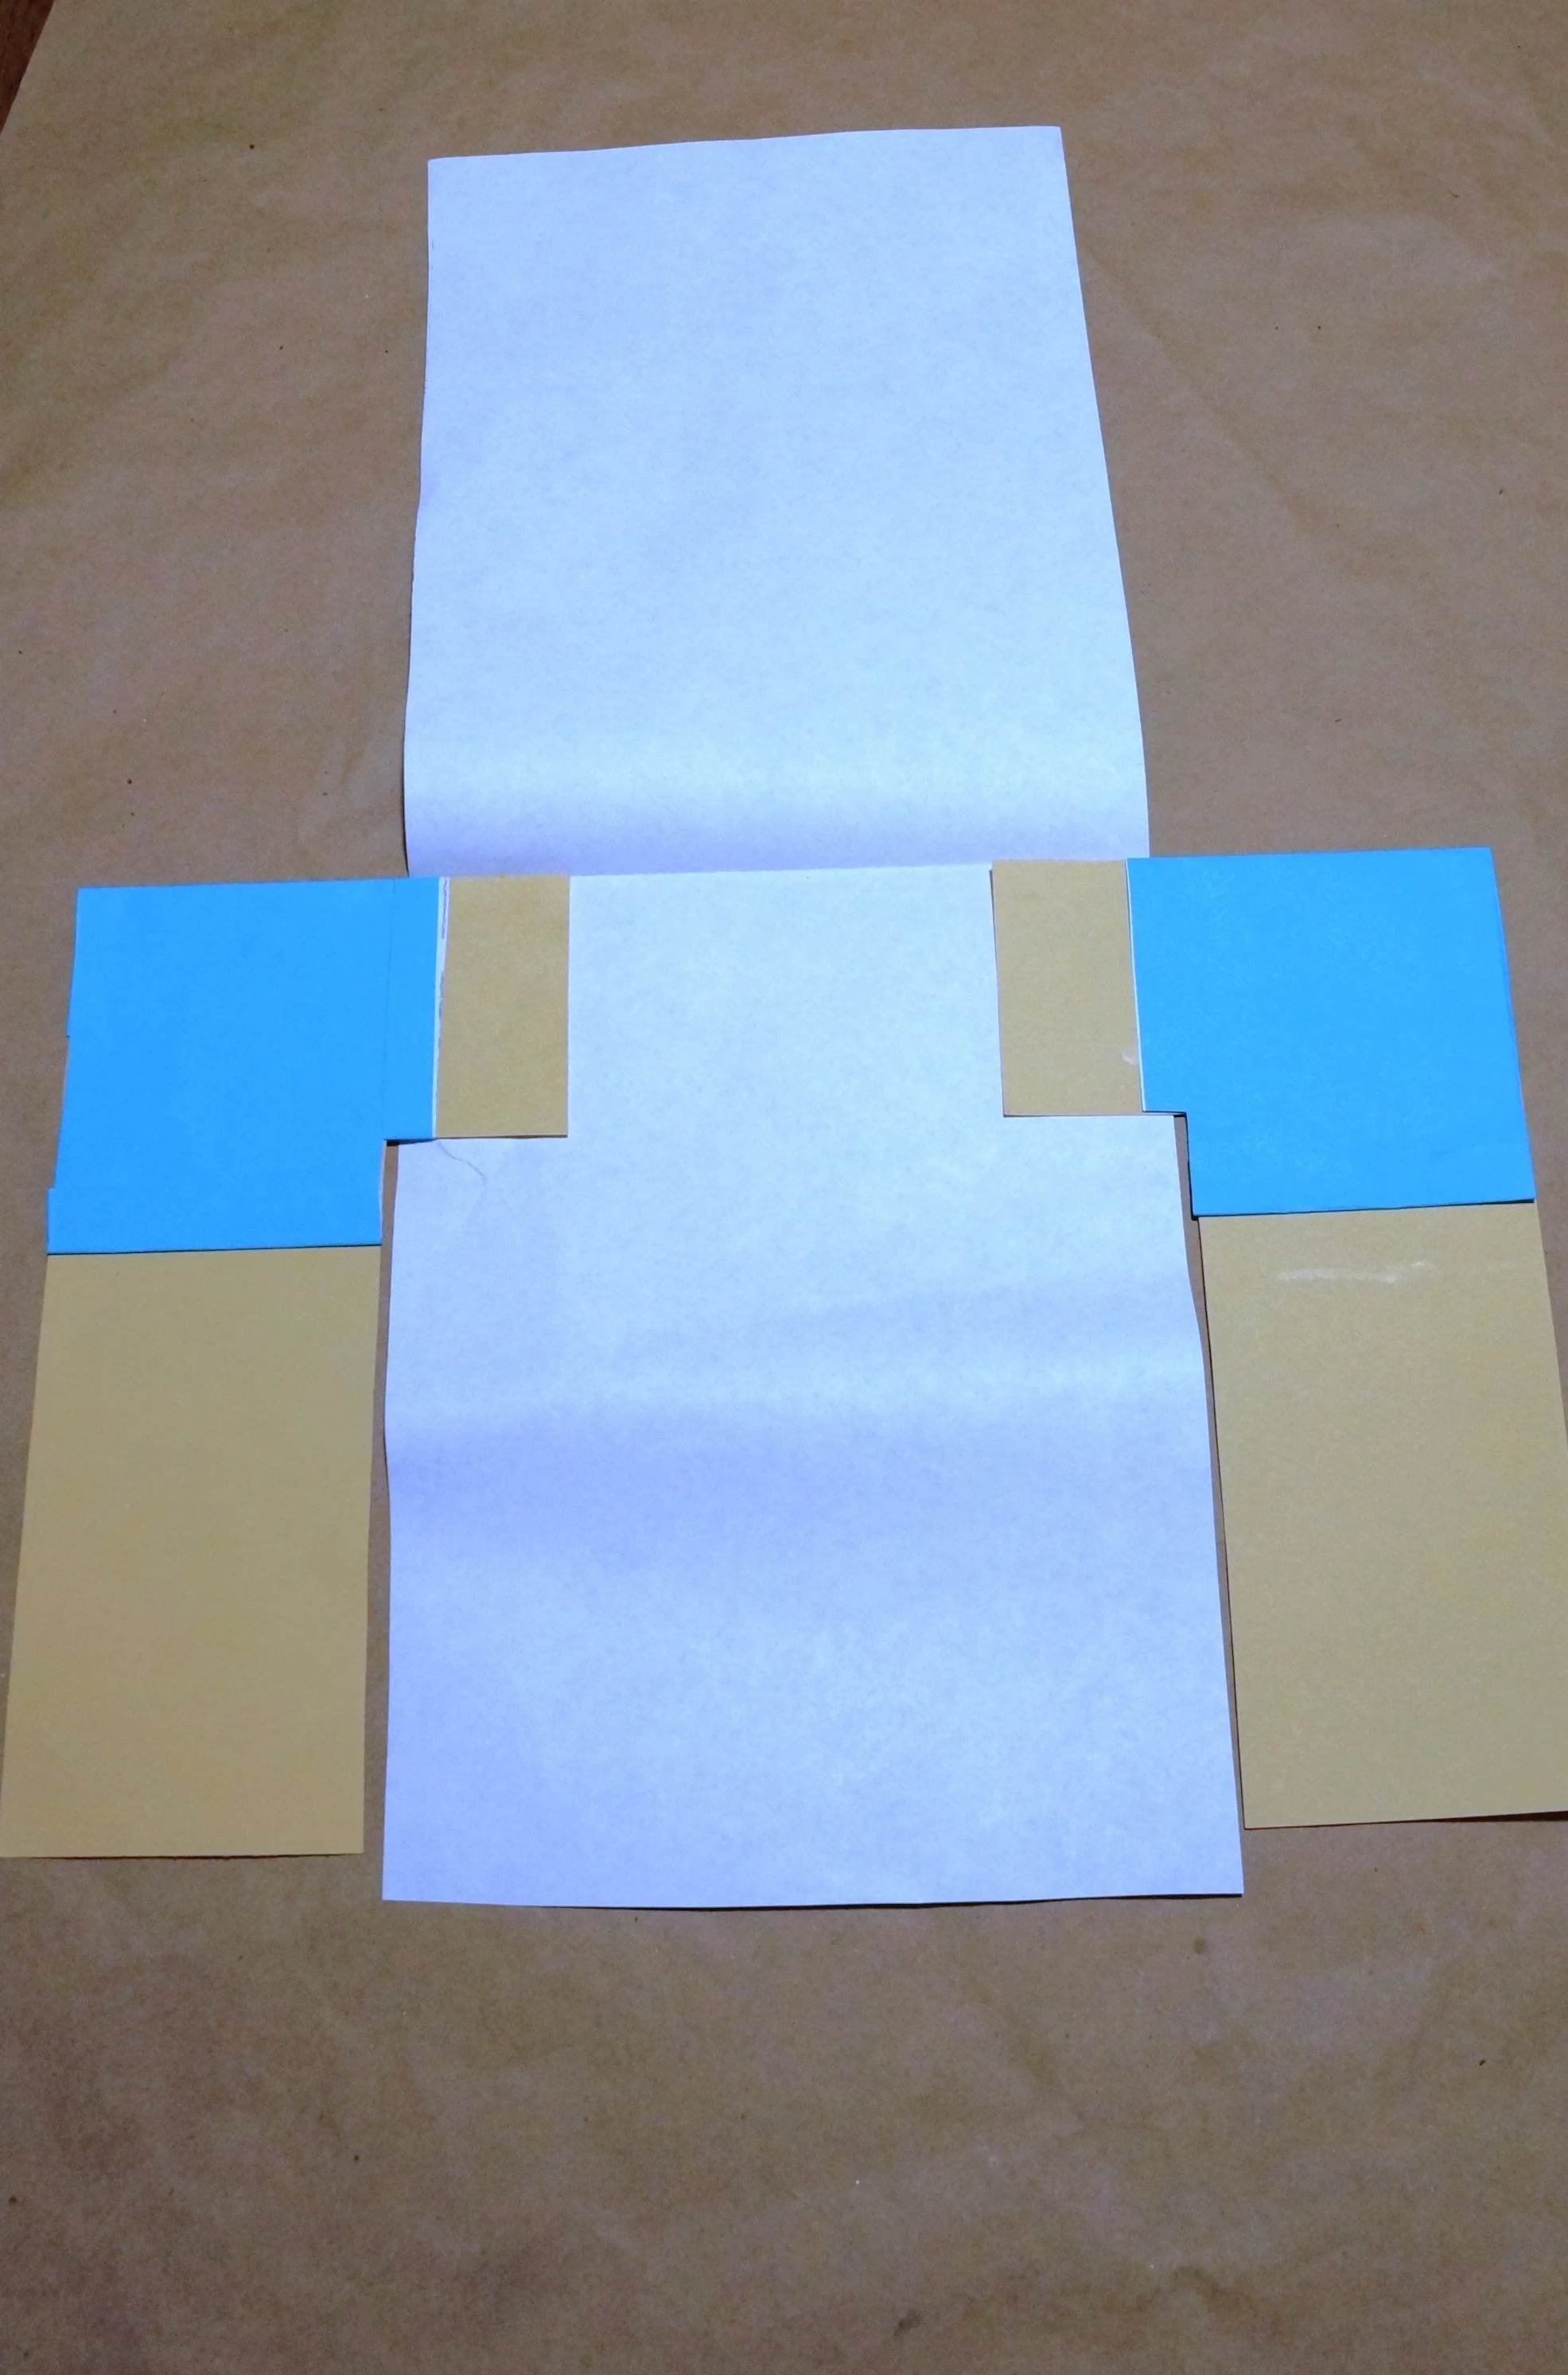

SHIRT: We used wrapping paper scraps
Stack your papers vertically, if using two, and cut out a 7-inch x 8.5-inch rectangle.
Use the scraps or a third sheet to cut out pieces for the shoulders, making sure there’s enough length to add a cuff, and glue them on.
Glue the arms between the larger sheets of turquoise paper.
Cut out a small neck opening, less than 2 inches wide, and then glue that section to the bottom of the shirt.
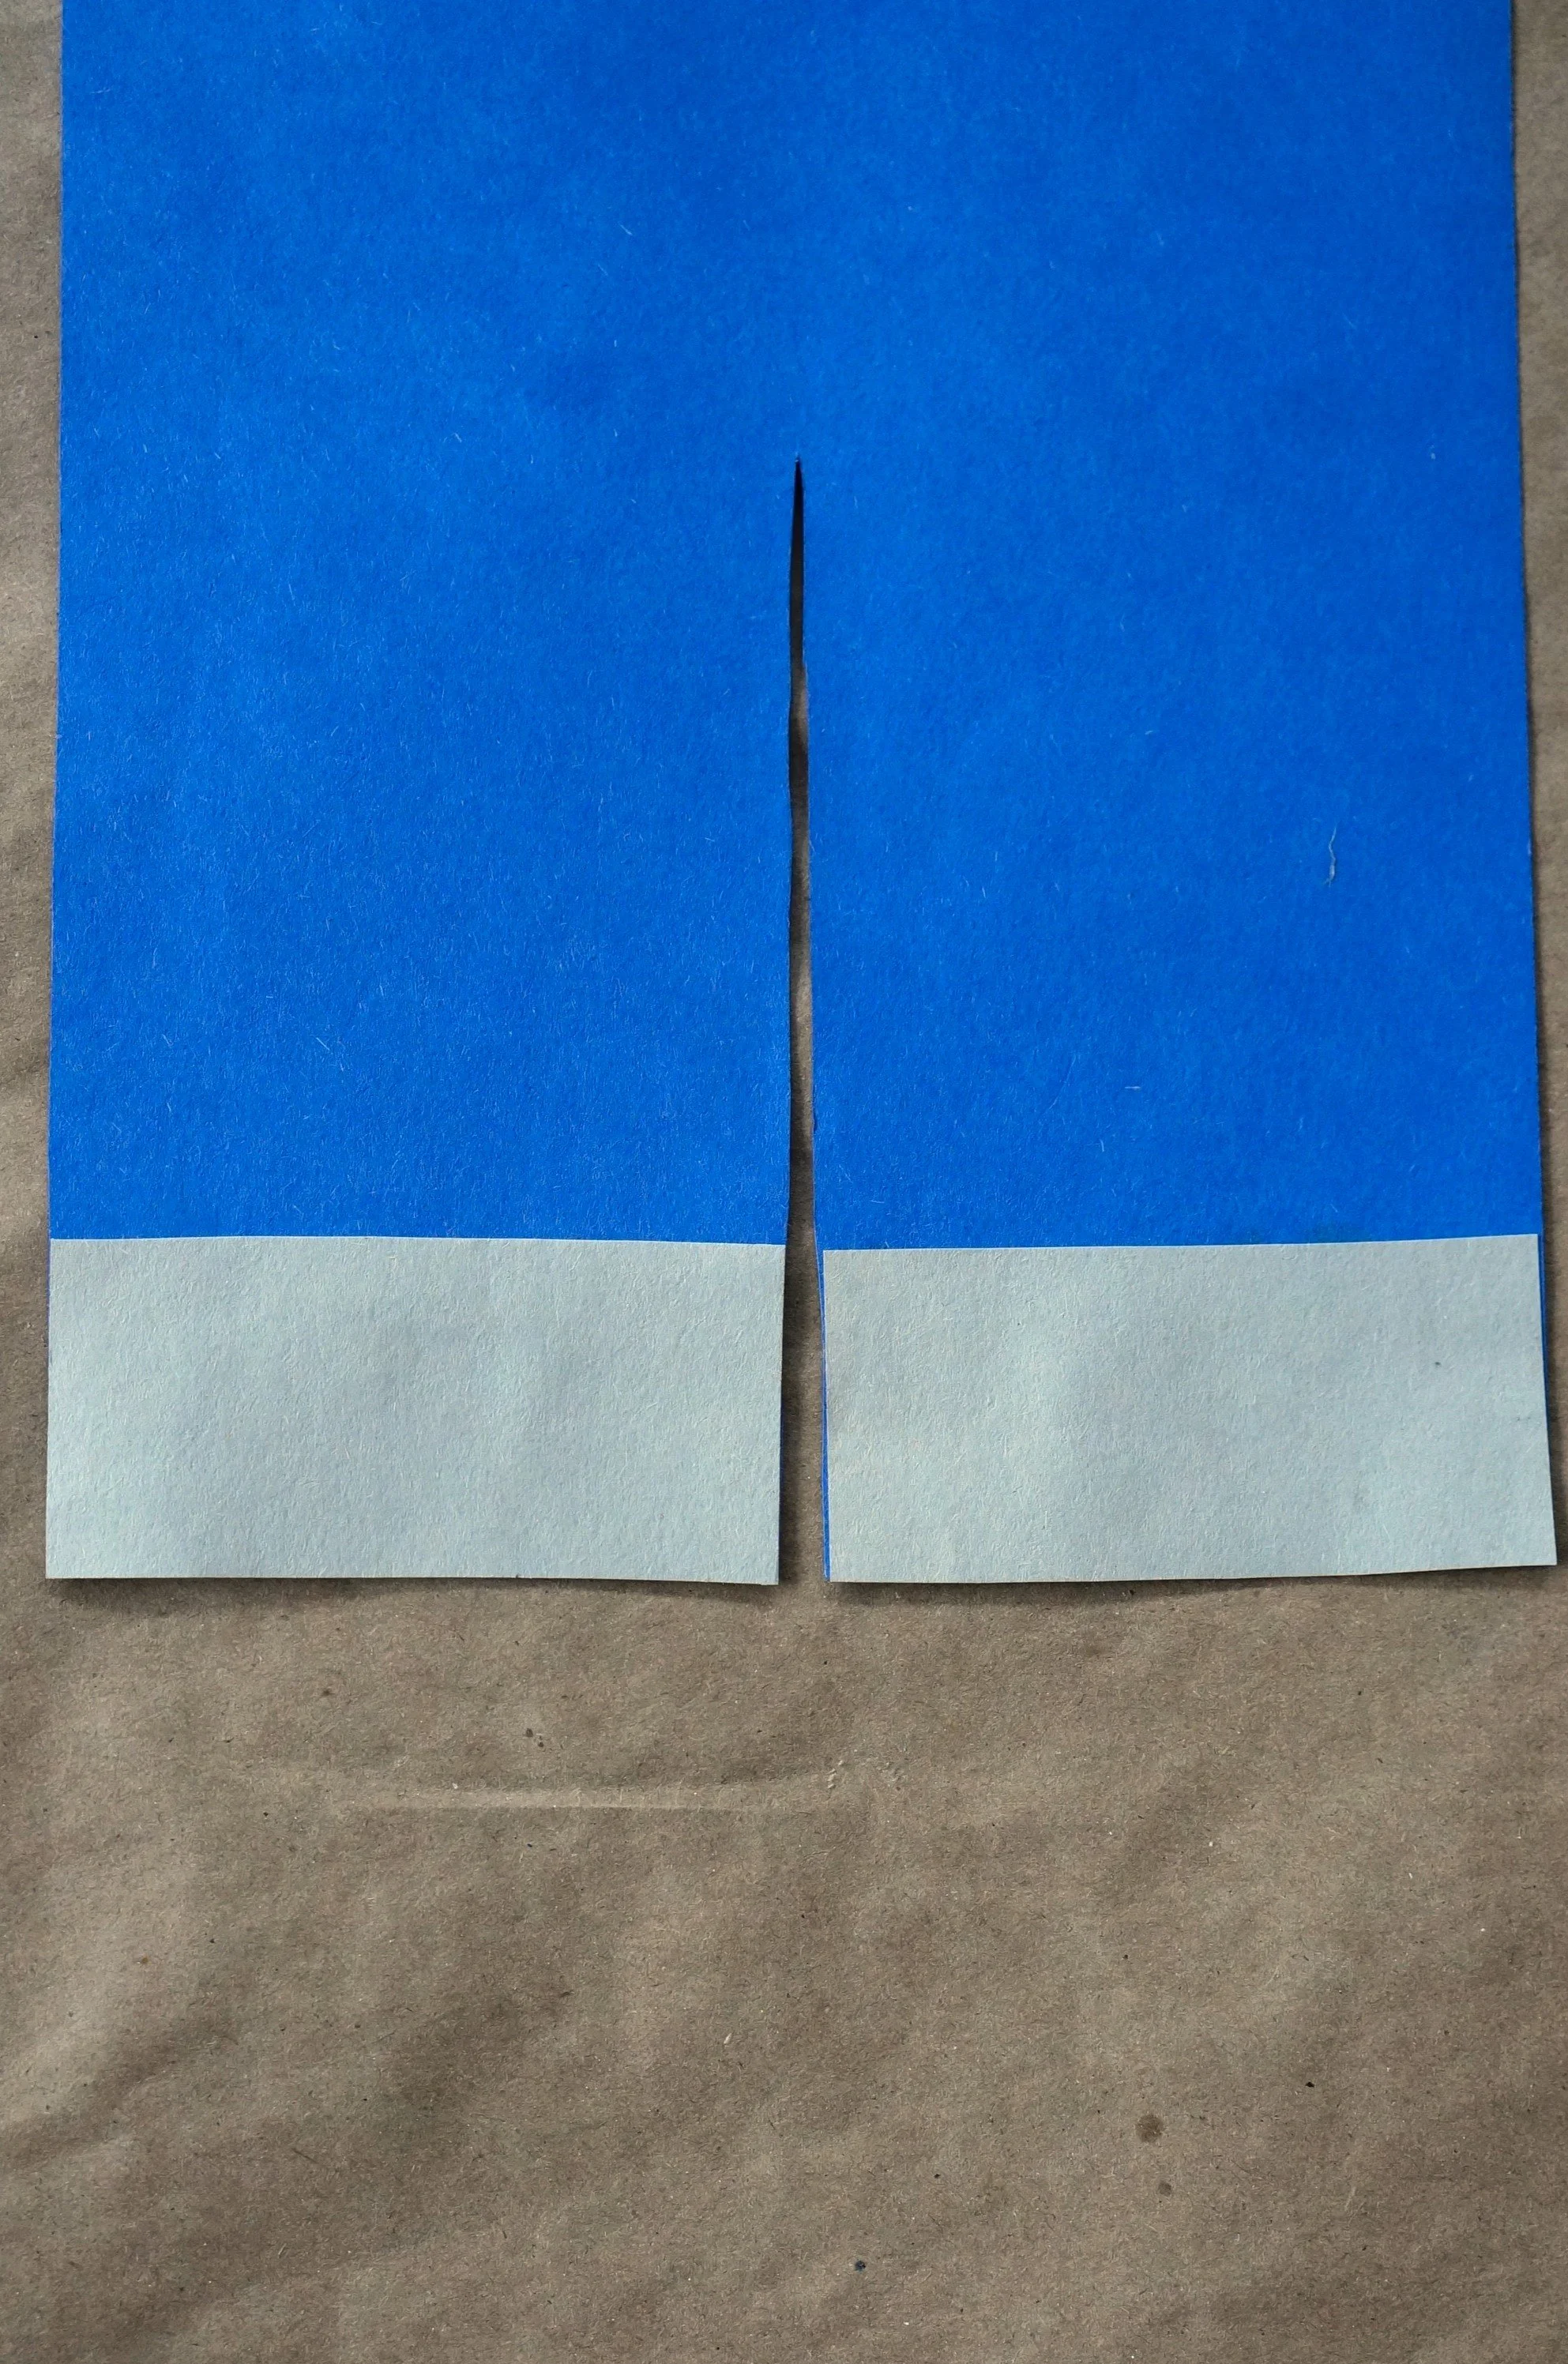
PANTS & SHOES
Cut a 7-inch x 10.5-inch rectangle from the blue paper, turn it vertically, and then cut a narrow sliver in the middle.
From the grey paper, cut out shoes, and glue them onto the bottom of the pants.

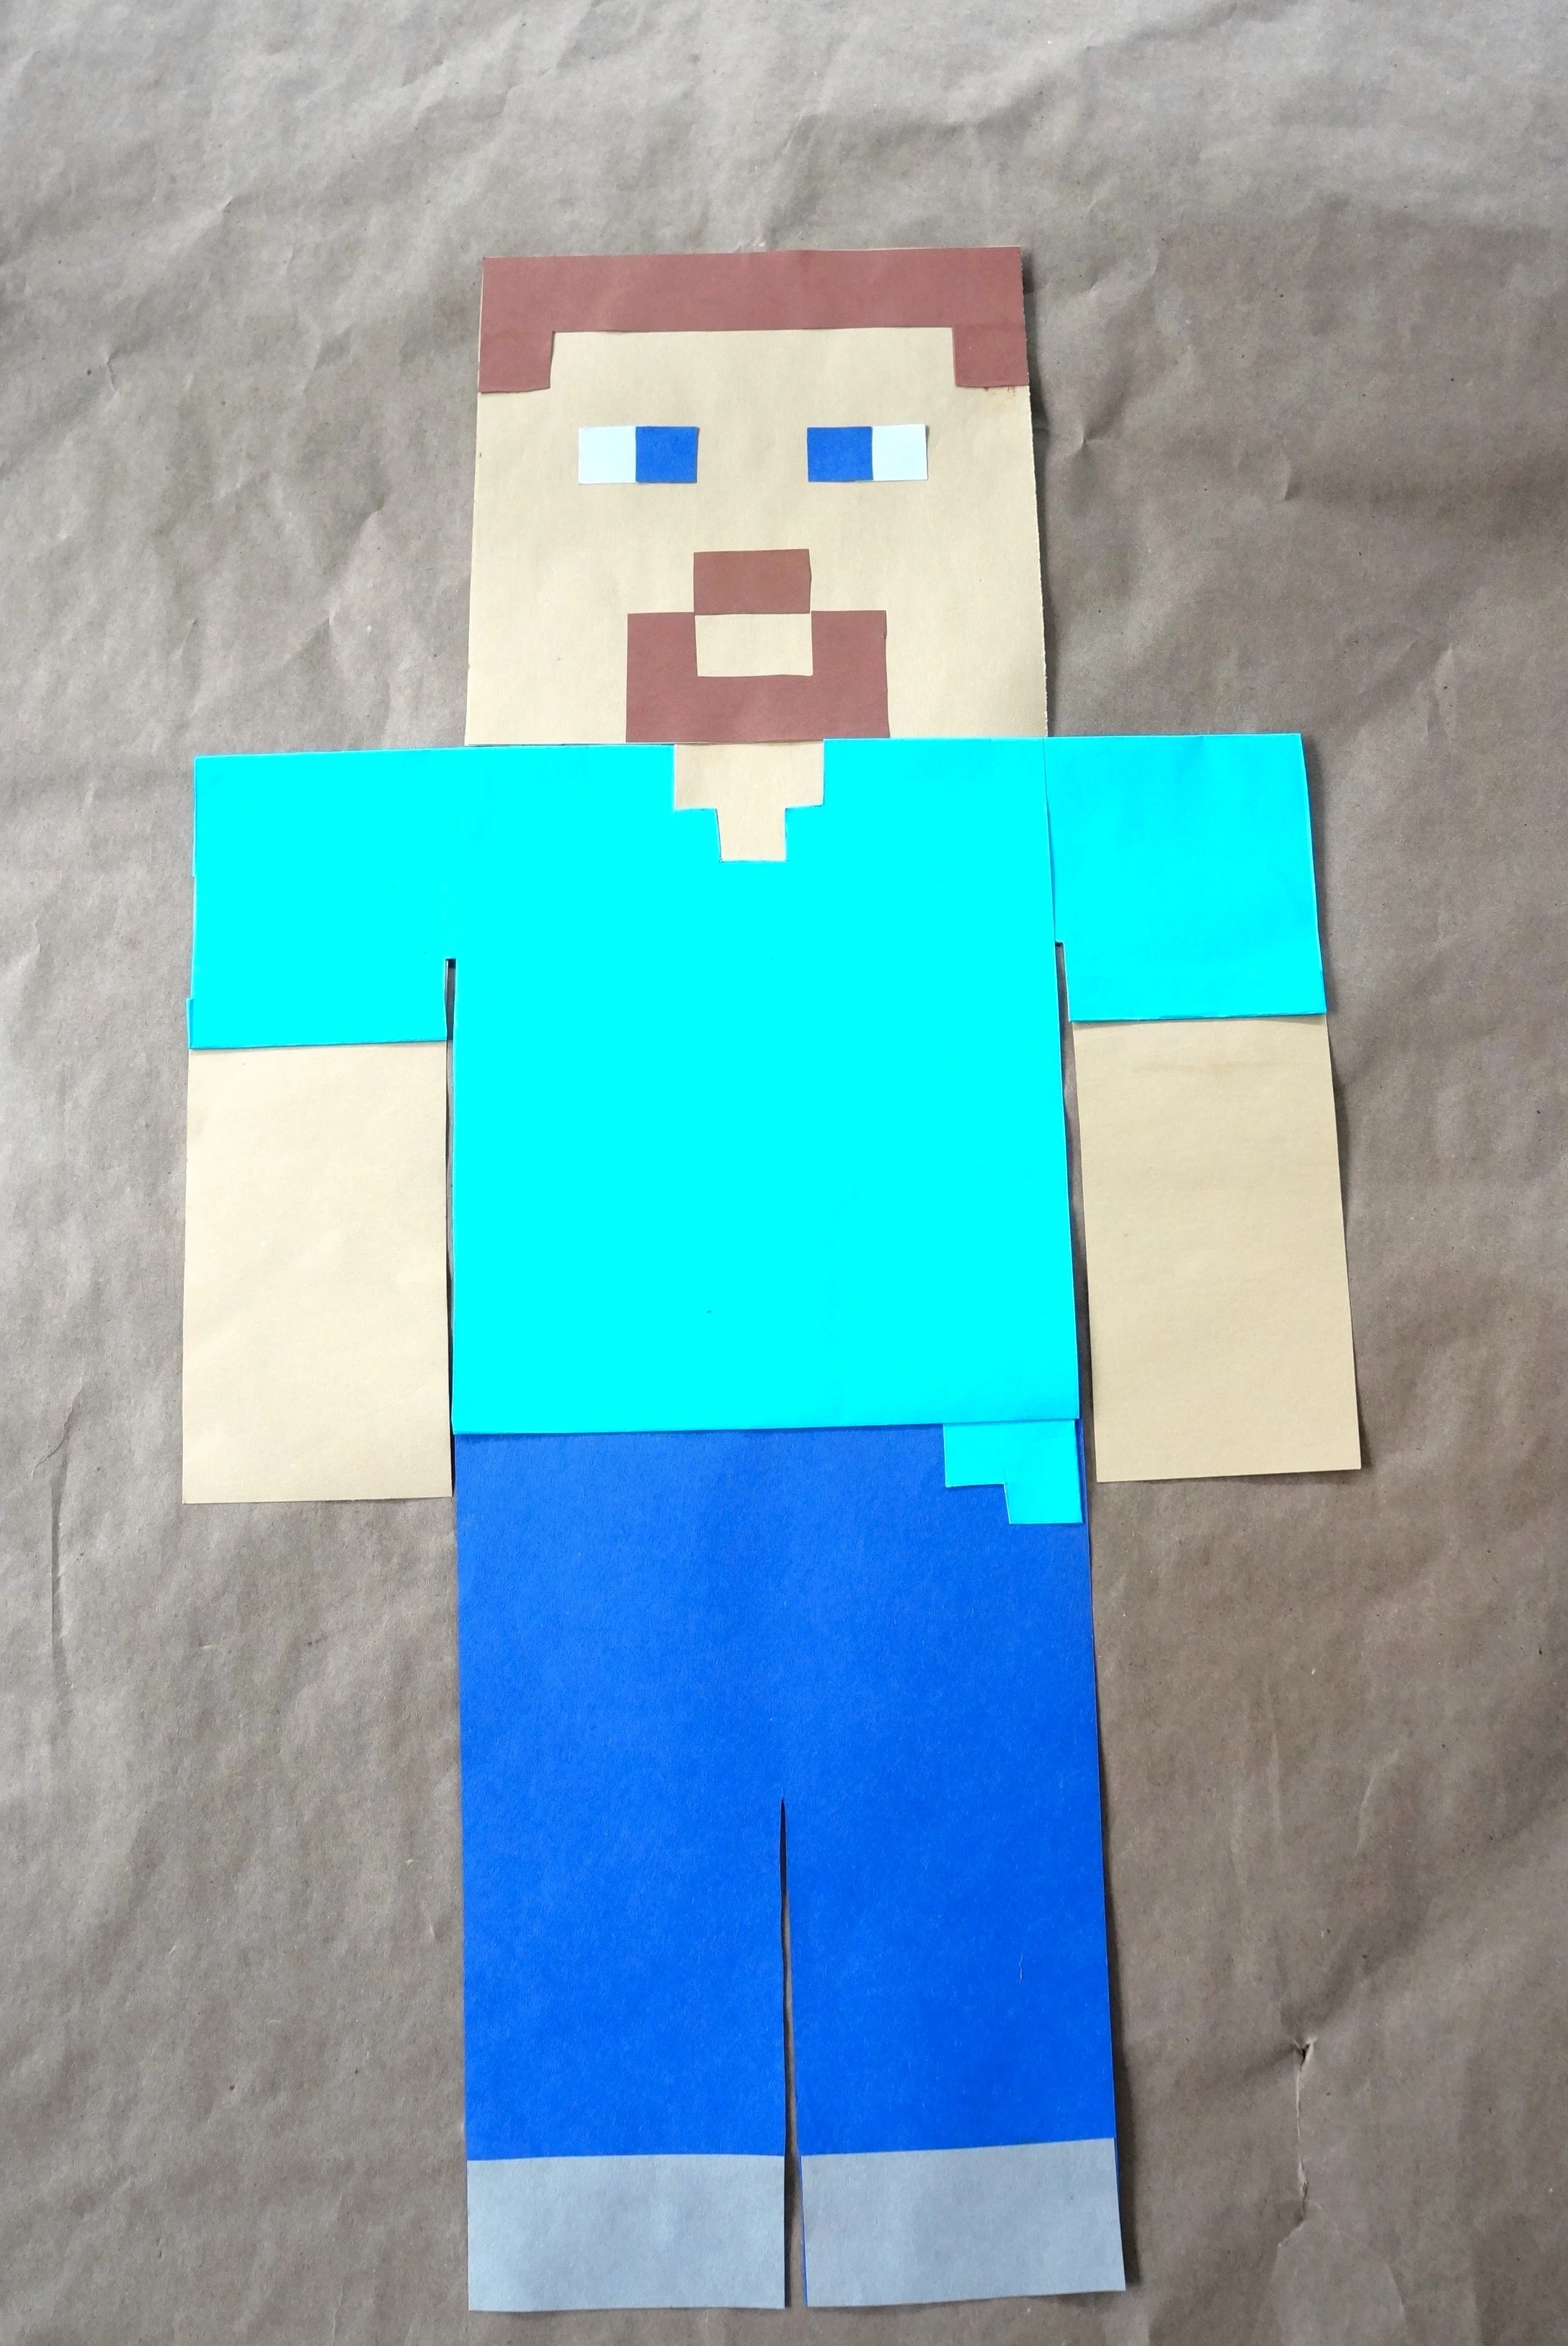
ASSEMBLE
Glue the face to the neck and the neck to the shirt.
Tuck the pants under the shirt a bit and glue them on.
Lastly, flip over Steve, fold the white scrap paper, then glue it to the back of the neck and pants(not shown) to secure it.
That’s it!
Happy crafting,
Amanda and Naomi
To share: take a photo of your craft and let us see it! Click Photo Submission, then submit the photo.


