
Hi friends,
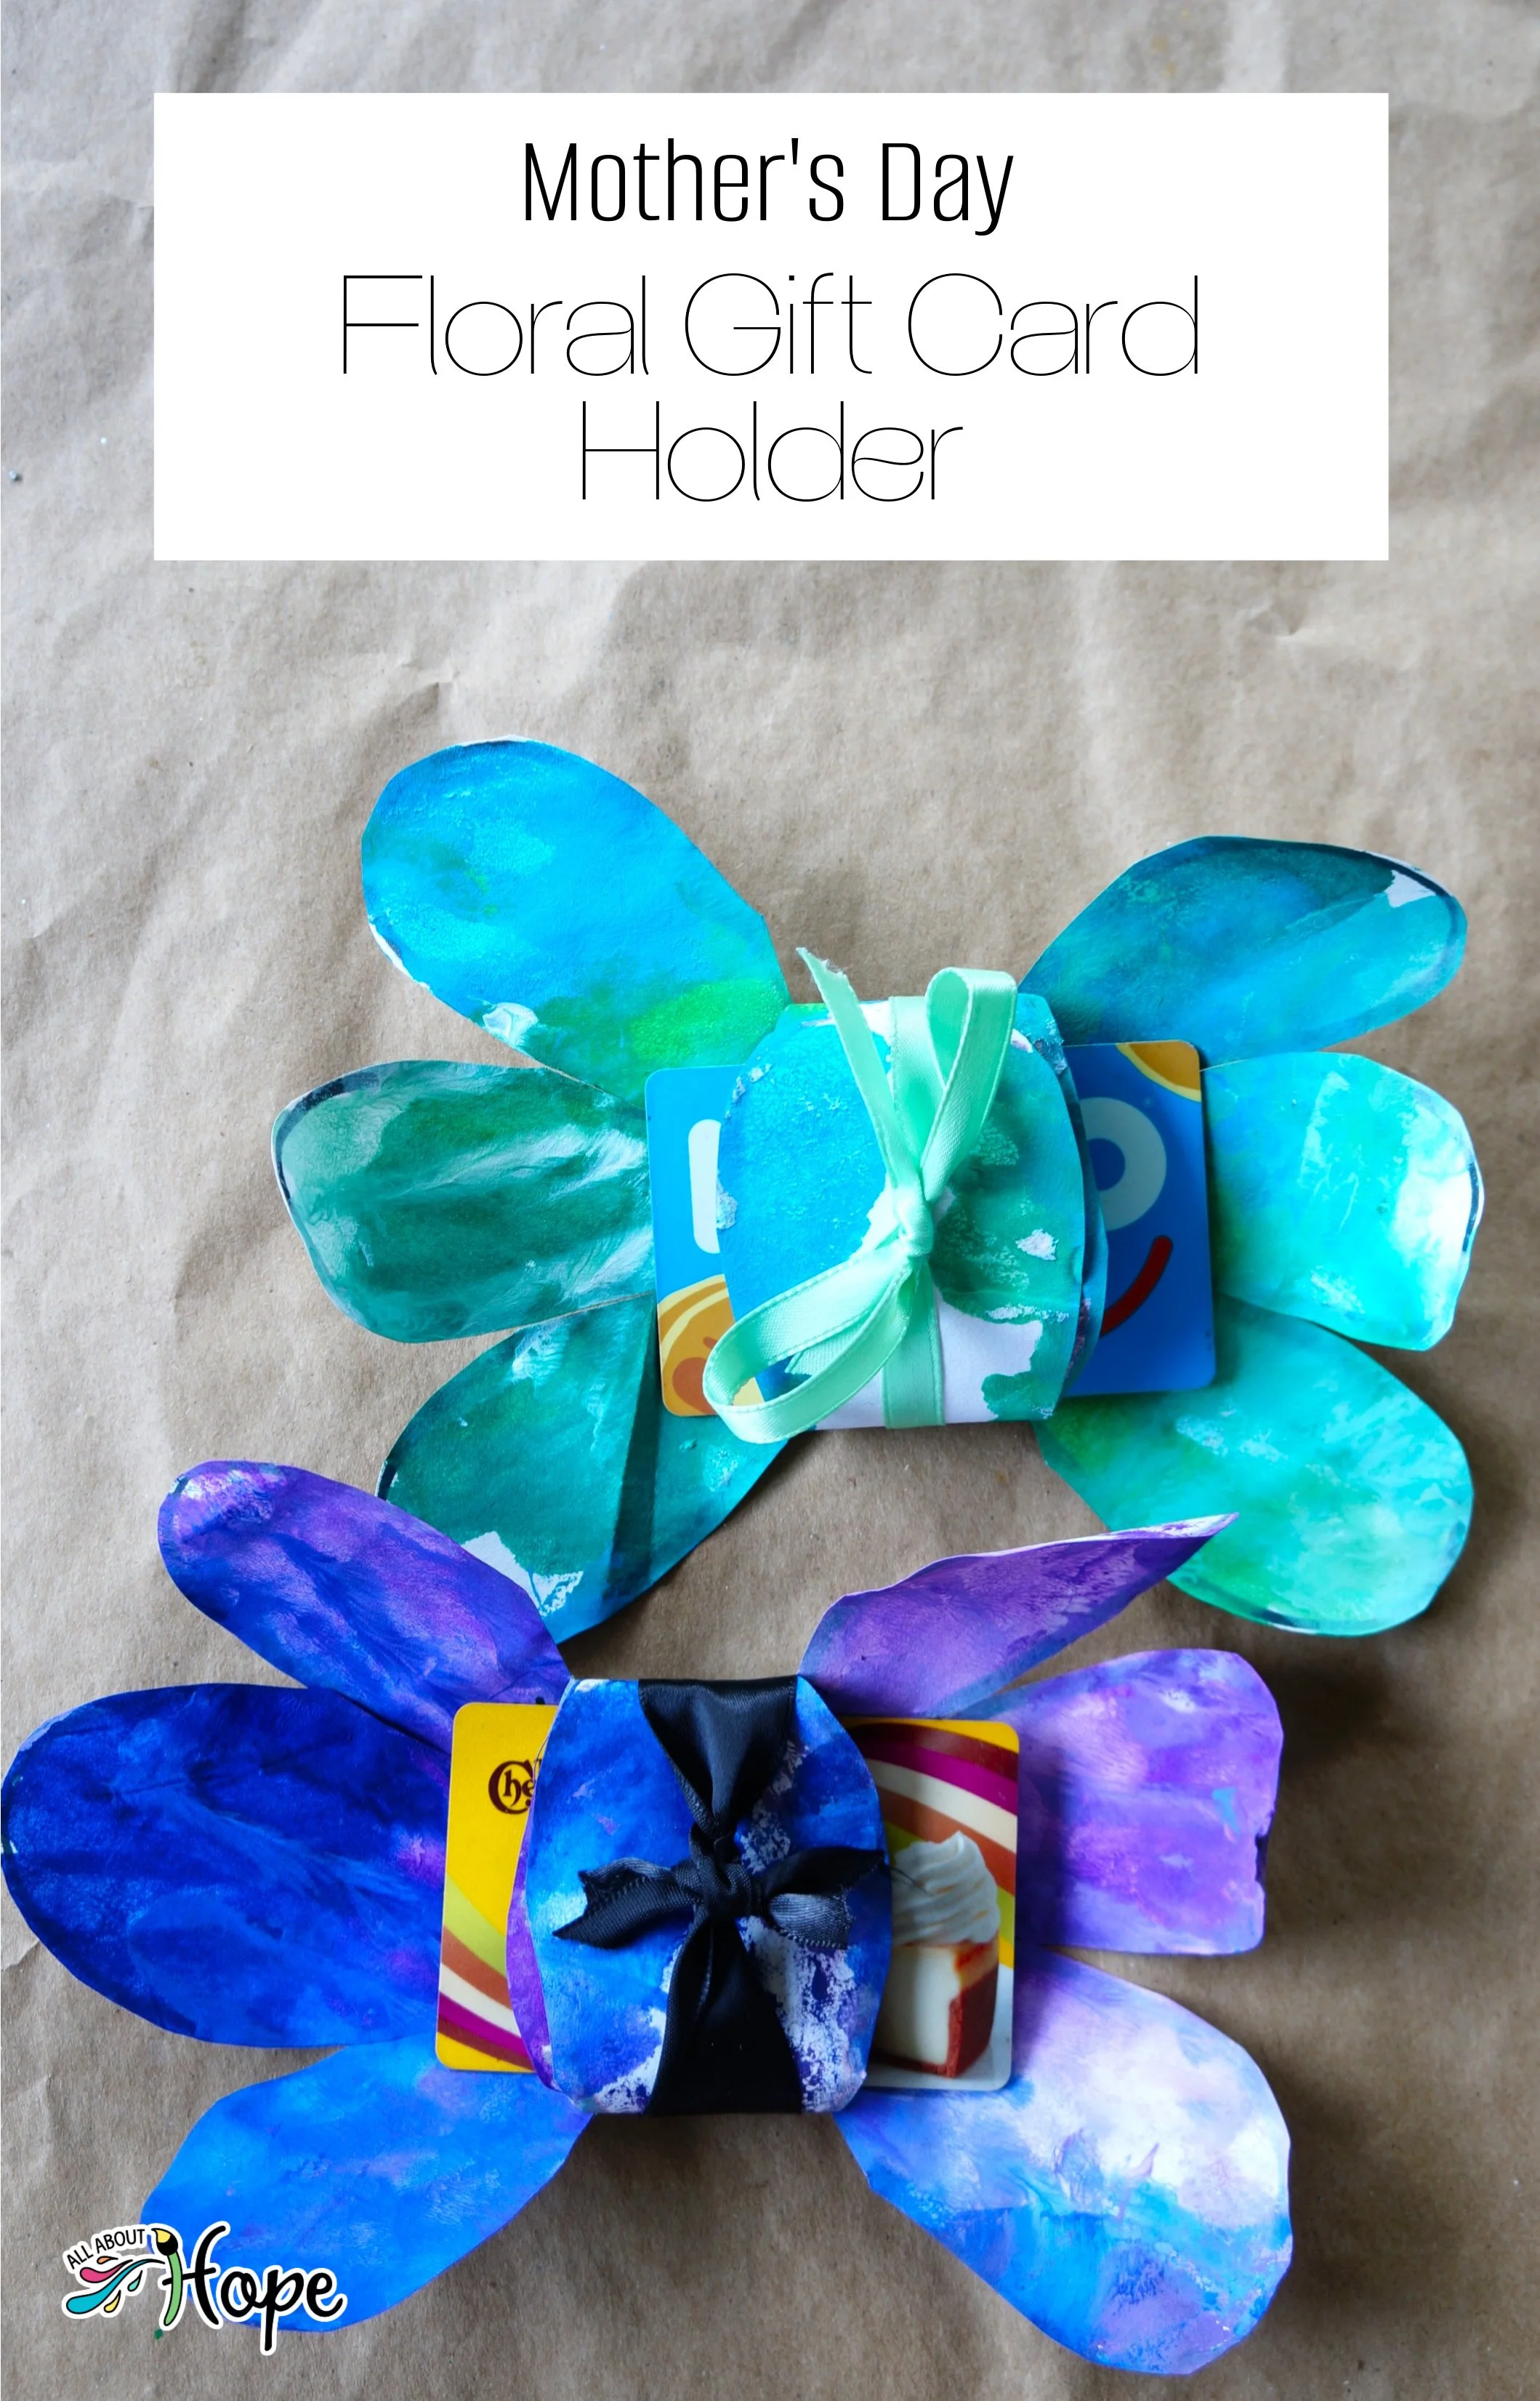
Give the moms in your life their favorite gift card with our colorful Mother’s Day Floral Gift Card Holder.
Your kiddos can get creative with the color choices, resulting in unique designs. We chose colors that were similar to our gift cards and added a few others. Check out the floral holders below.
*Click on the photos for a closer look
What You'll Need
Watercolor Paper
Gallon-Size Plastic Bag
Craft Paints
Scissors
Black Marker
Gift Card
Ribbon
Removable Tape or Mounting Putty
Cookie Sheet
The Steps
We want to see your craft! Click PHOTO SUBMISSION, then submit the photo.
PREP
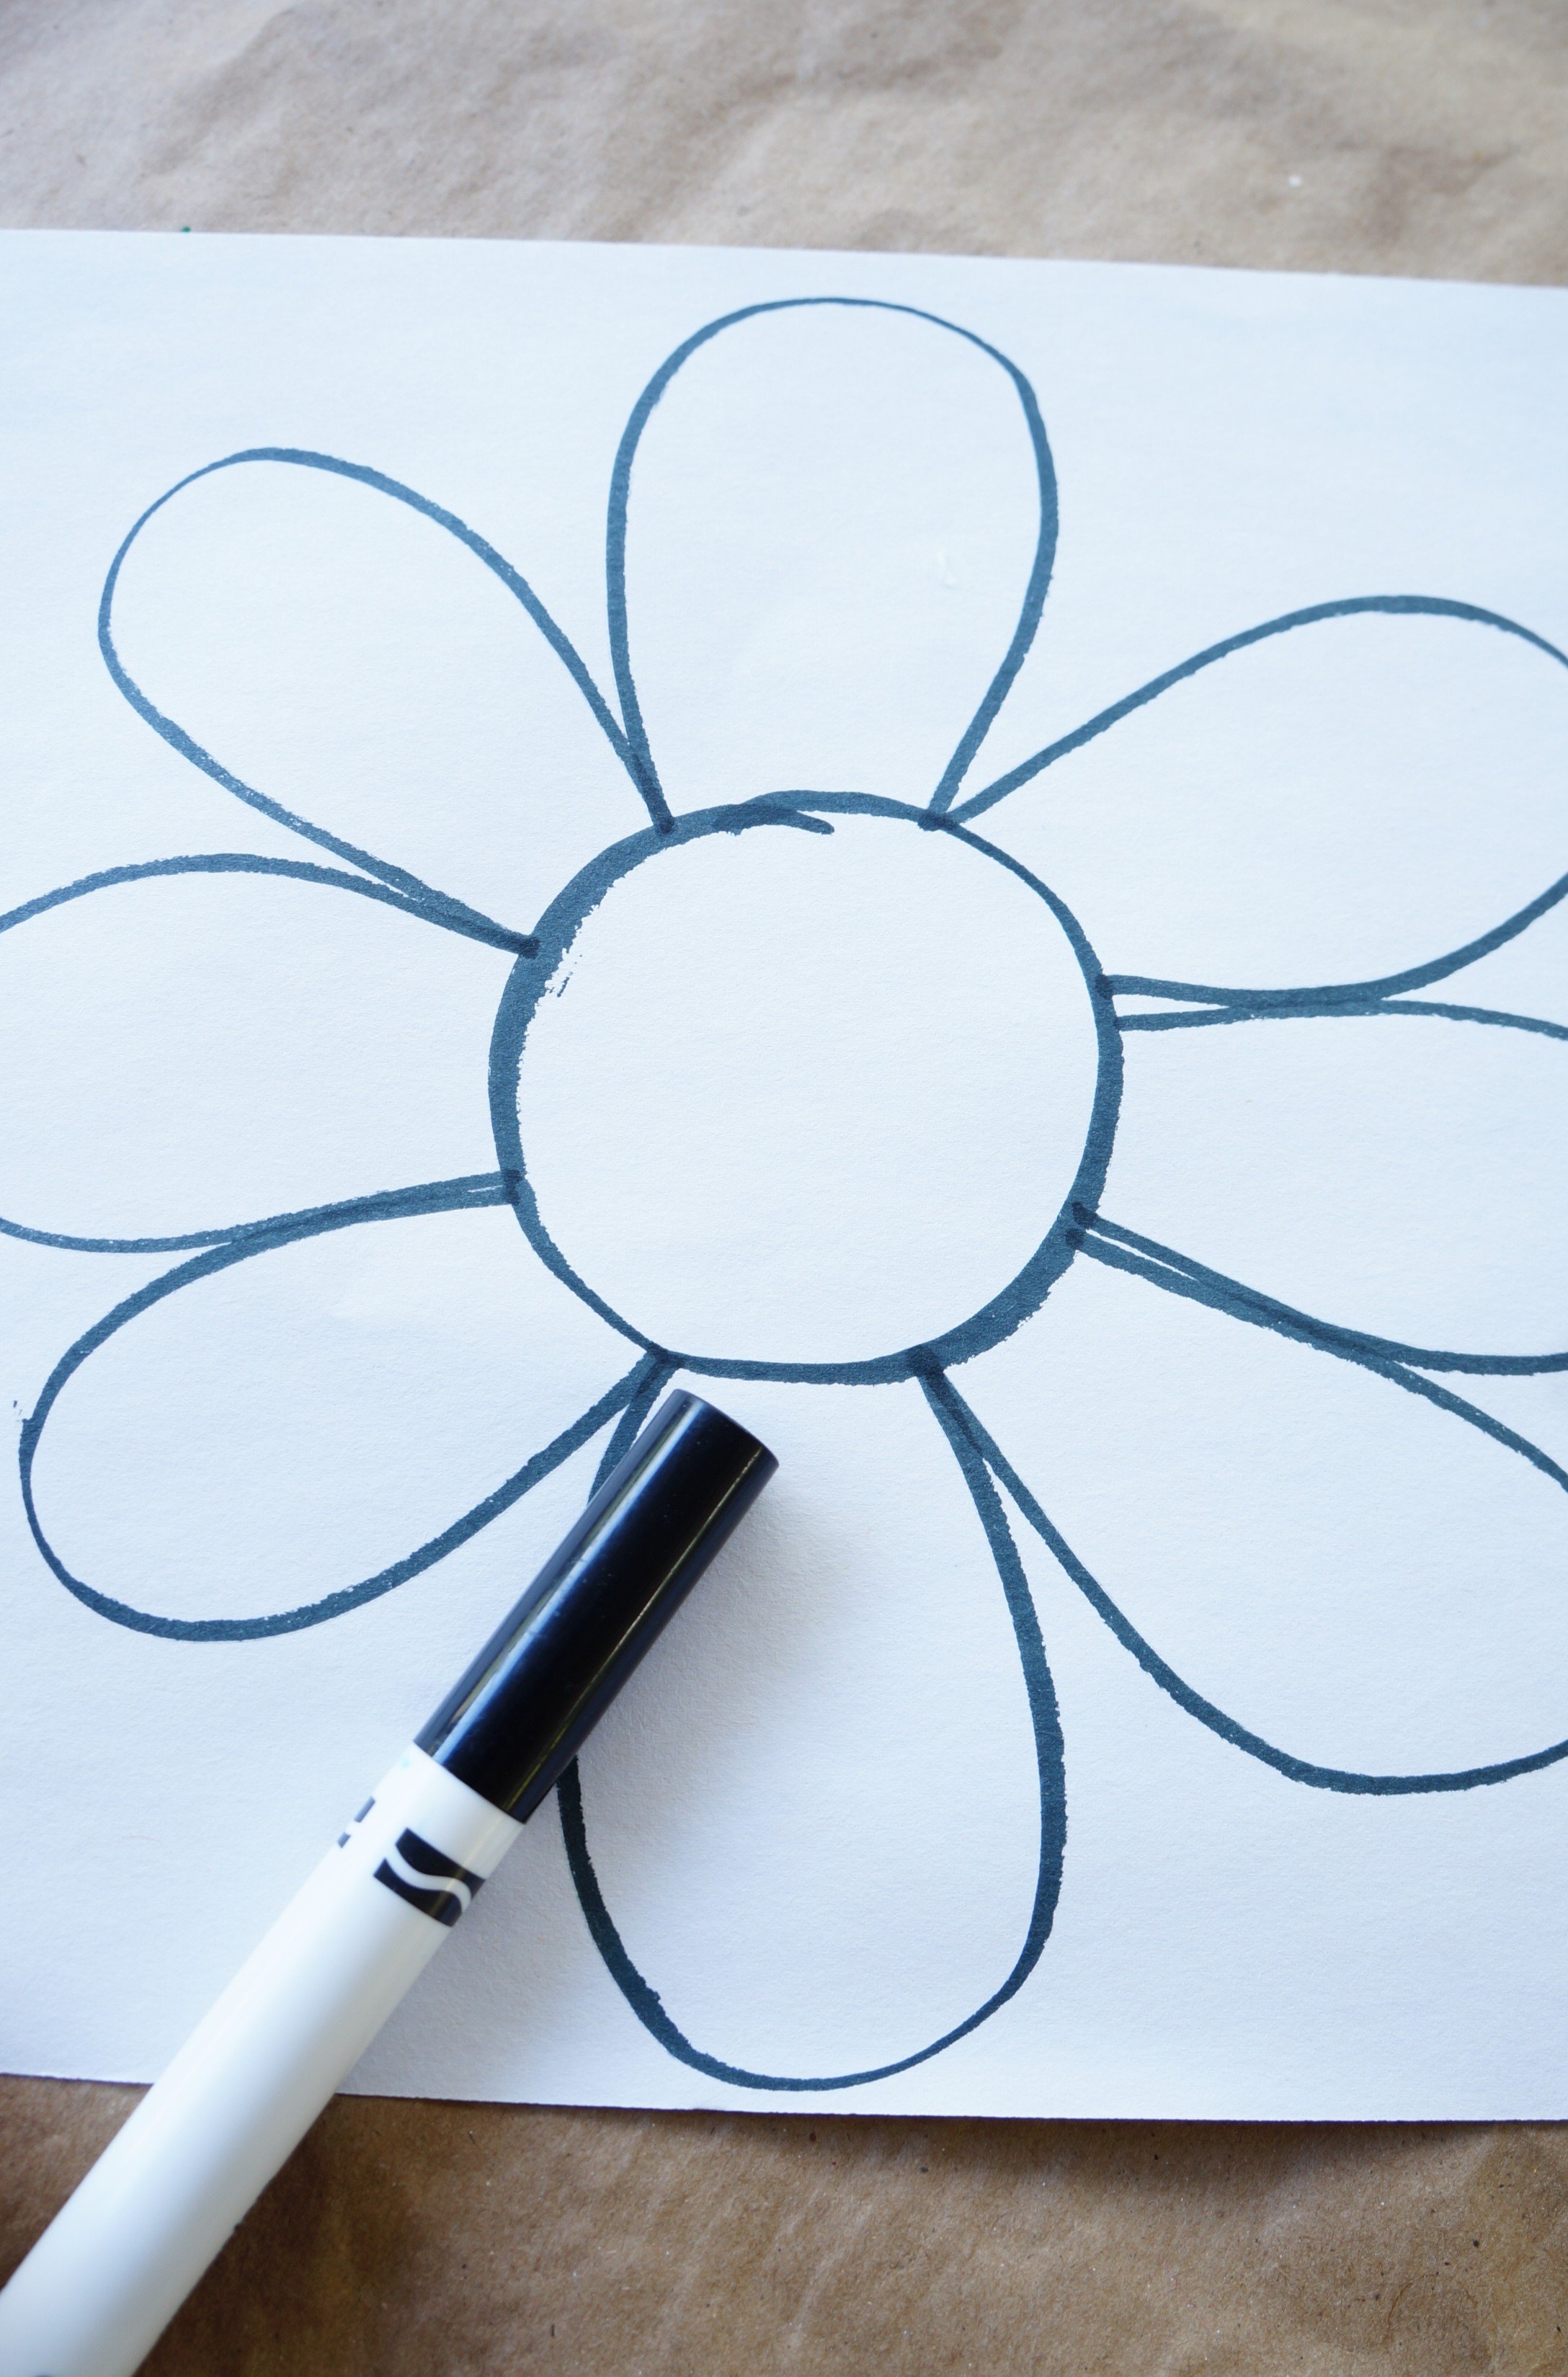
Turn your *paper horizontally. With the marker, draw a 3-inch circle, two longer petals opposite each other, and three more petals on each side.
Cut out your flower, making sure to cut between each petal and to the center circle.
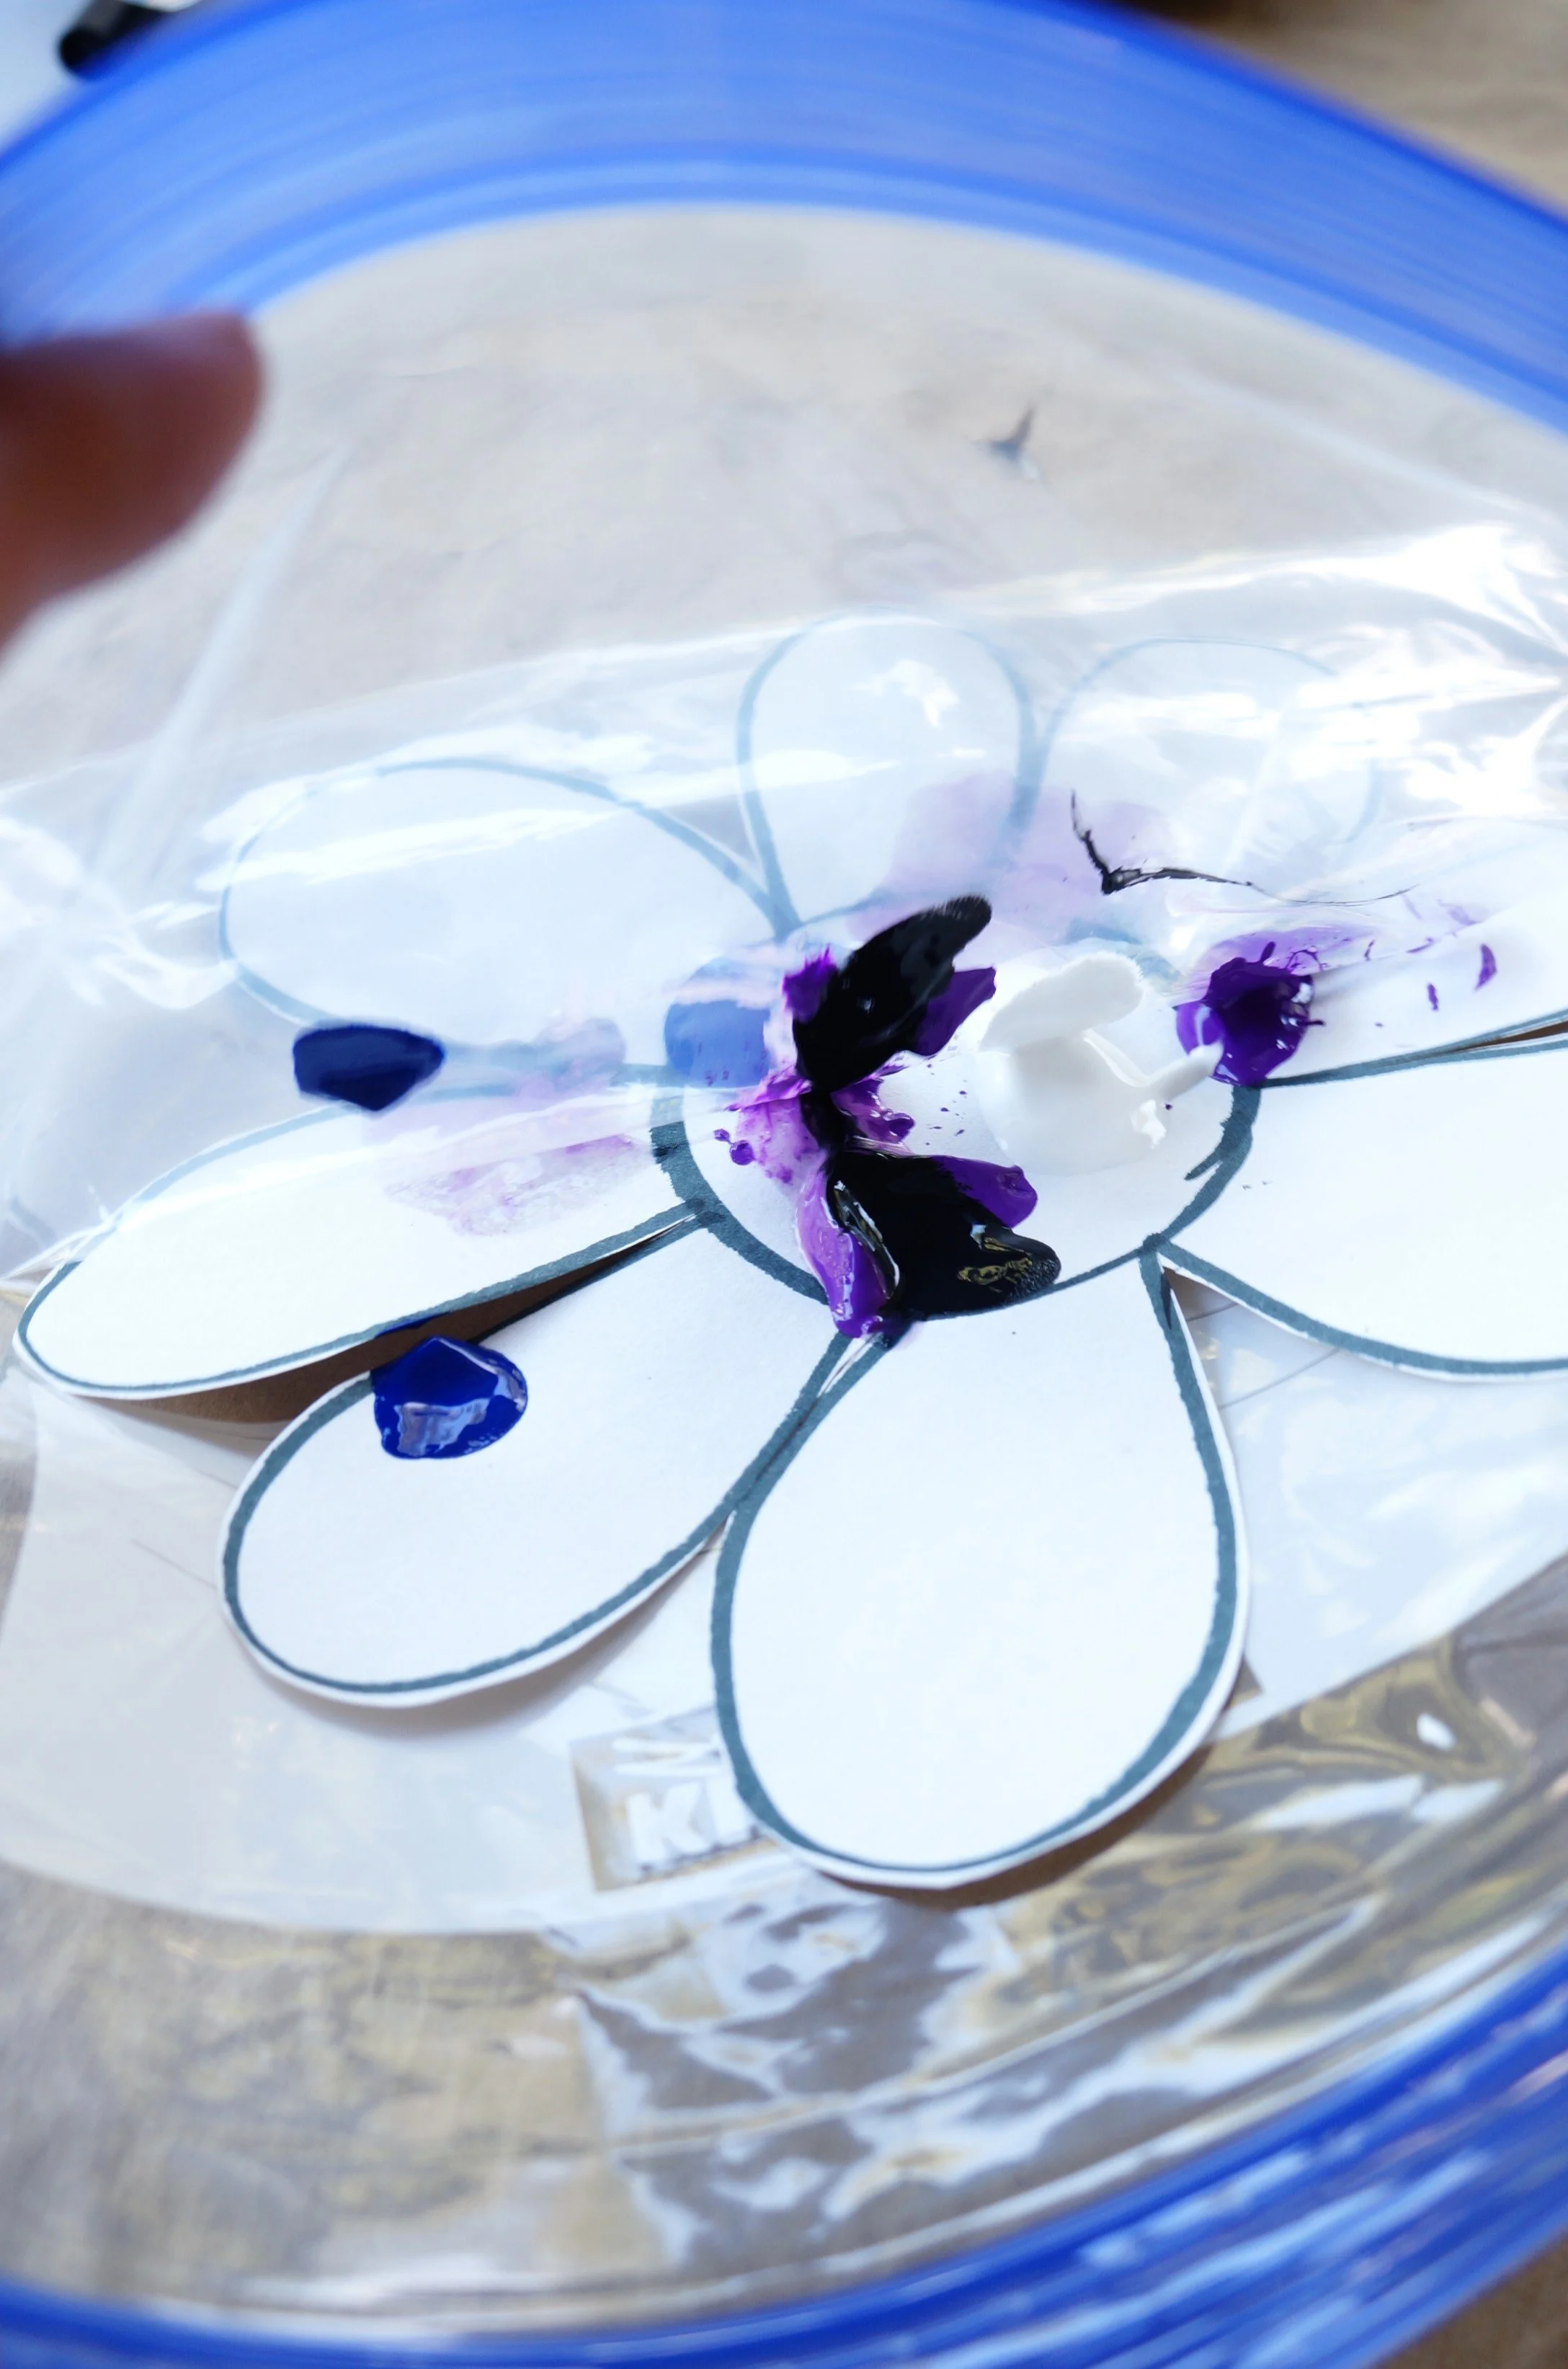
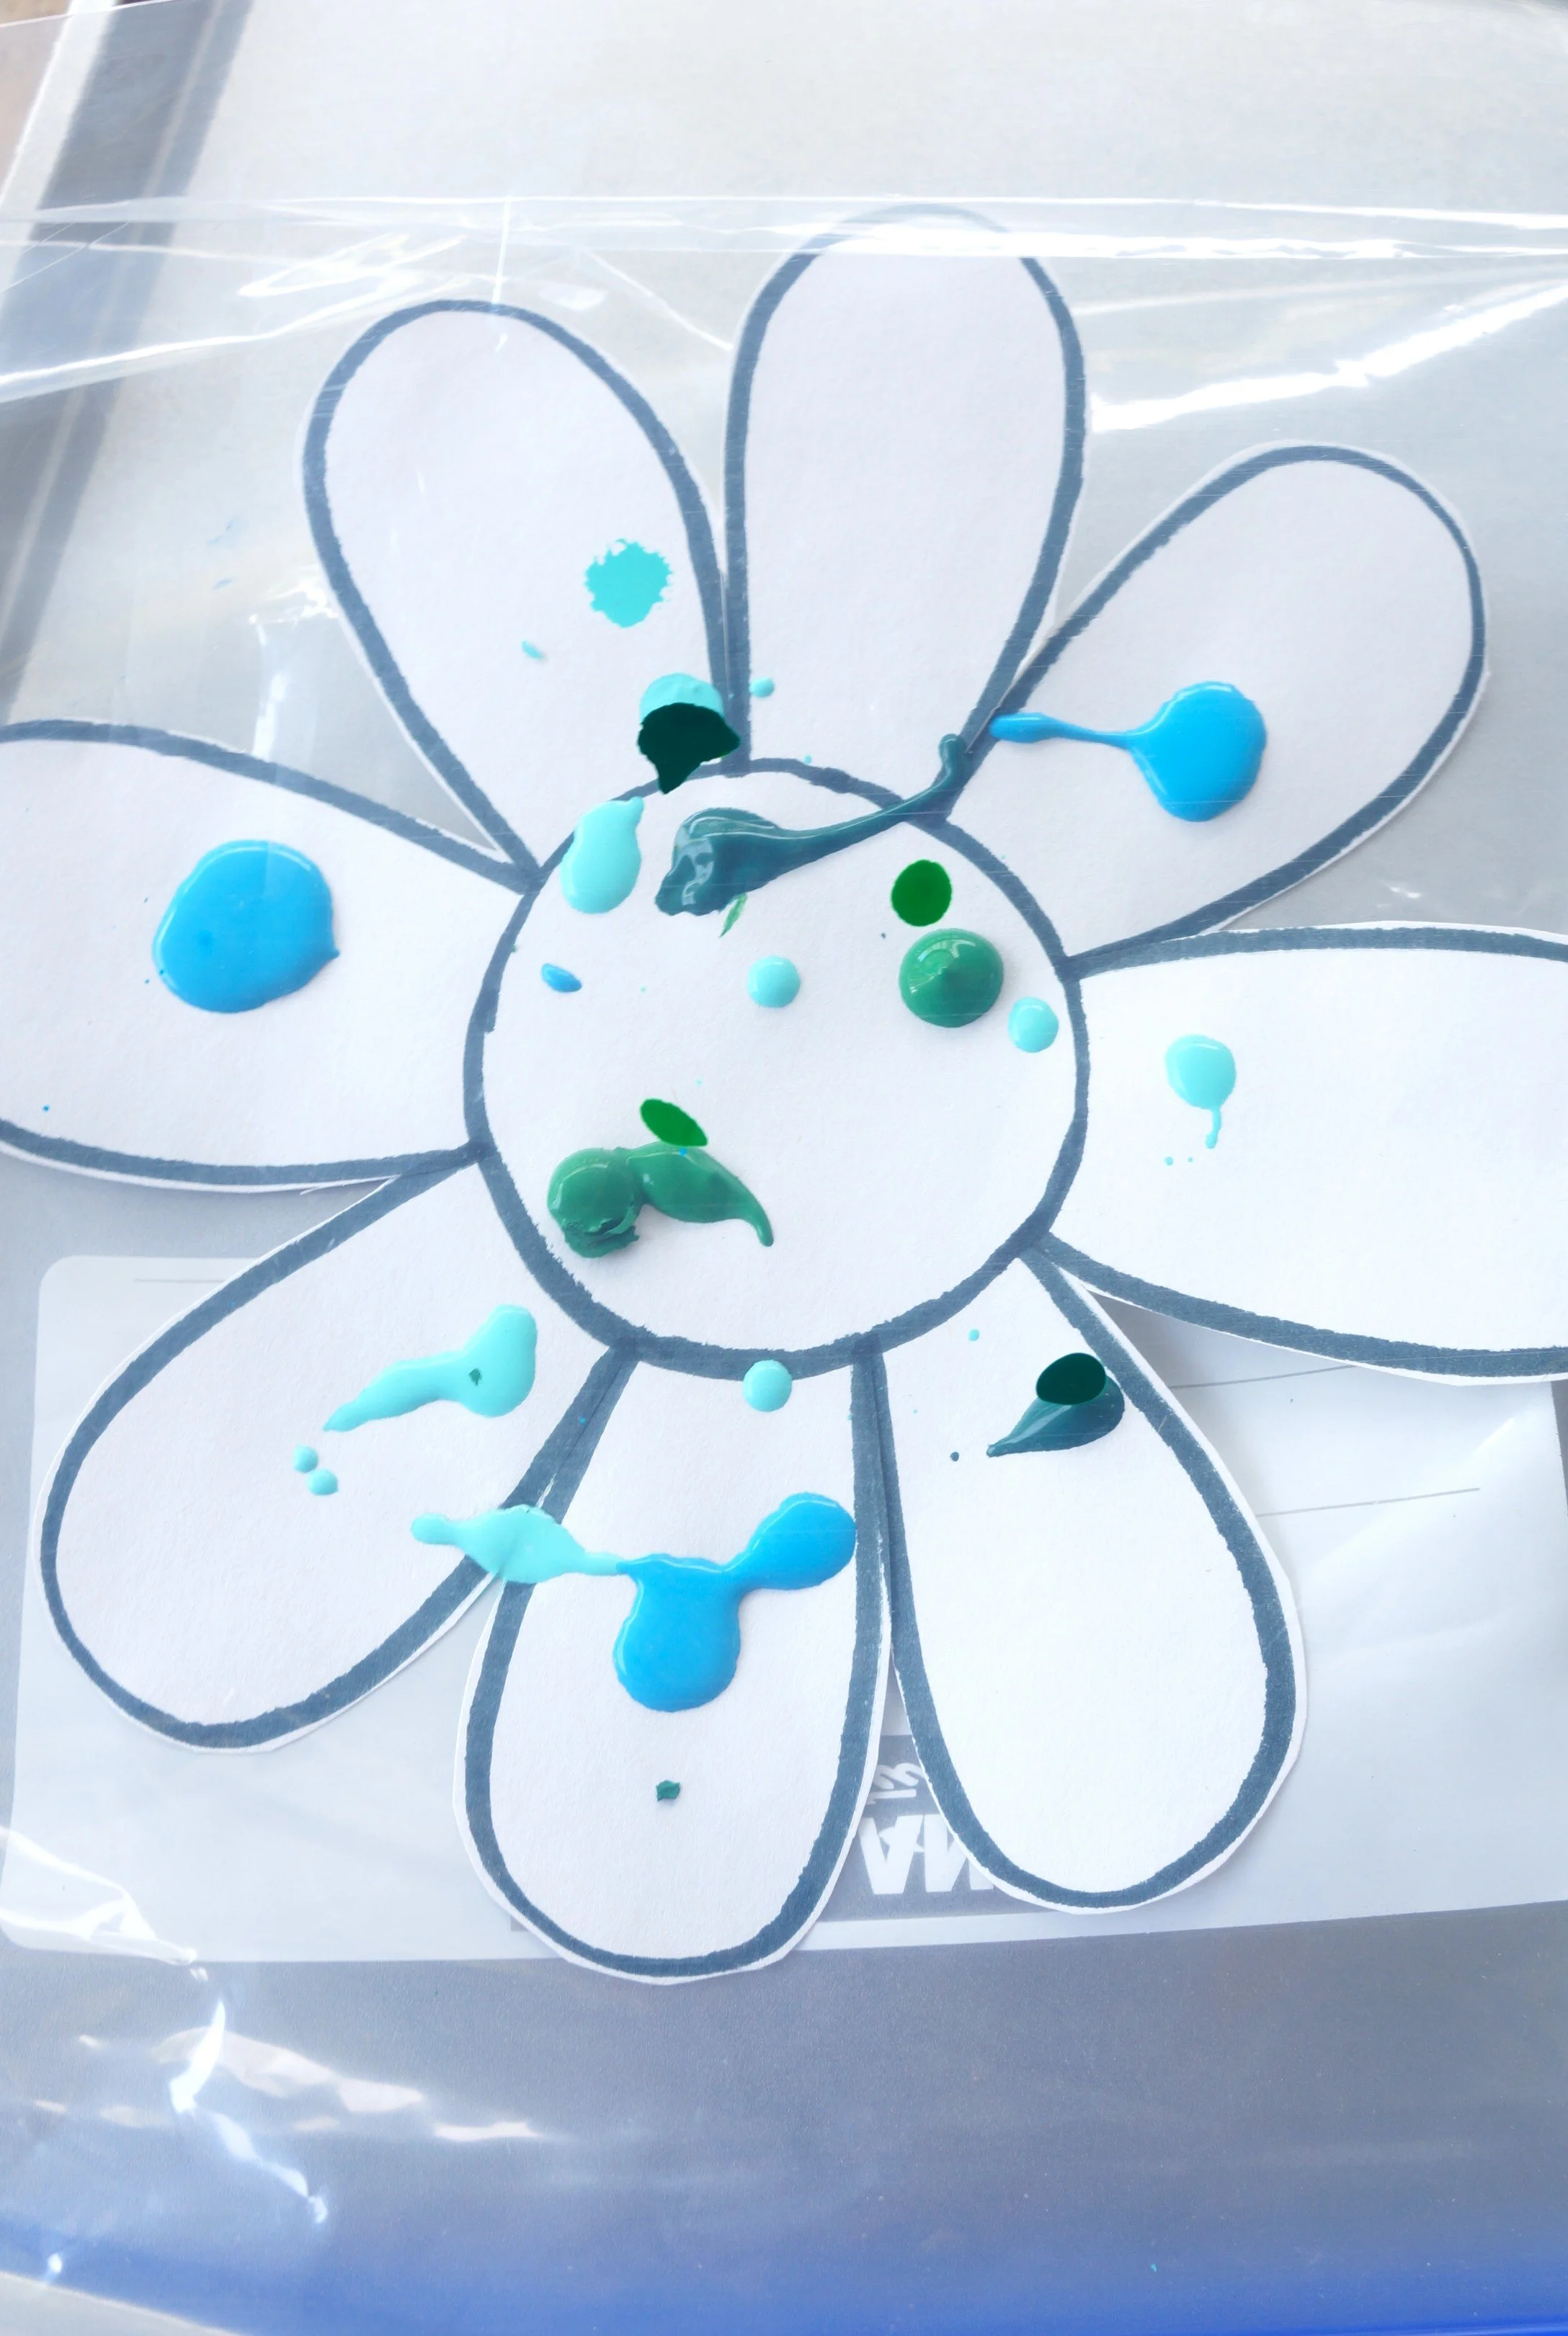
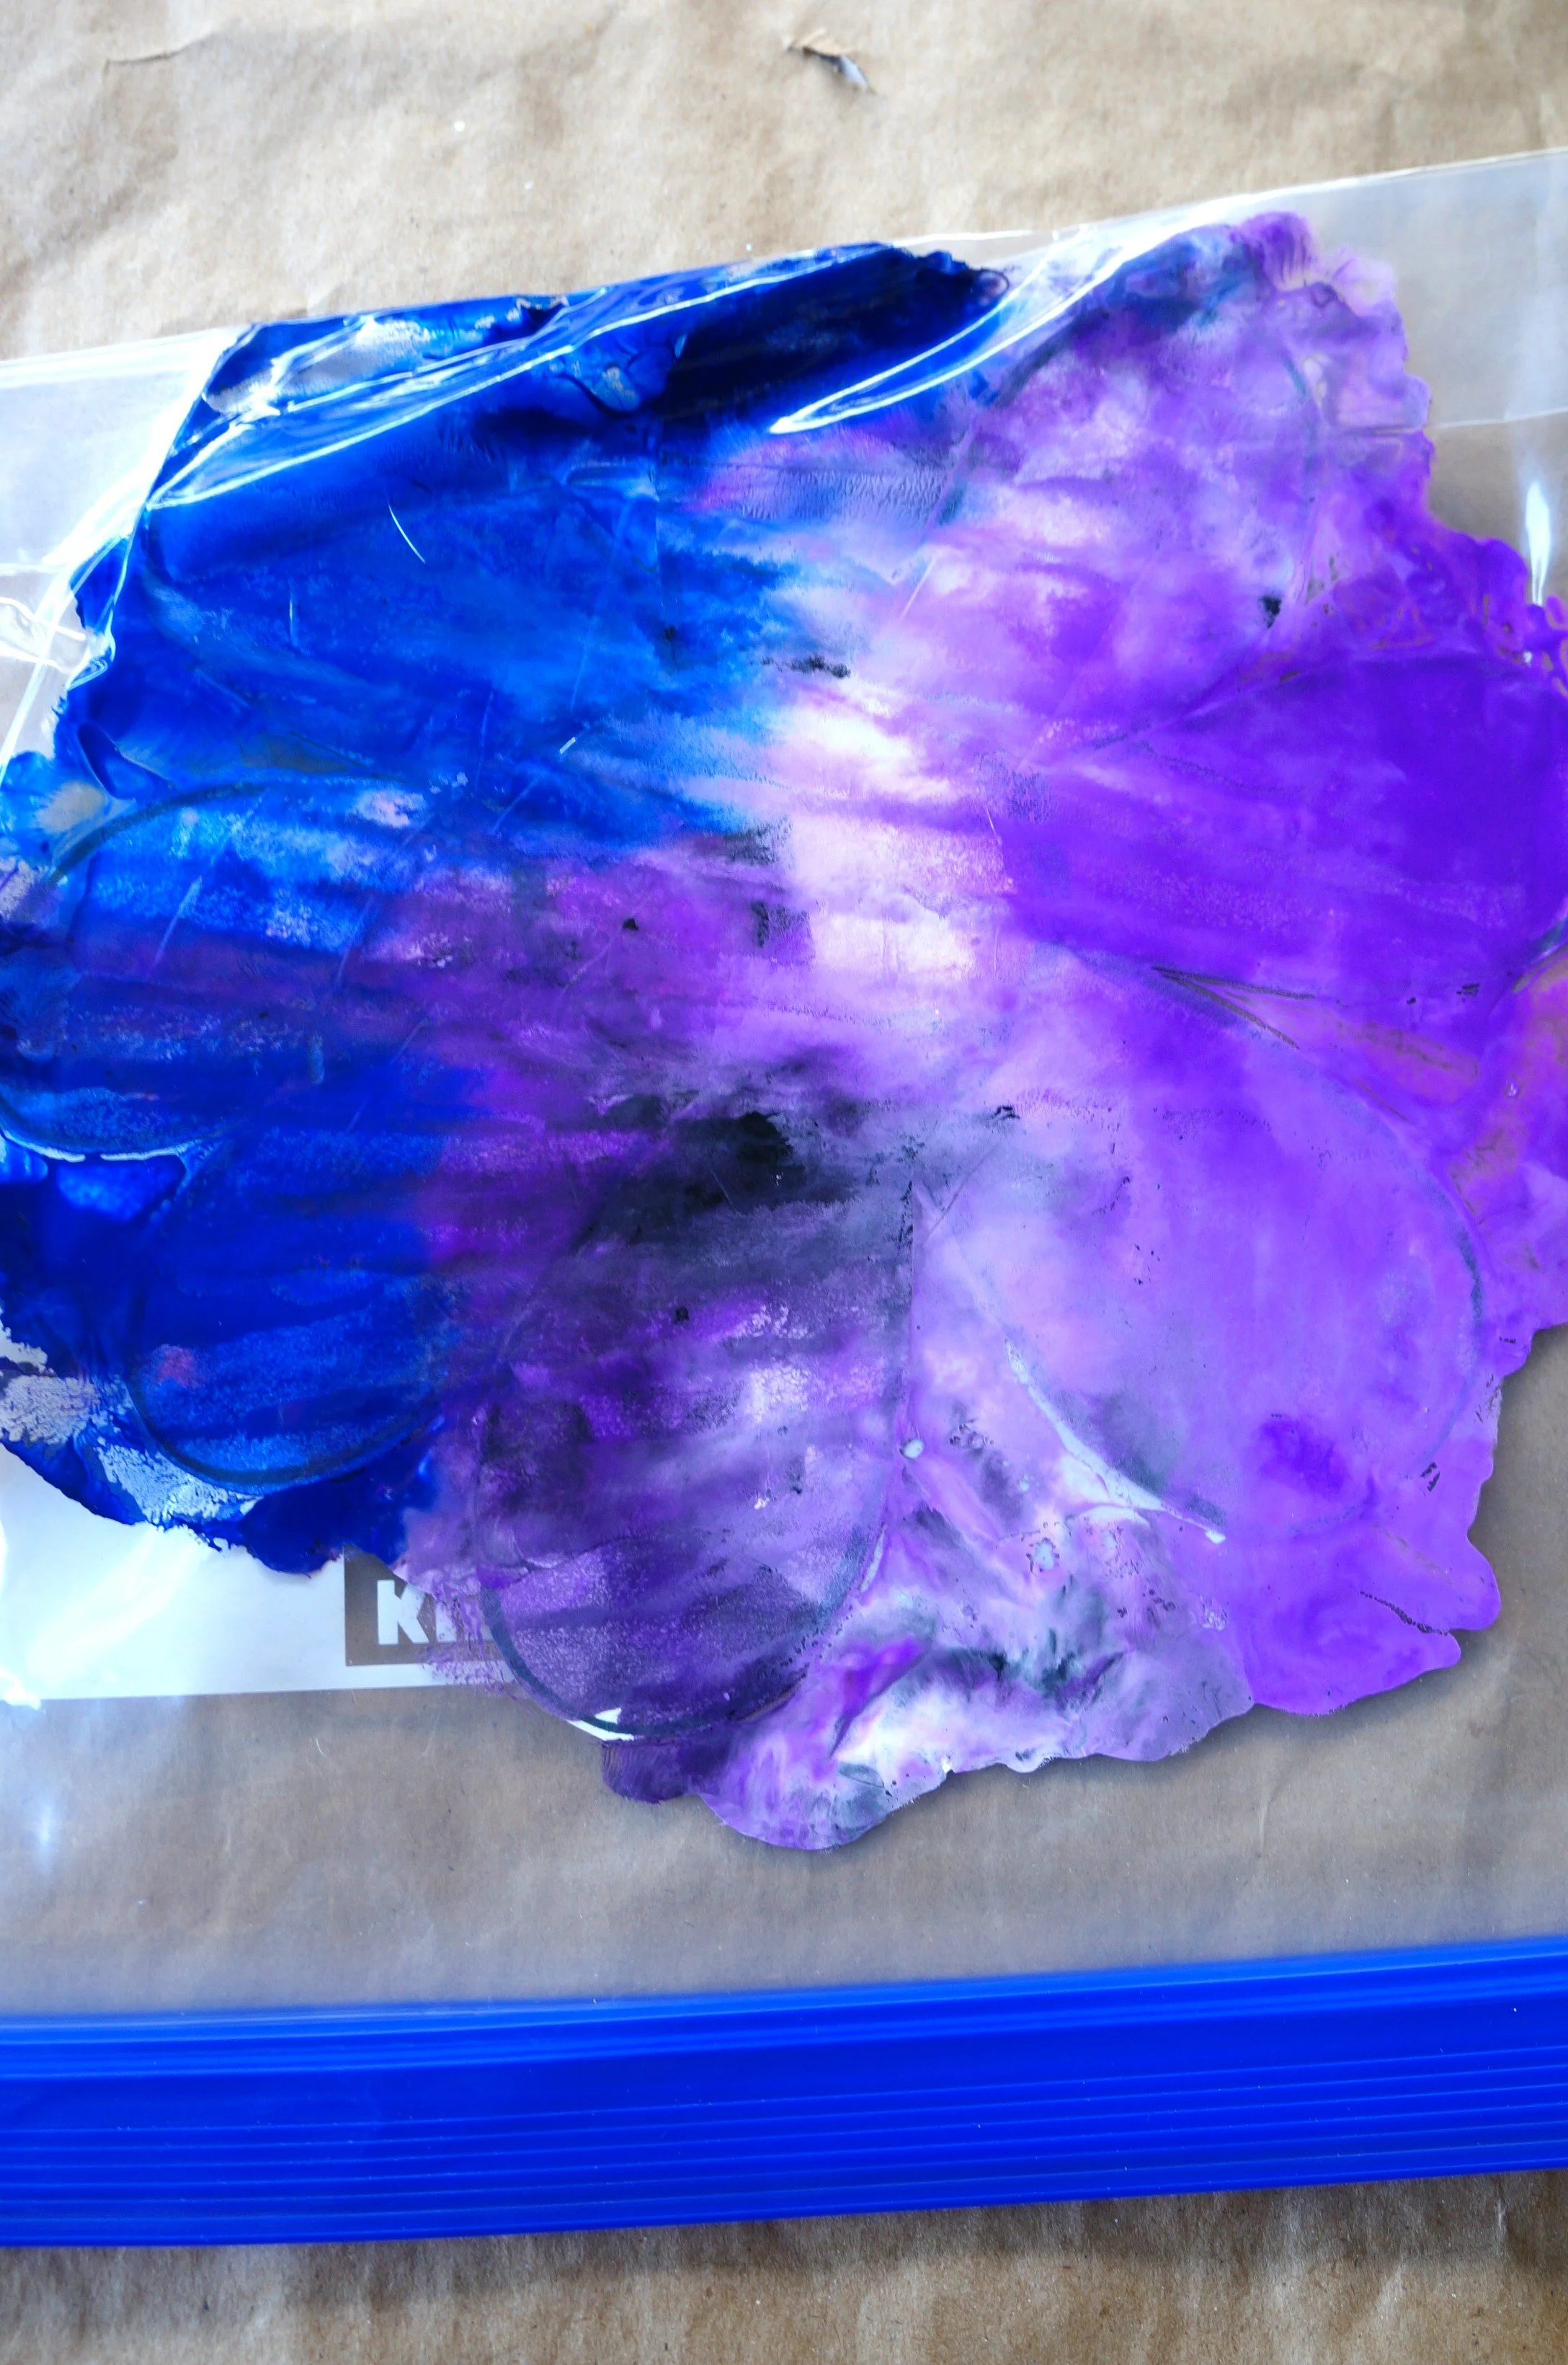
Place the flower inside the bag and squirt different paints over the flower.
*Construction paper works, but it is more delicate and prone to tearing. IF using construction paper, use a little less paint, spread thoroughly, working quickly, before moving on to the next steps.

PAINT PRESSING
Lay the bag down on a flat surface and spread the paint with your fingers over the bag. If more paint is necessary, add a bit more.
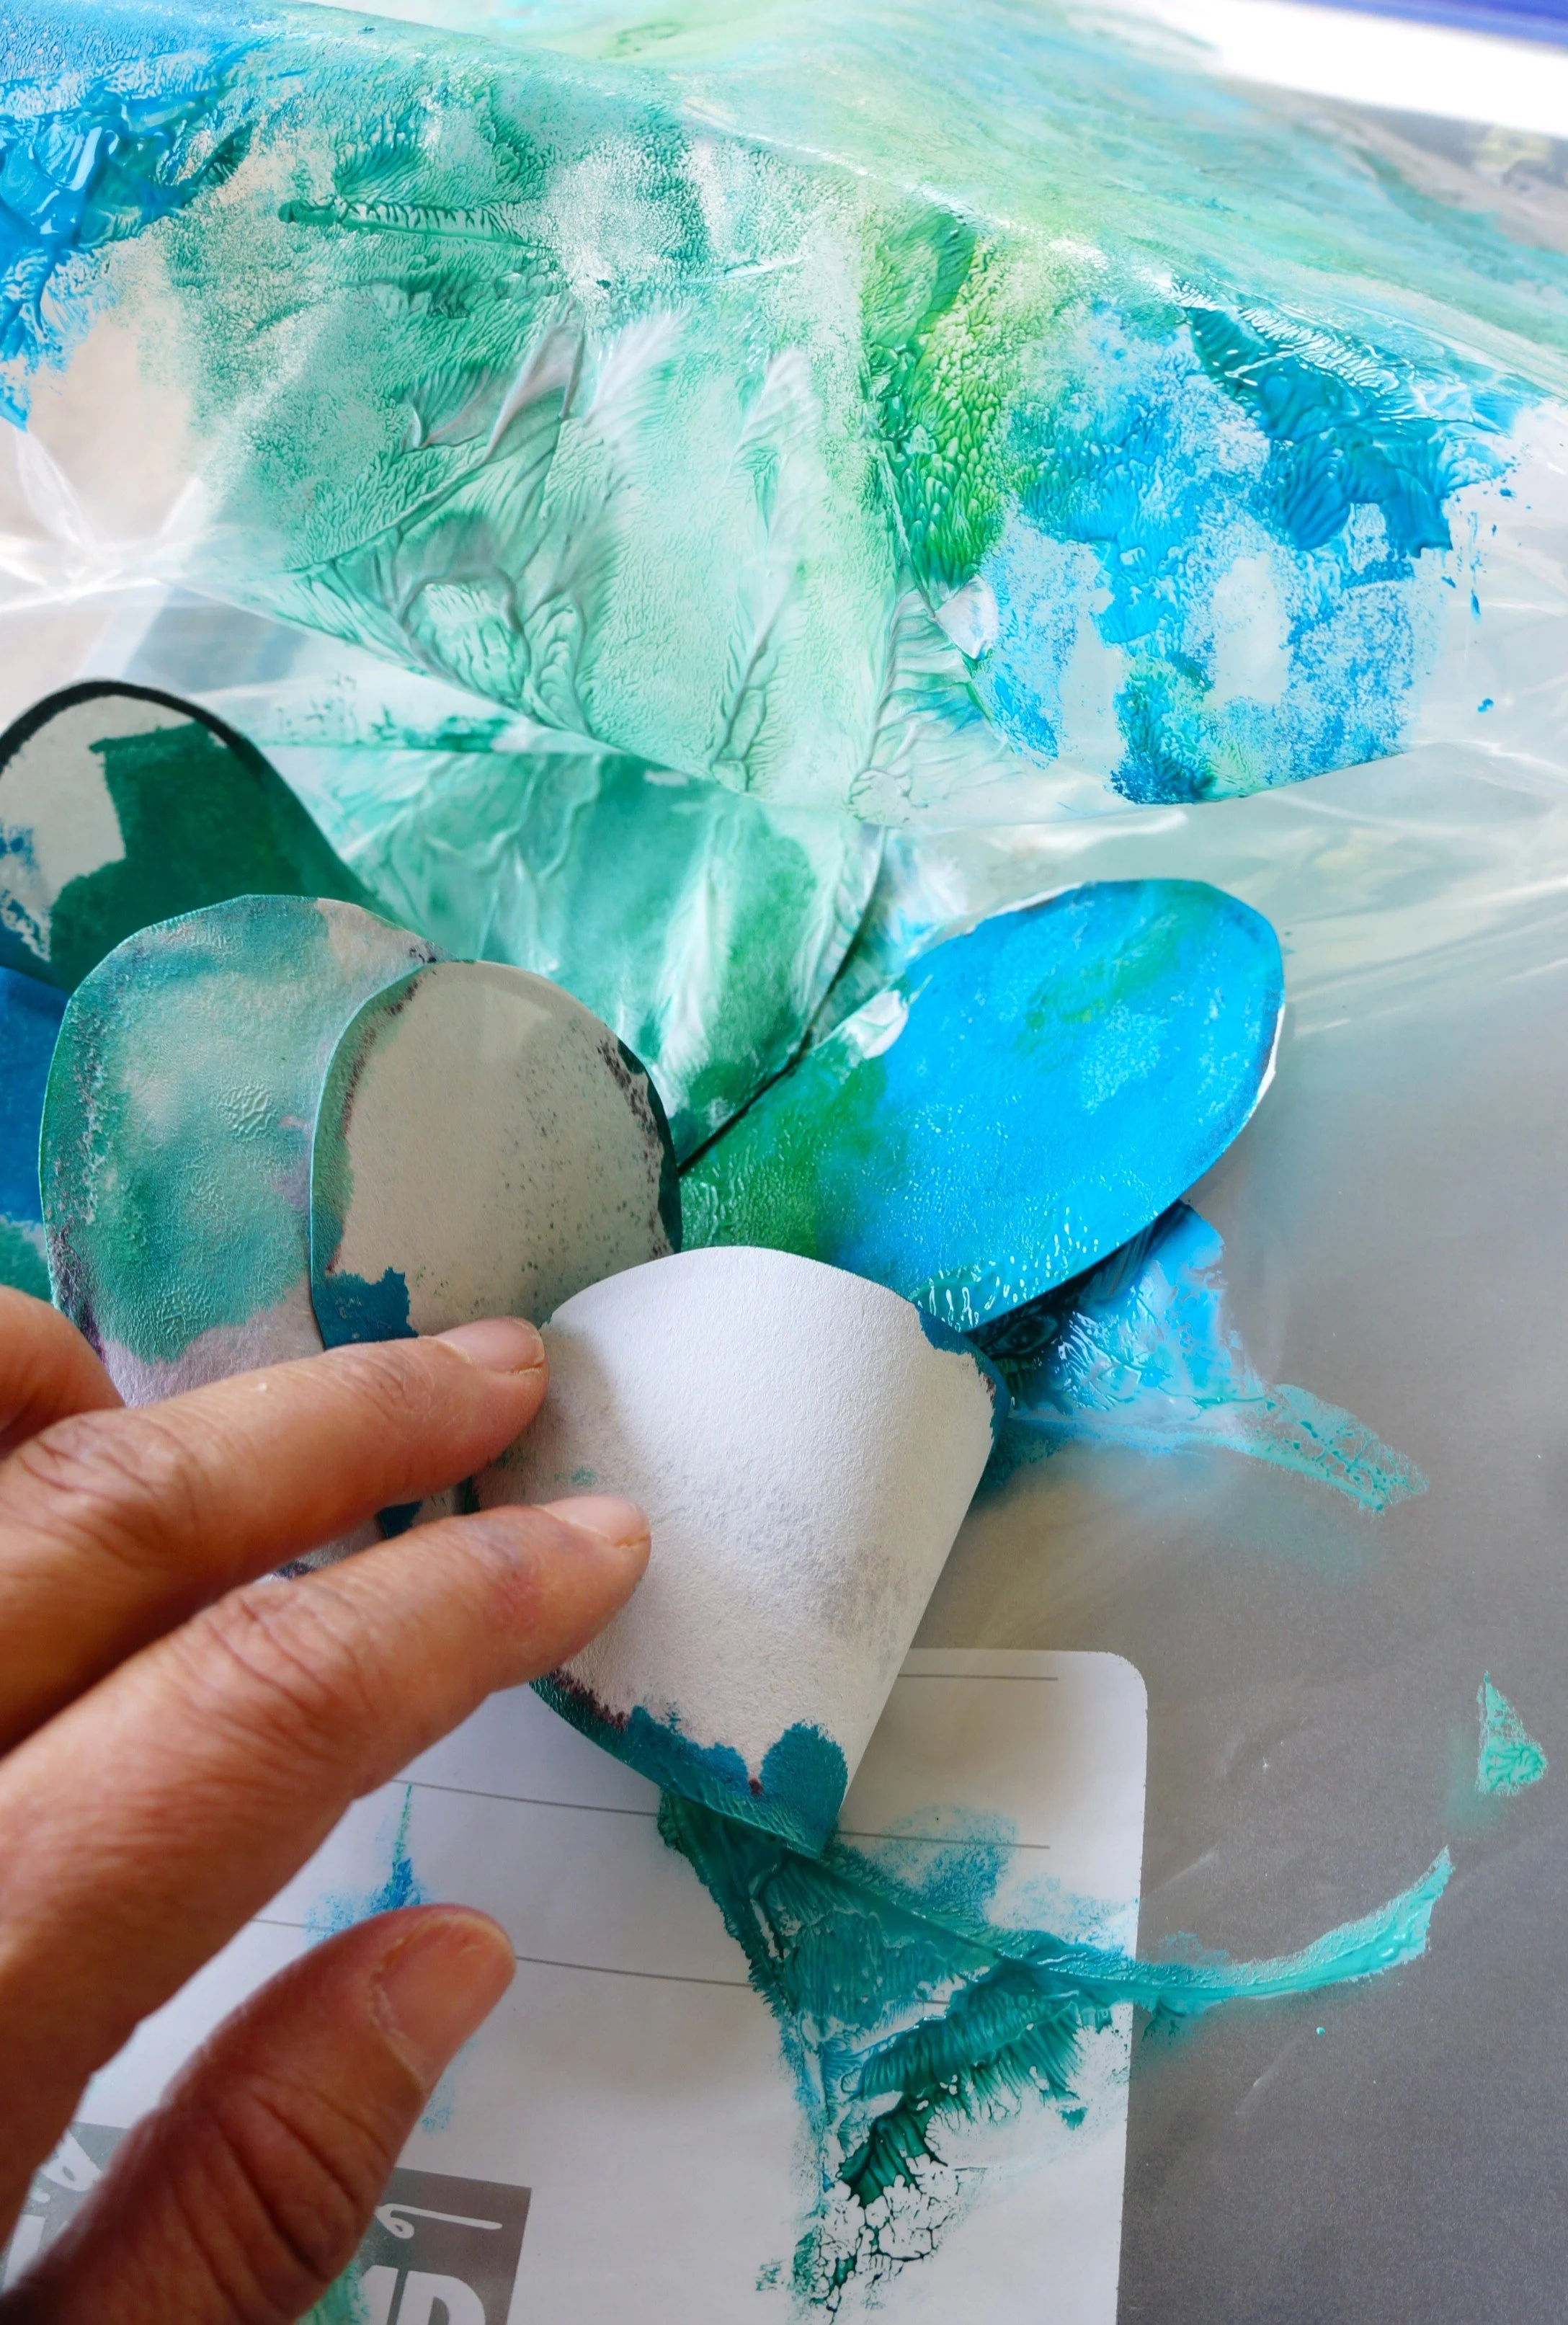
Cut the sides of the bag, slowly flip over the top layer of the bag, making sure not to tear the petals, and carefully pull up each petal from the paint.
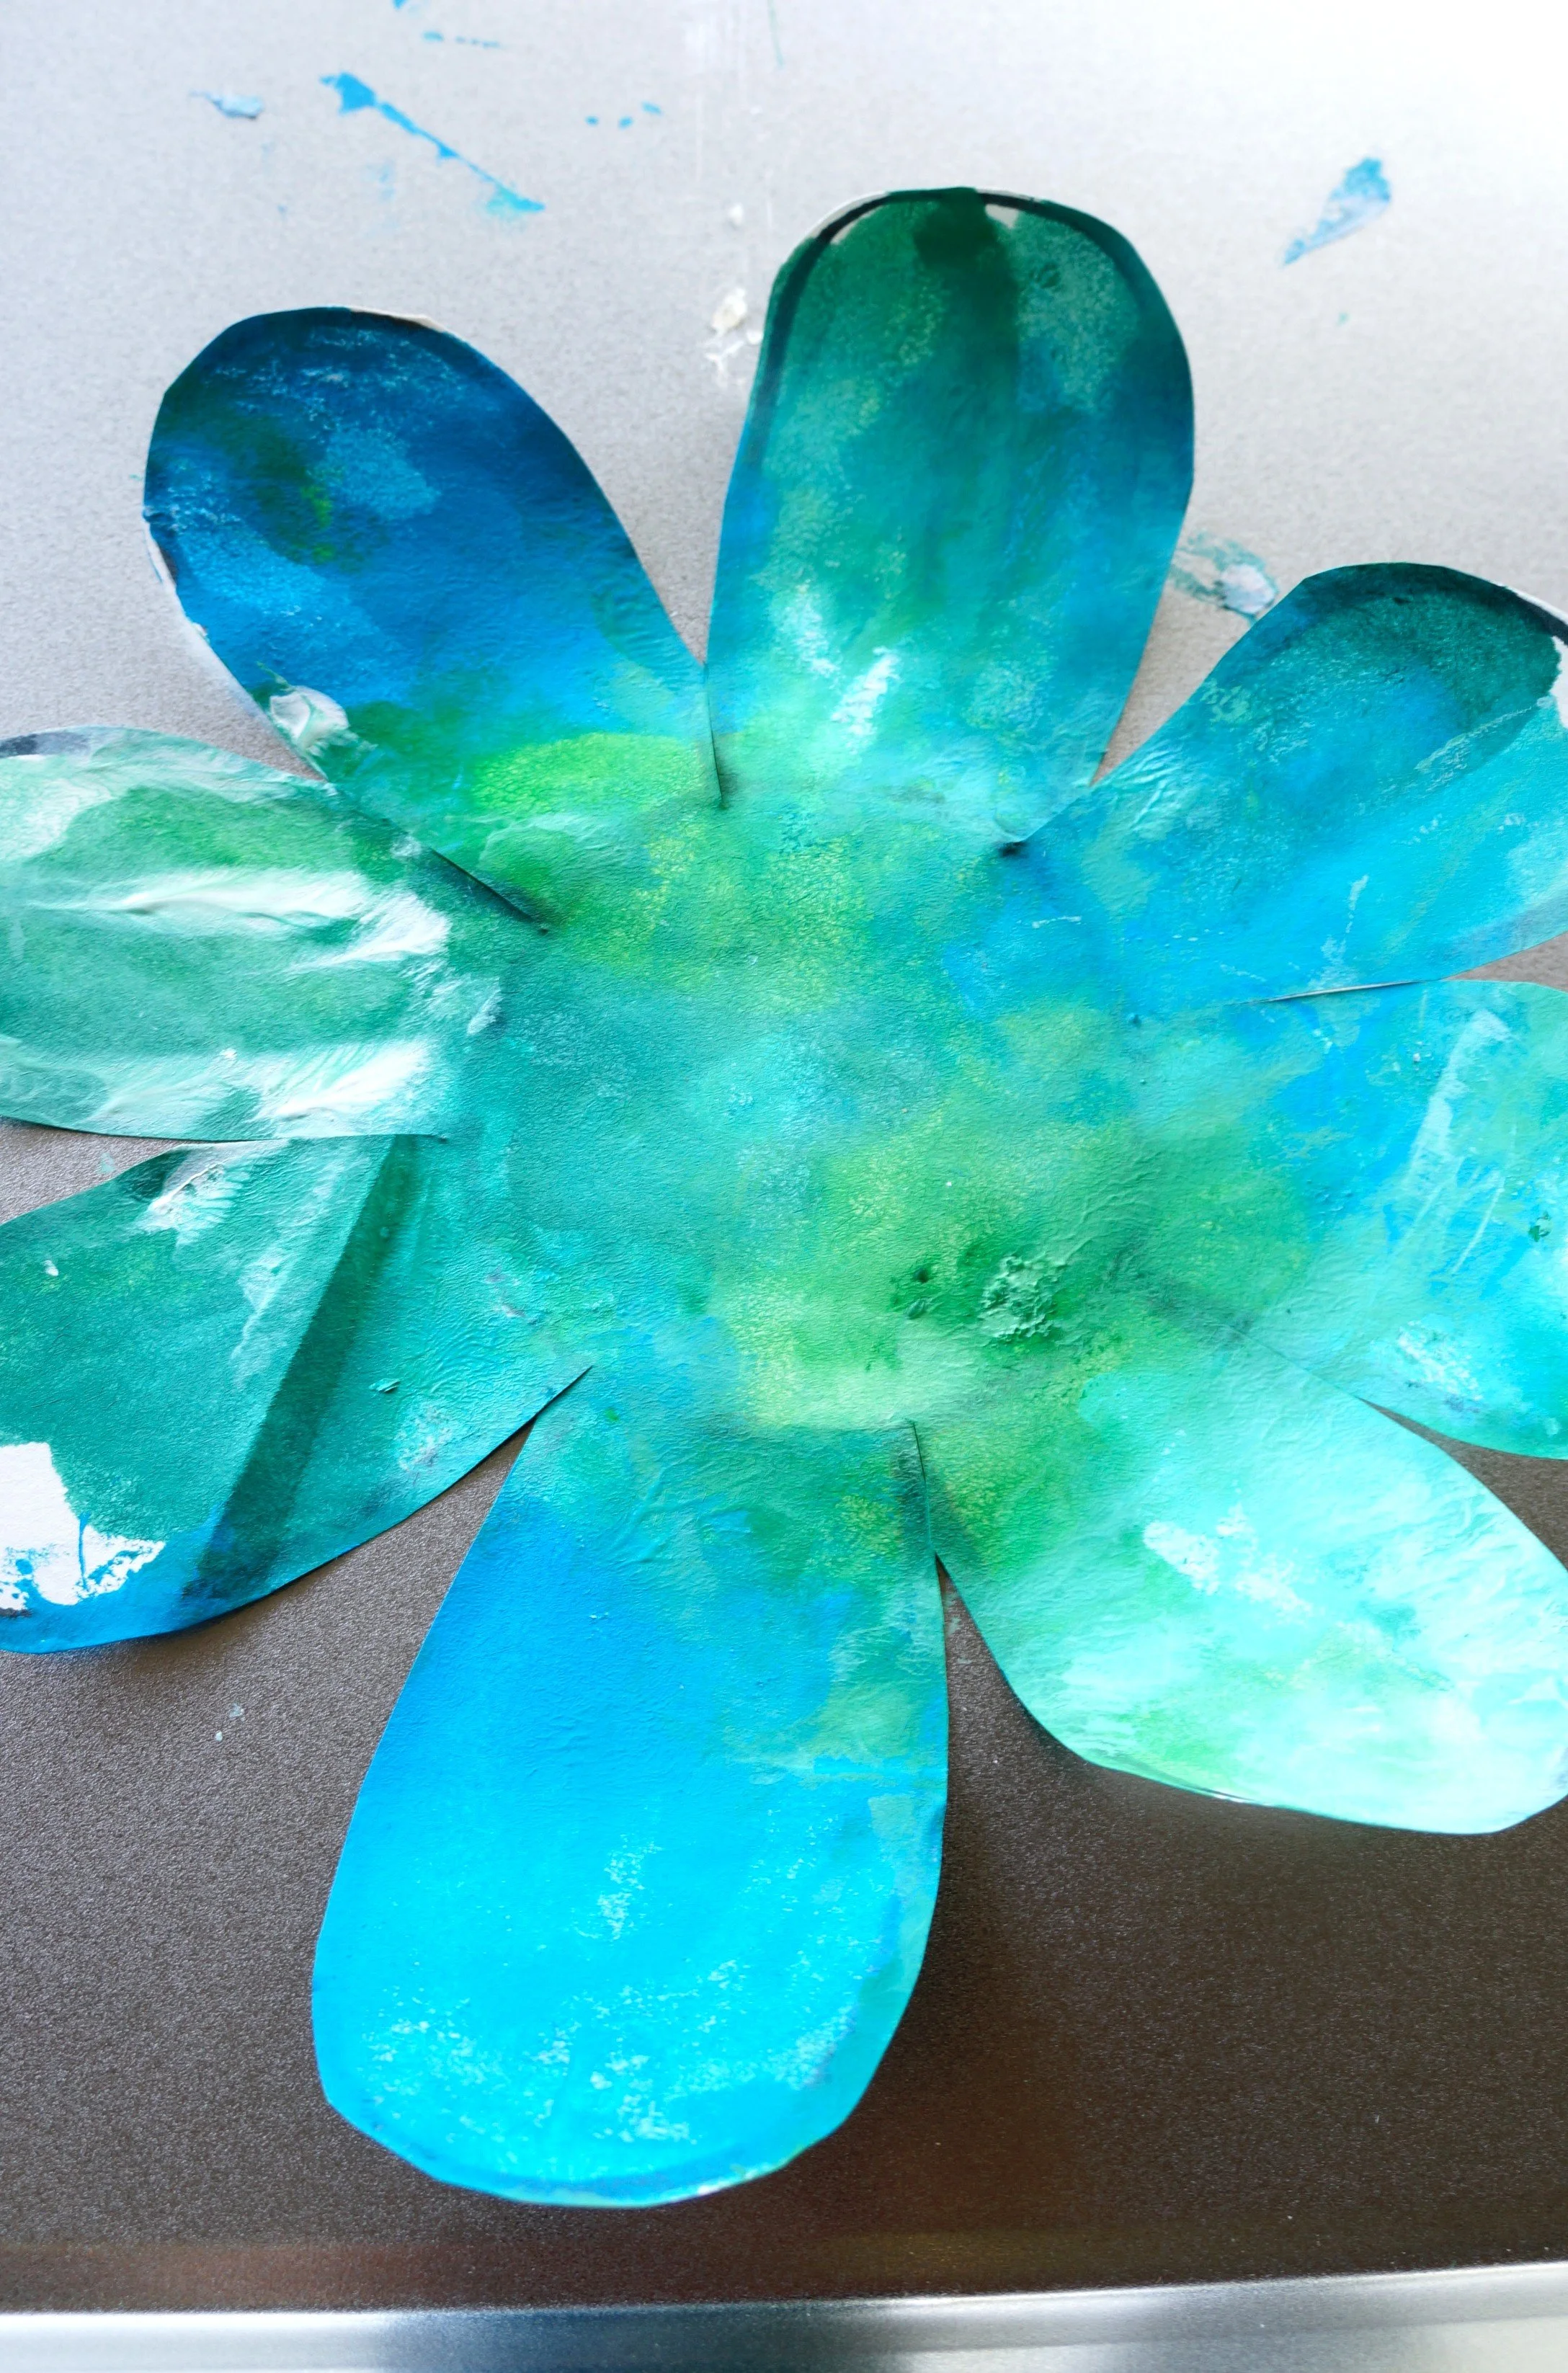
Transfer the flower to the cookie sheet and allow it to dry for 10-15 minutes.
If you have too much paint on the flower, use a clean sheet of paper, press it directly onto the flower, and carefully remove it. Repeat if necessary to lessen the amount of paint and drying time.

MESSAGE & GIFT CARD
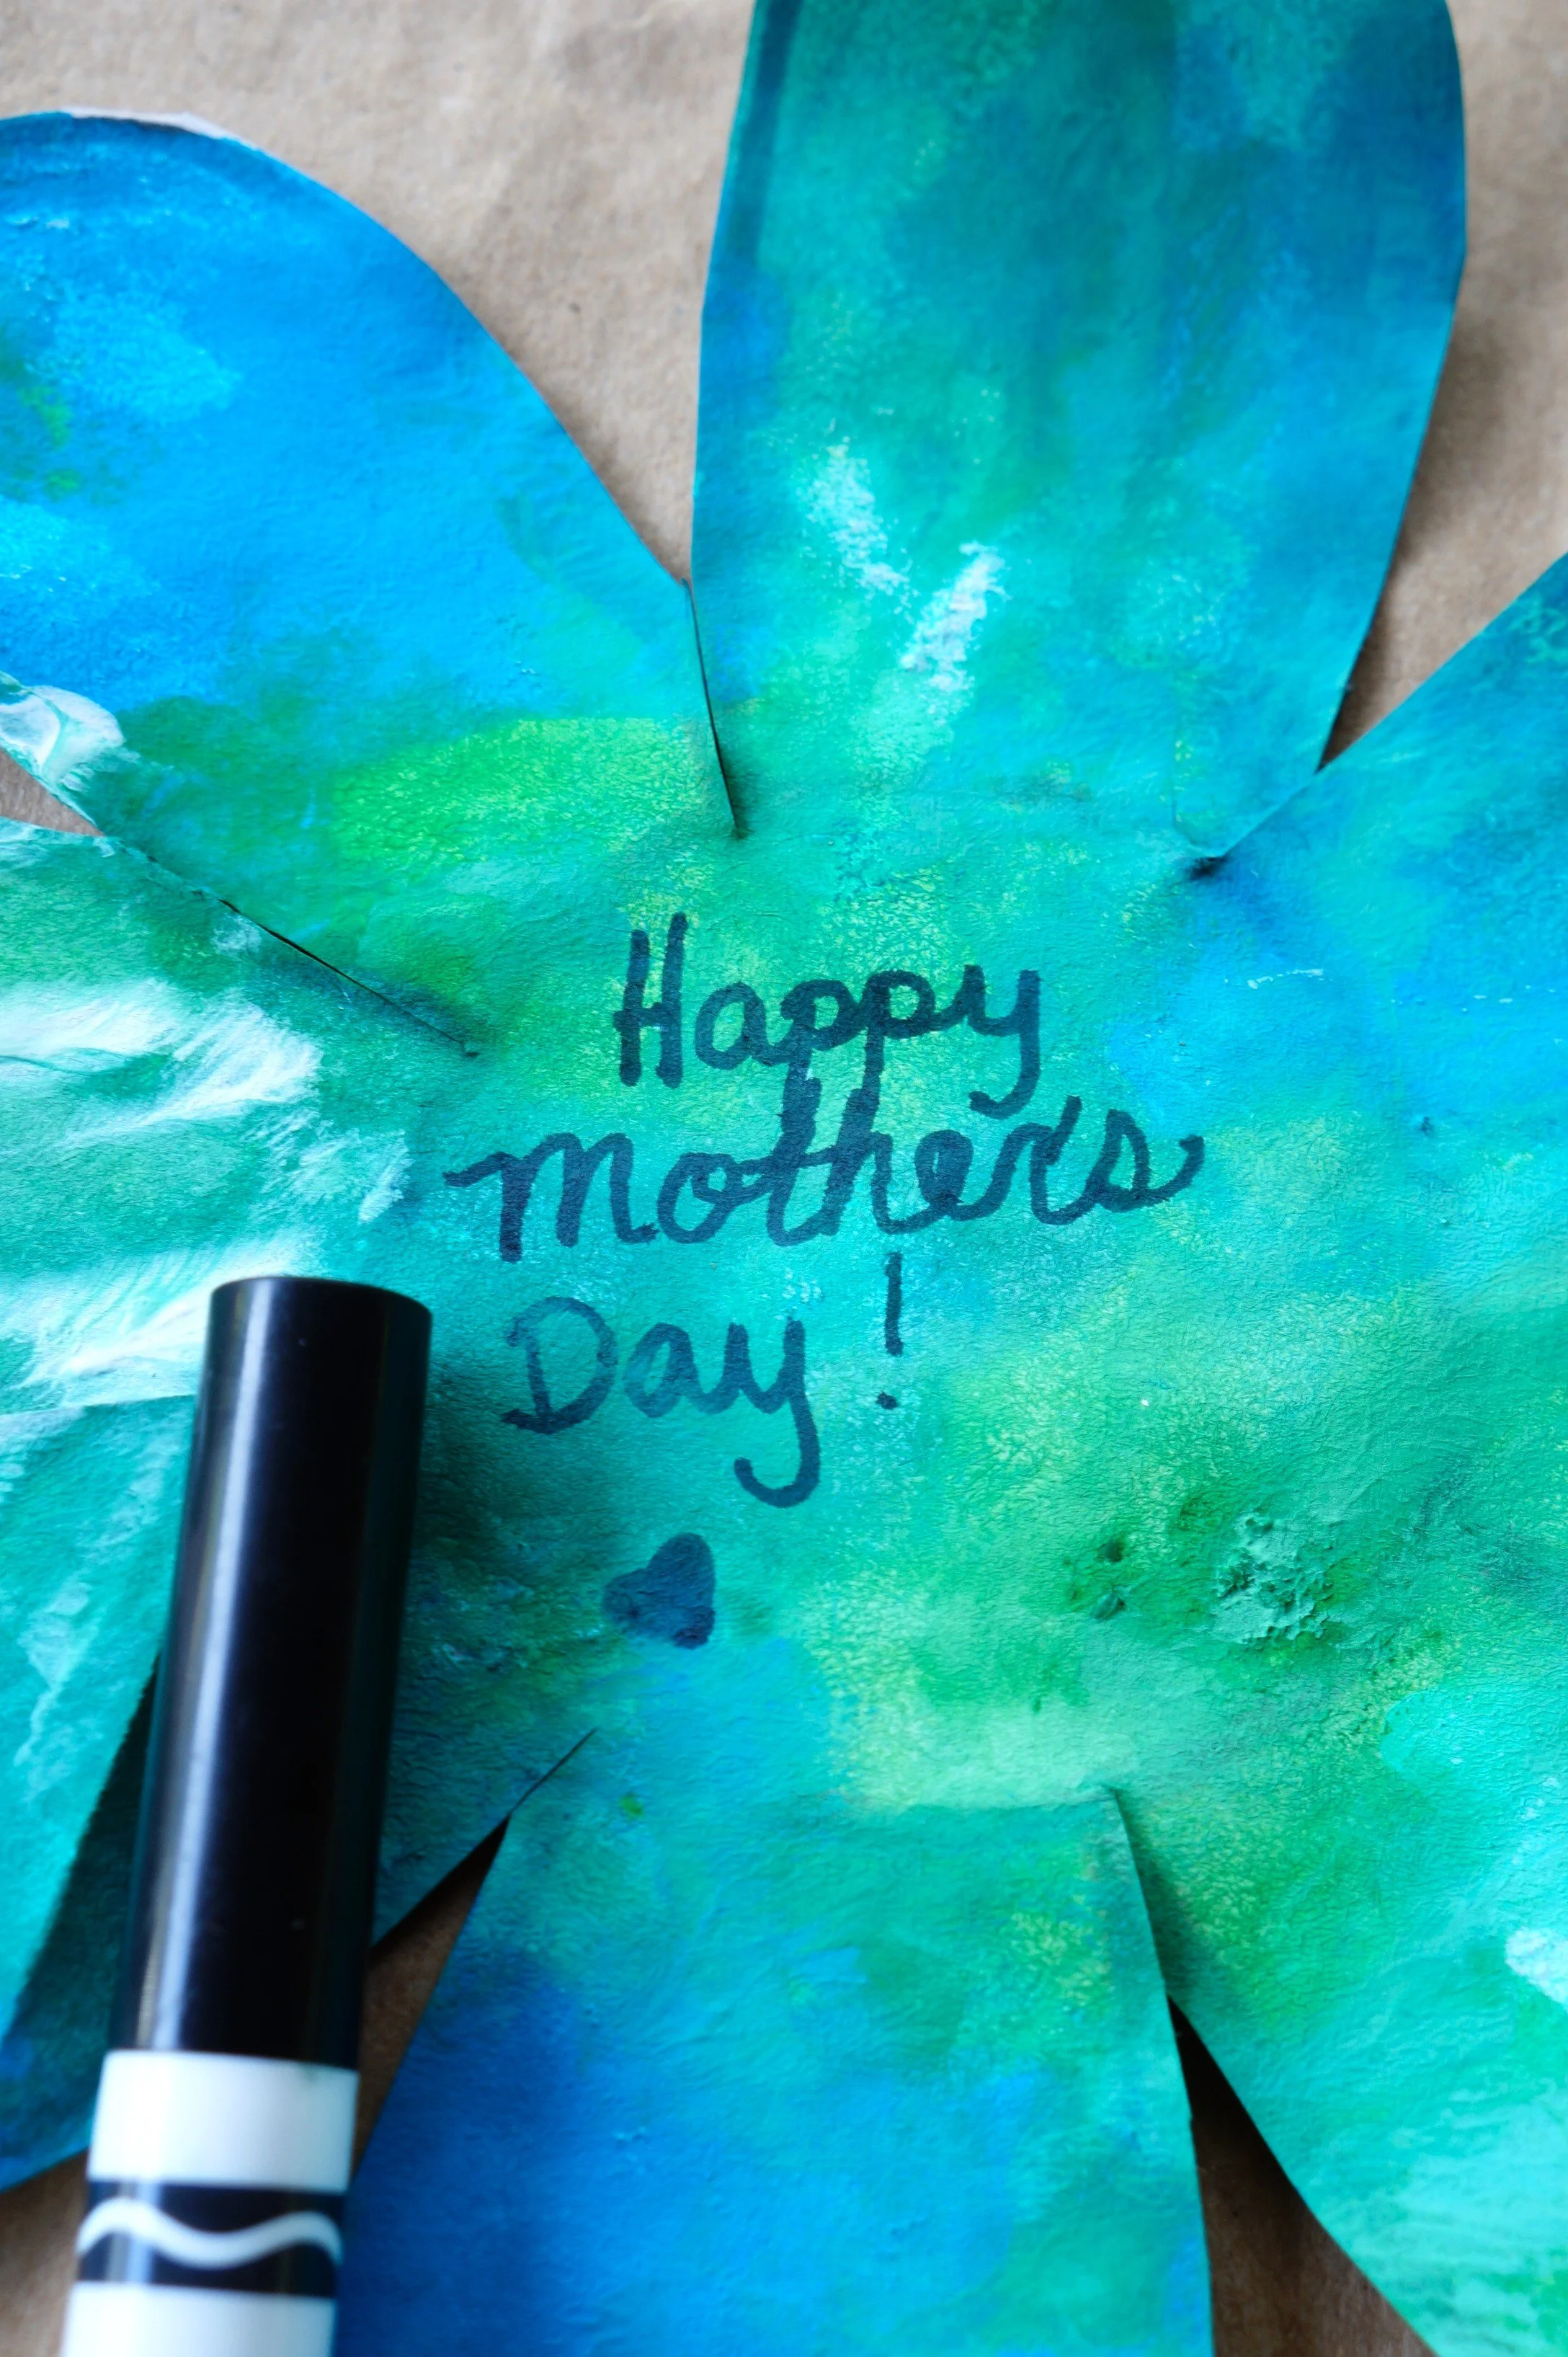
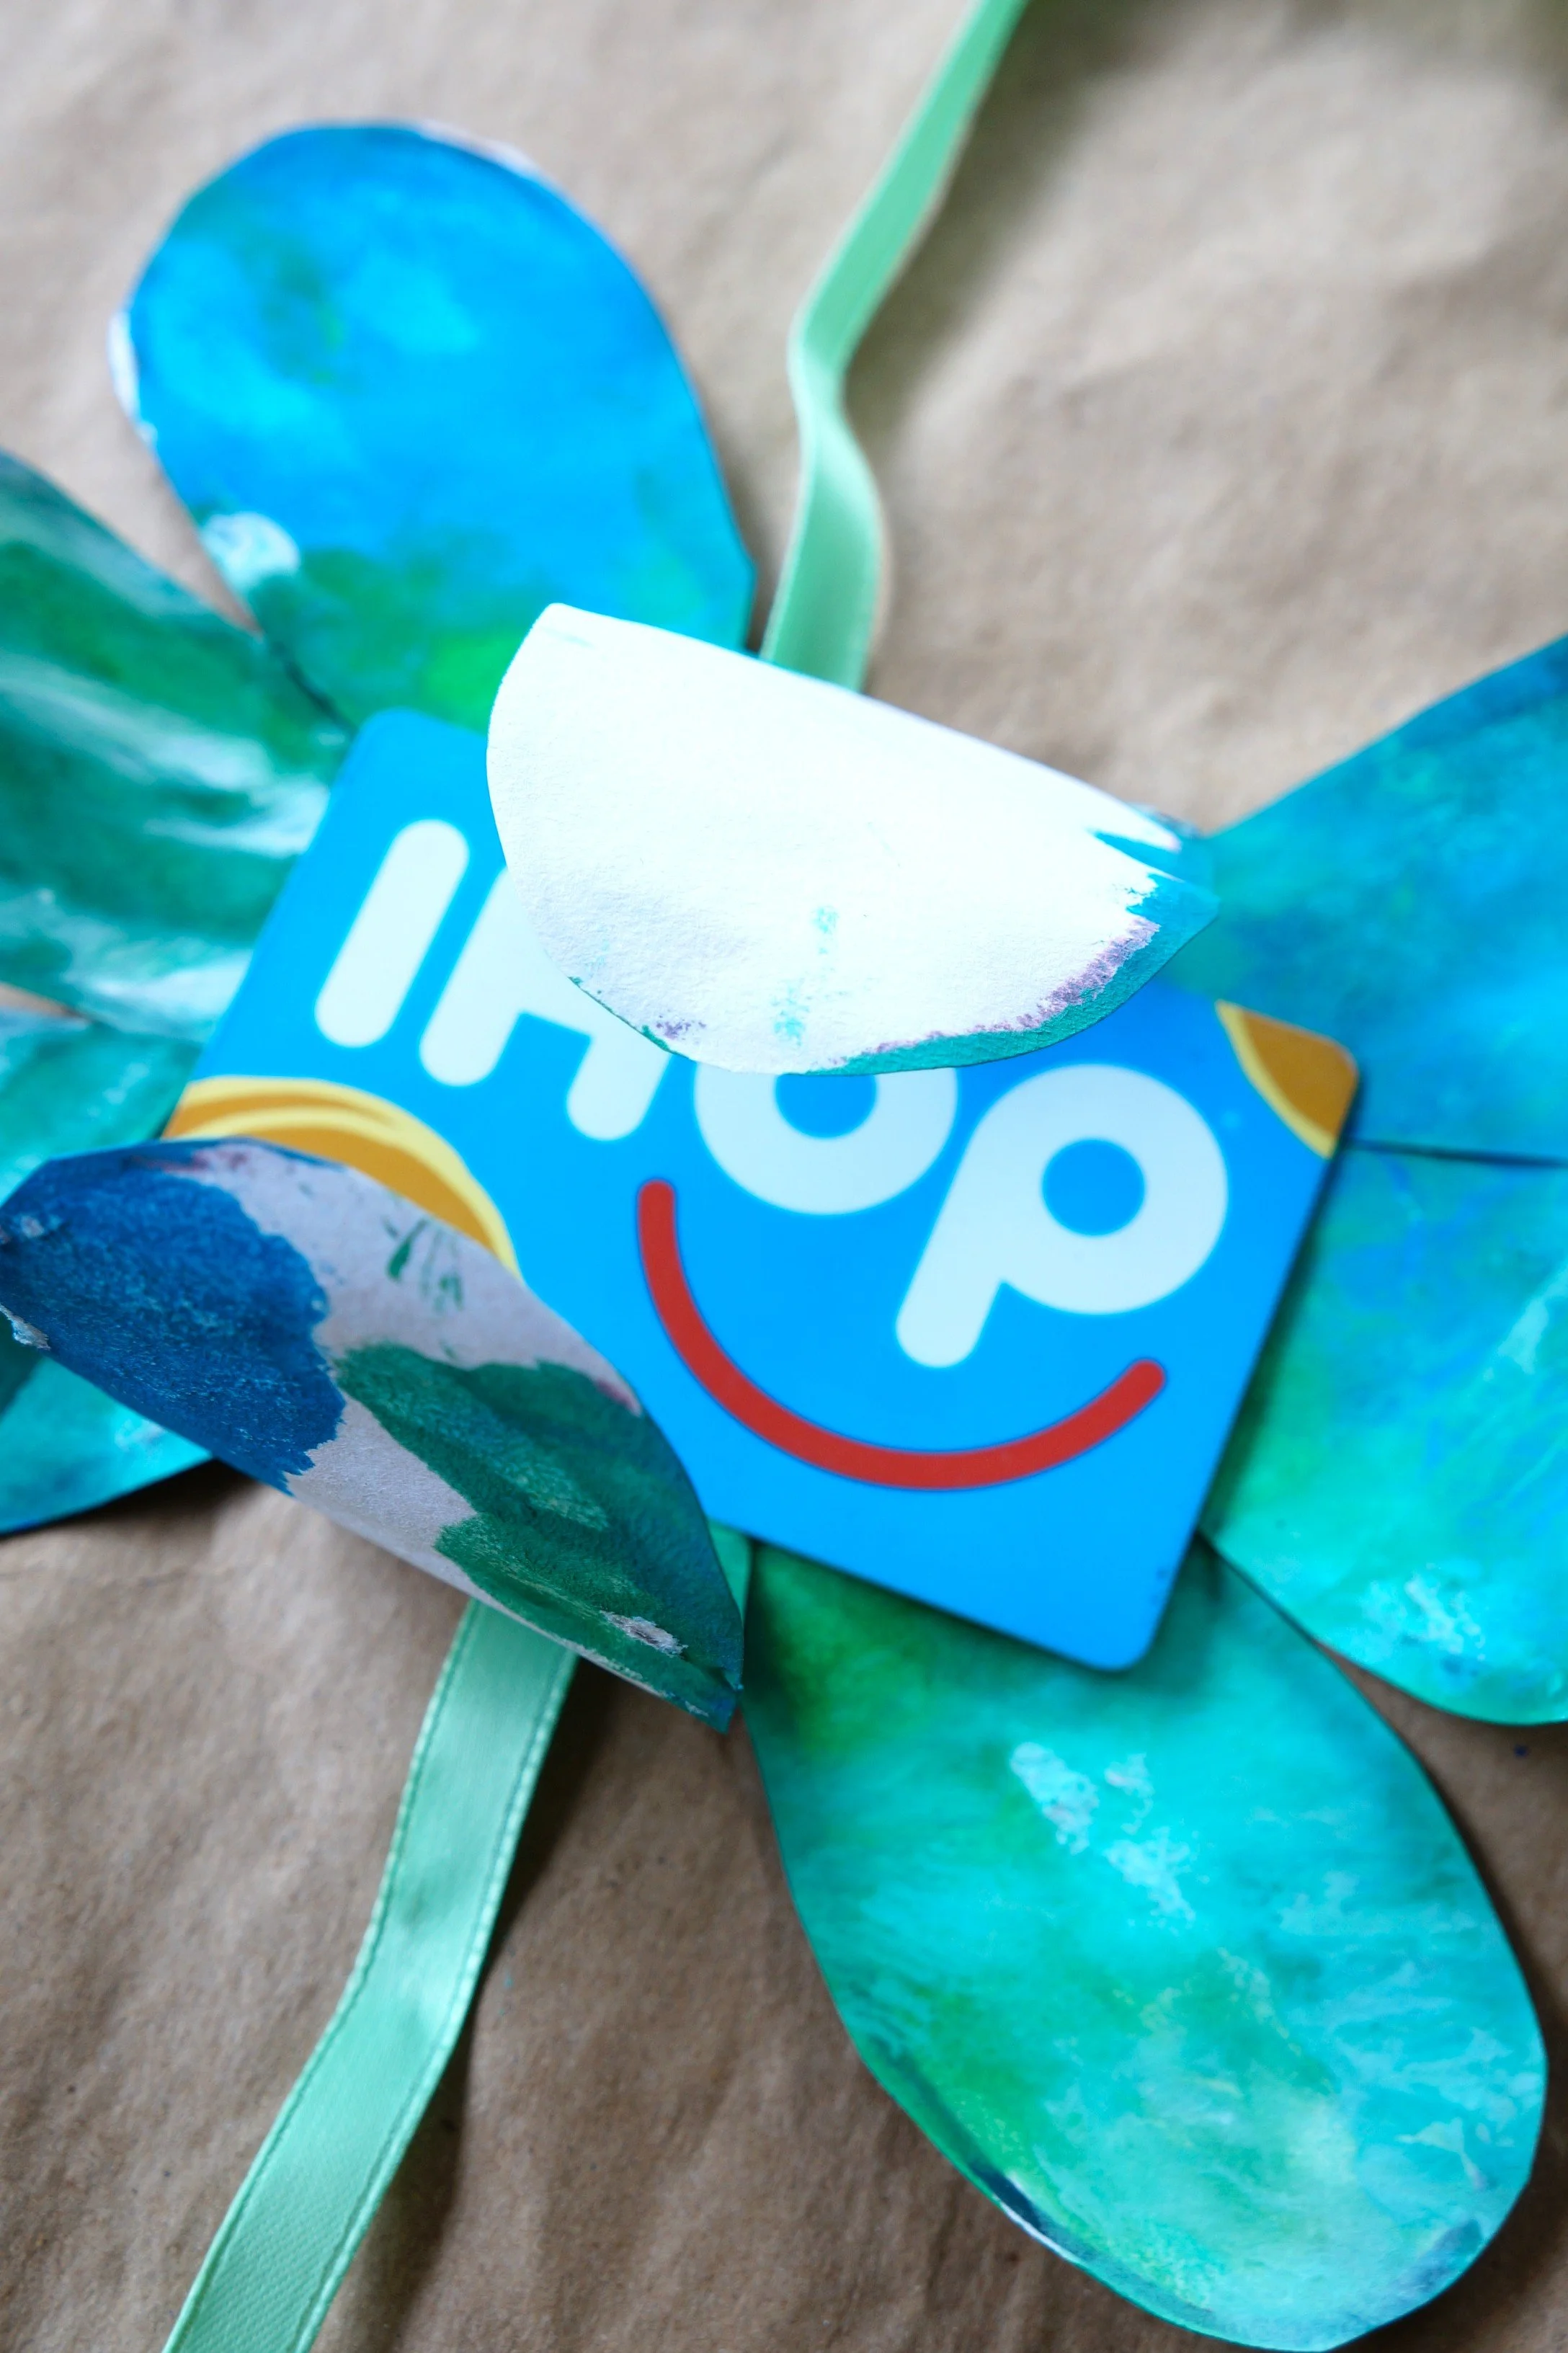
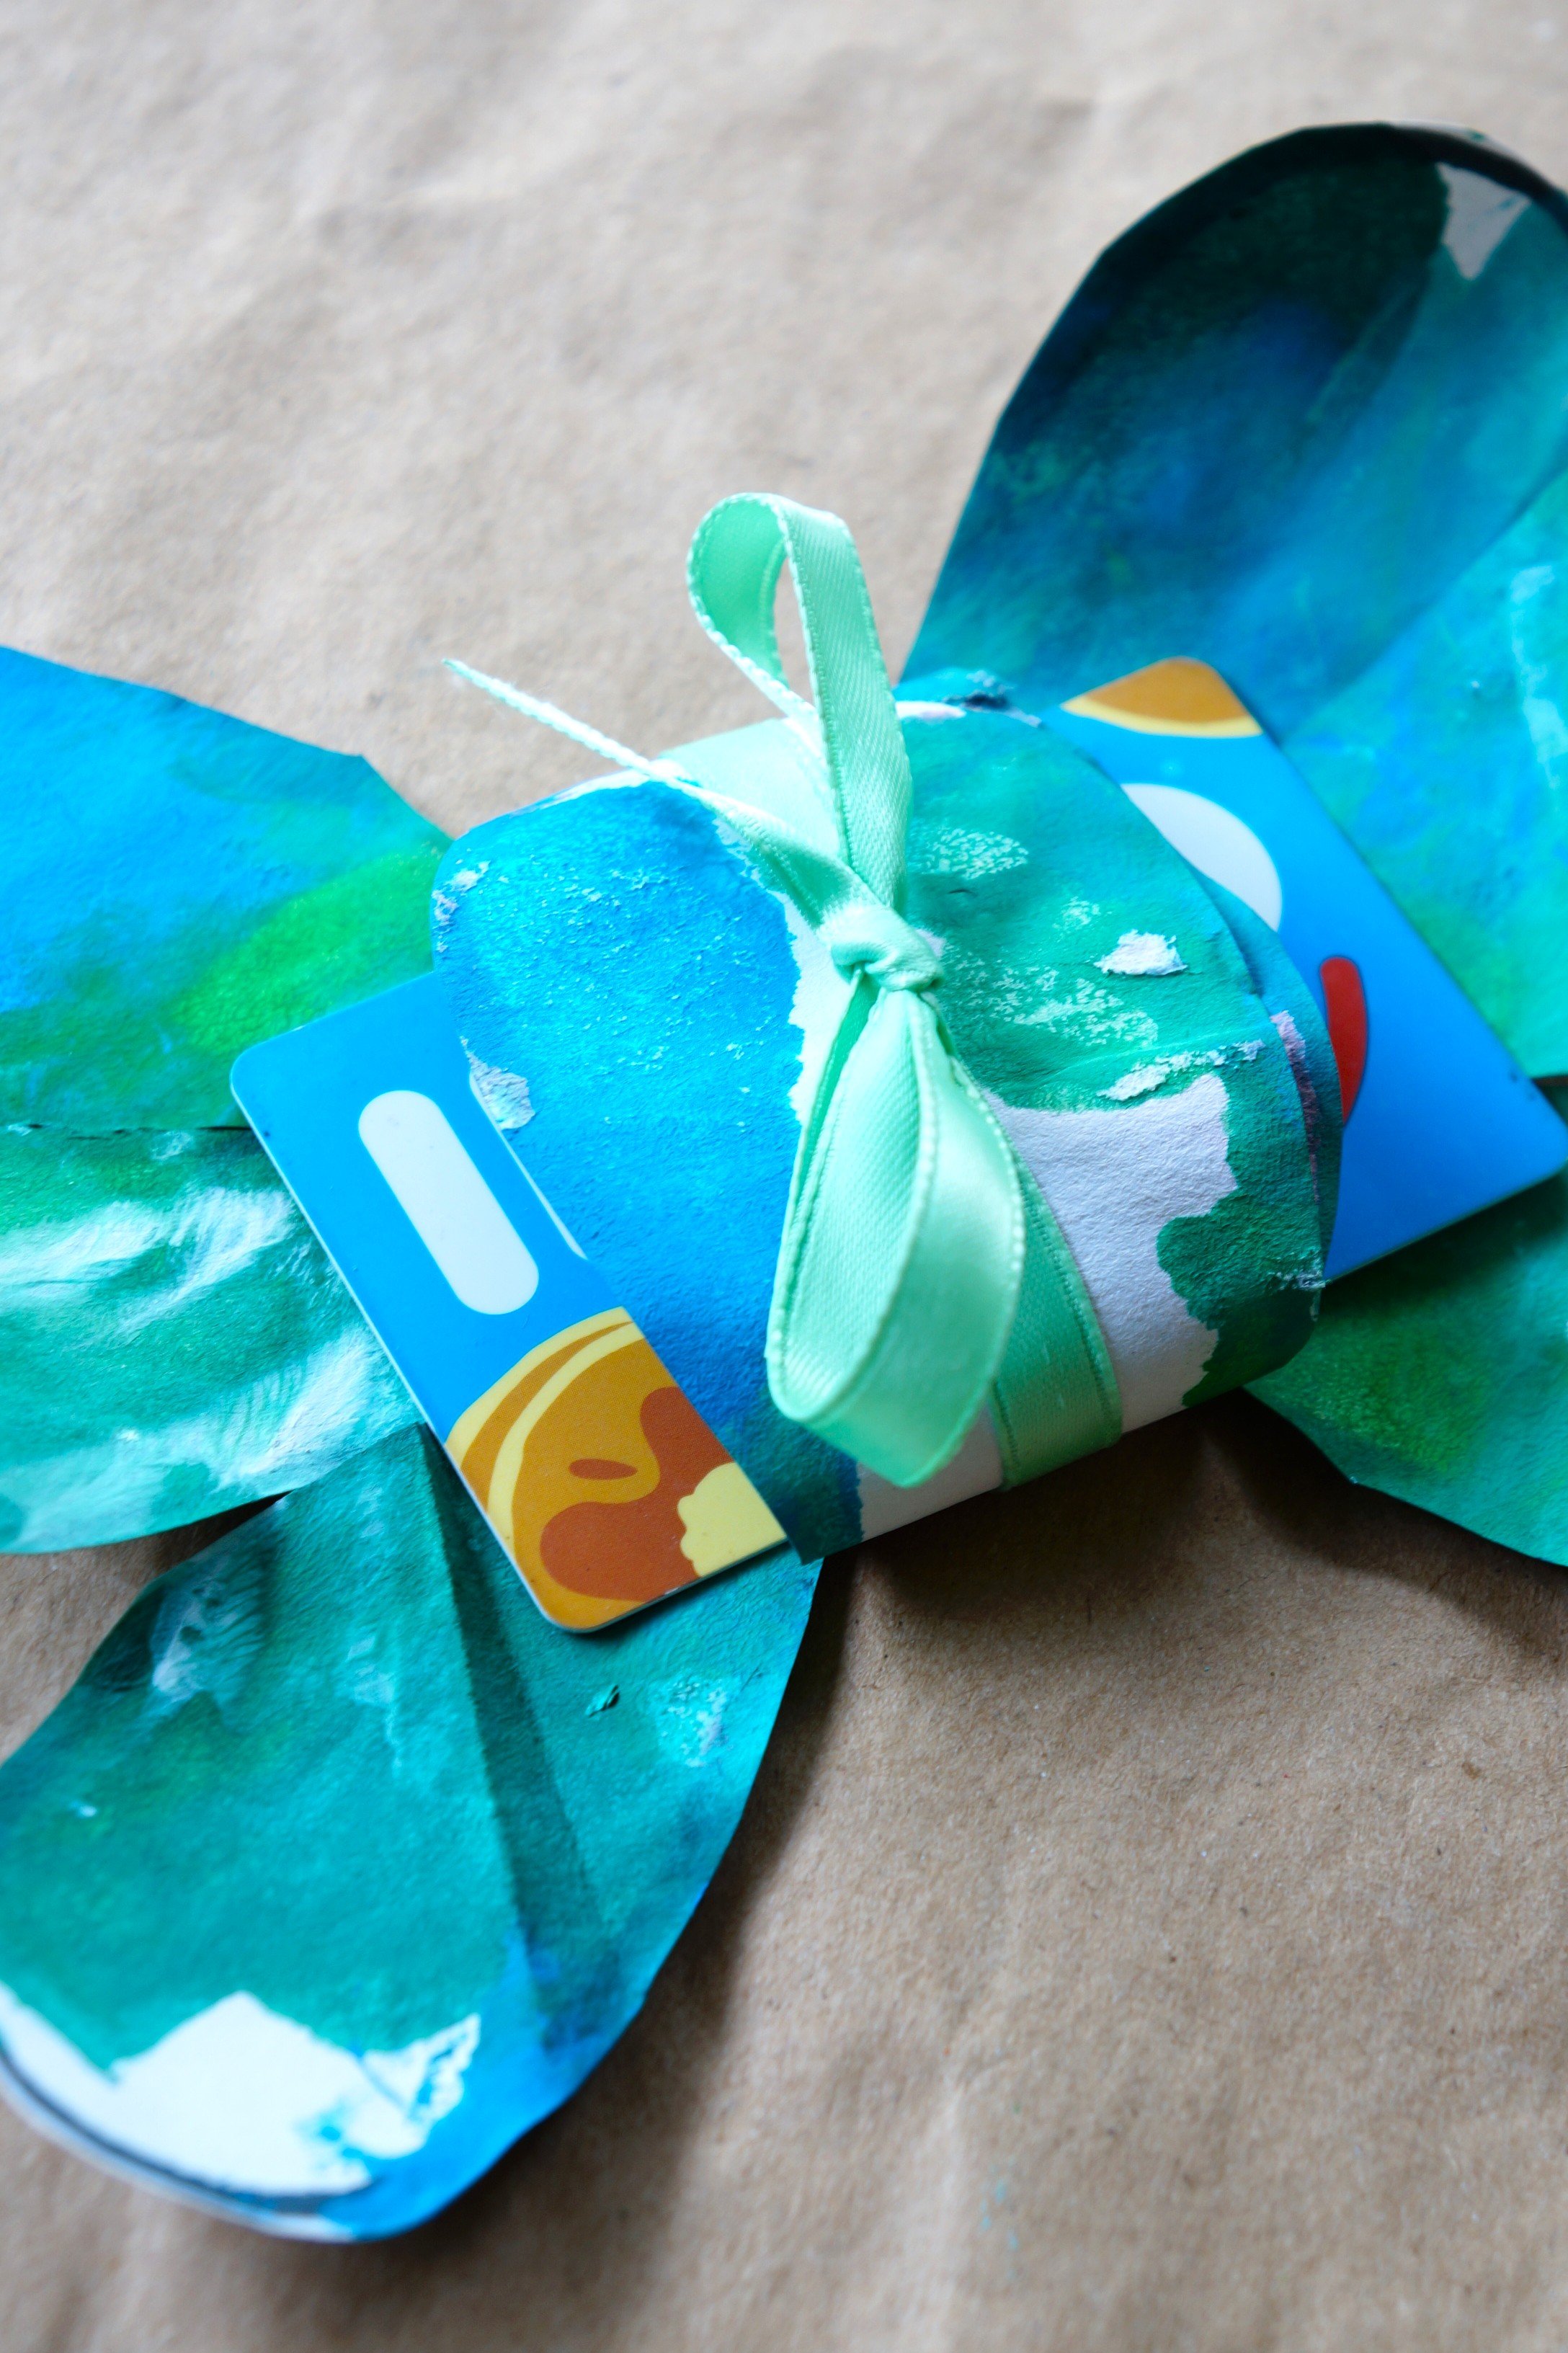
Once the paint is completely dry, face the longer petals vertically, then use the marker to write Happy Mother’s Day!, their name, and yours in the center.
Cut a strip of matching ribbon and lay it under the longer petals.
Add a bit of removable tape or putty to the center of the flower, press the gift card down, wrap the longer petals over the card, and tie the ribbon.
That’s it!
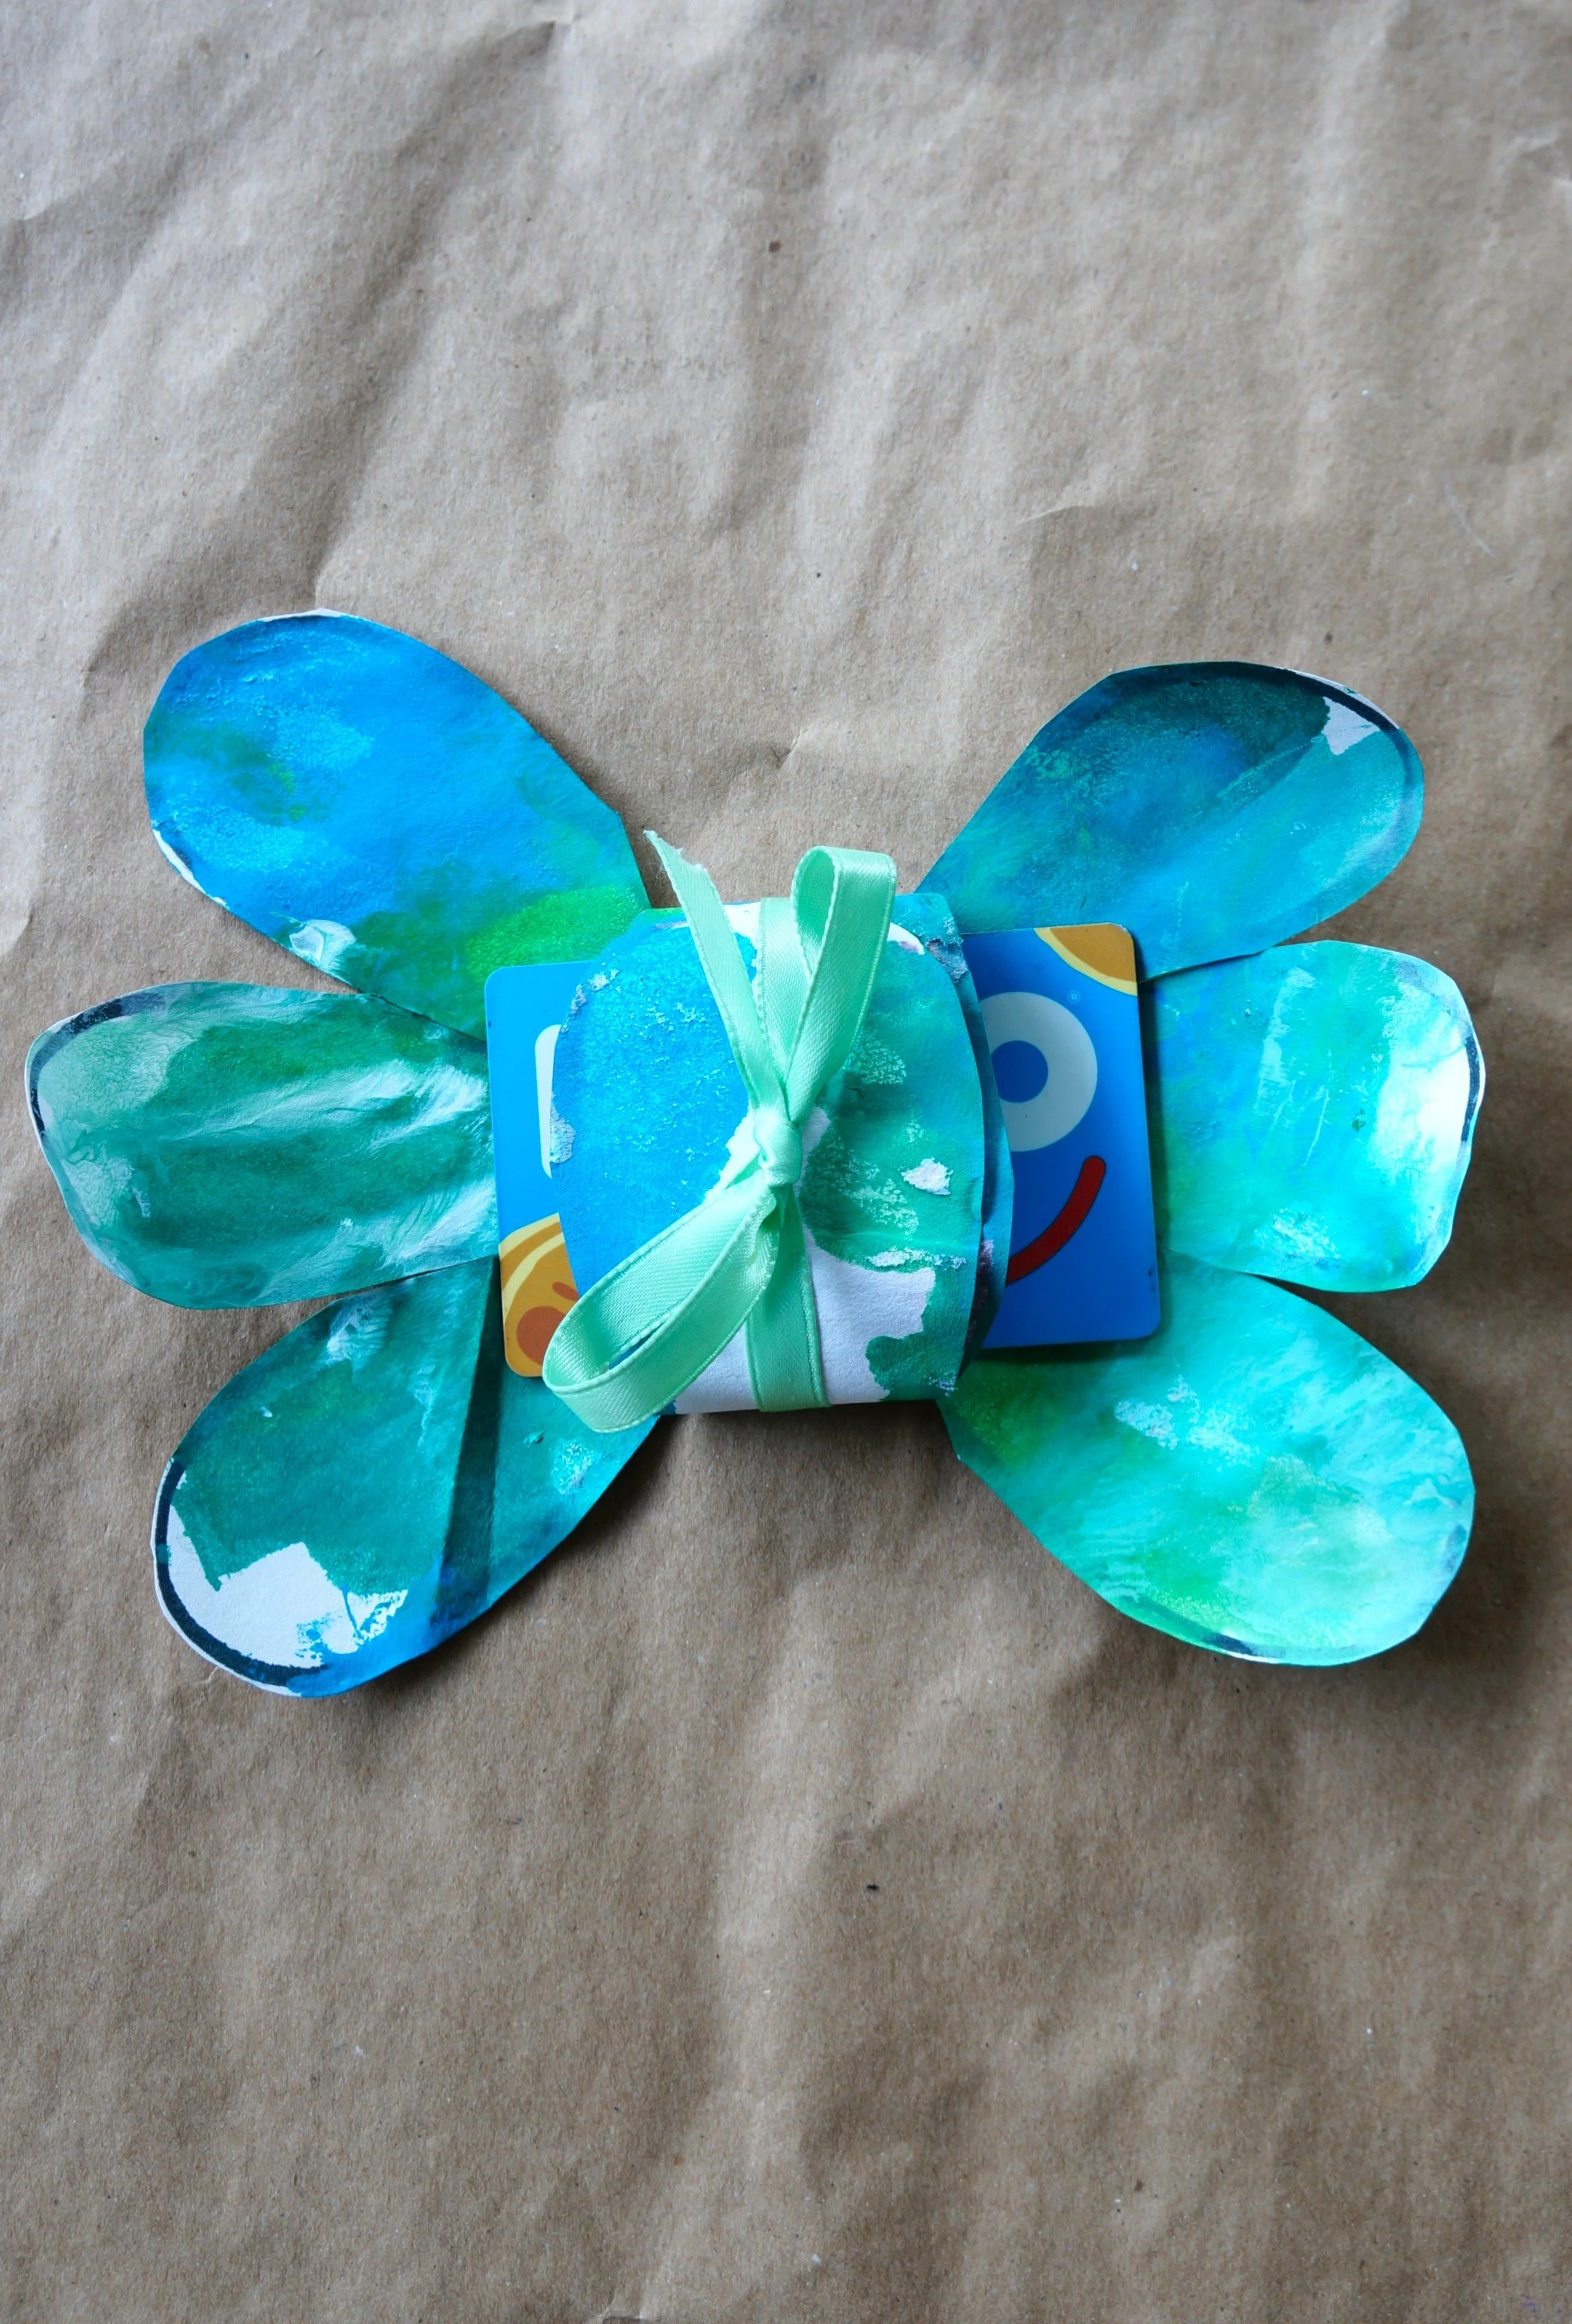
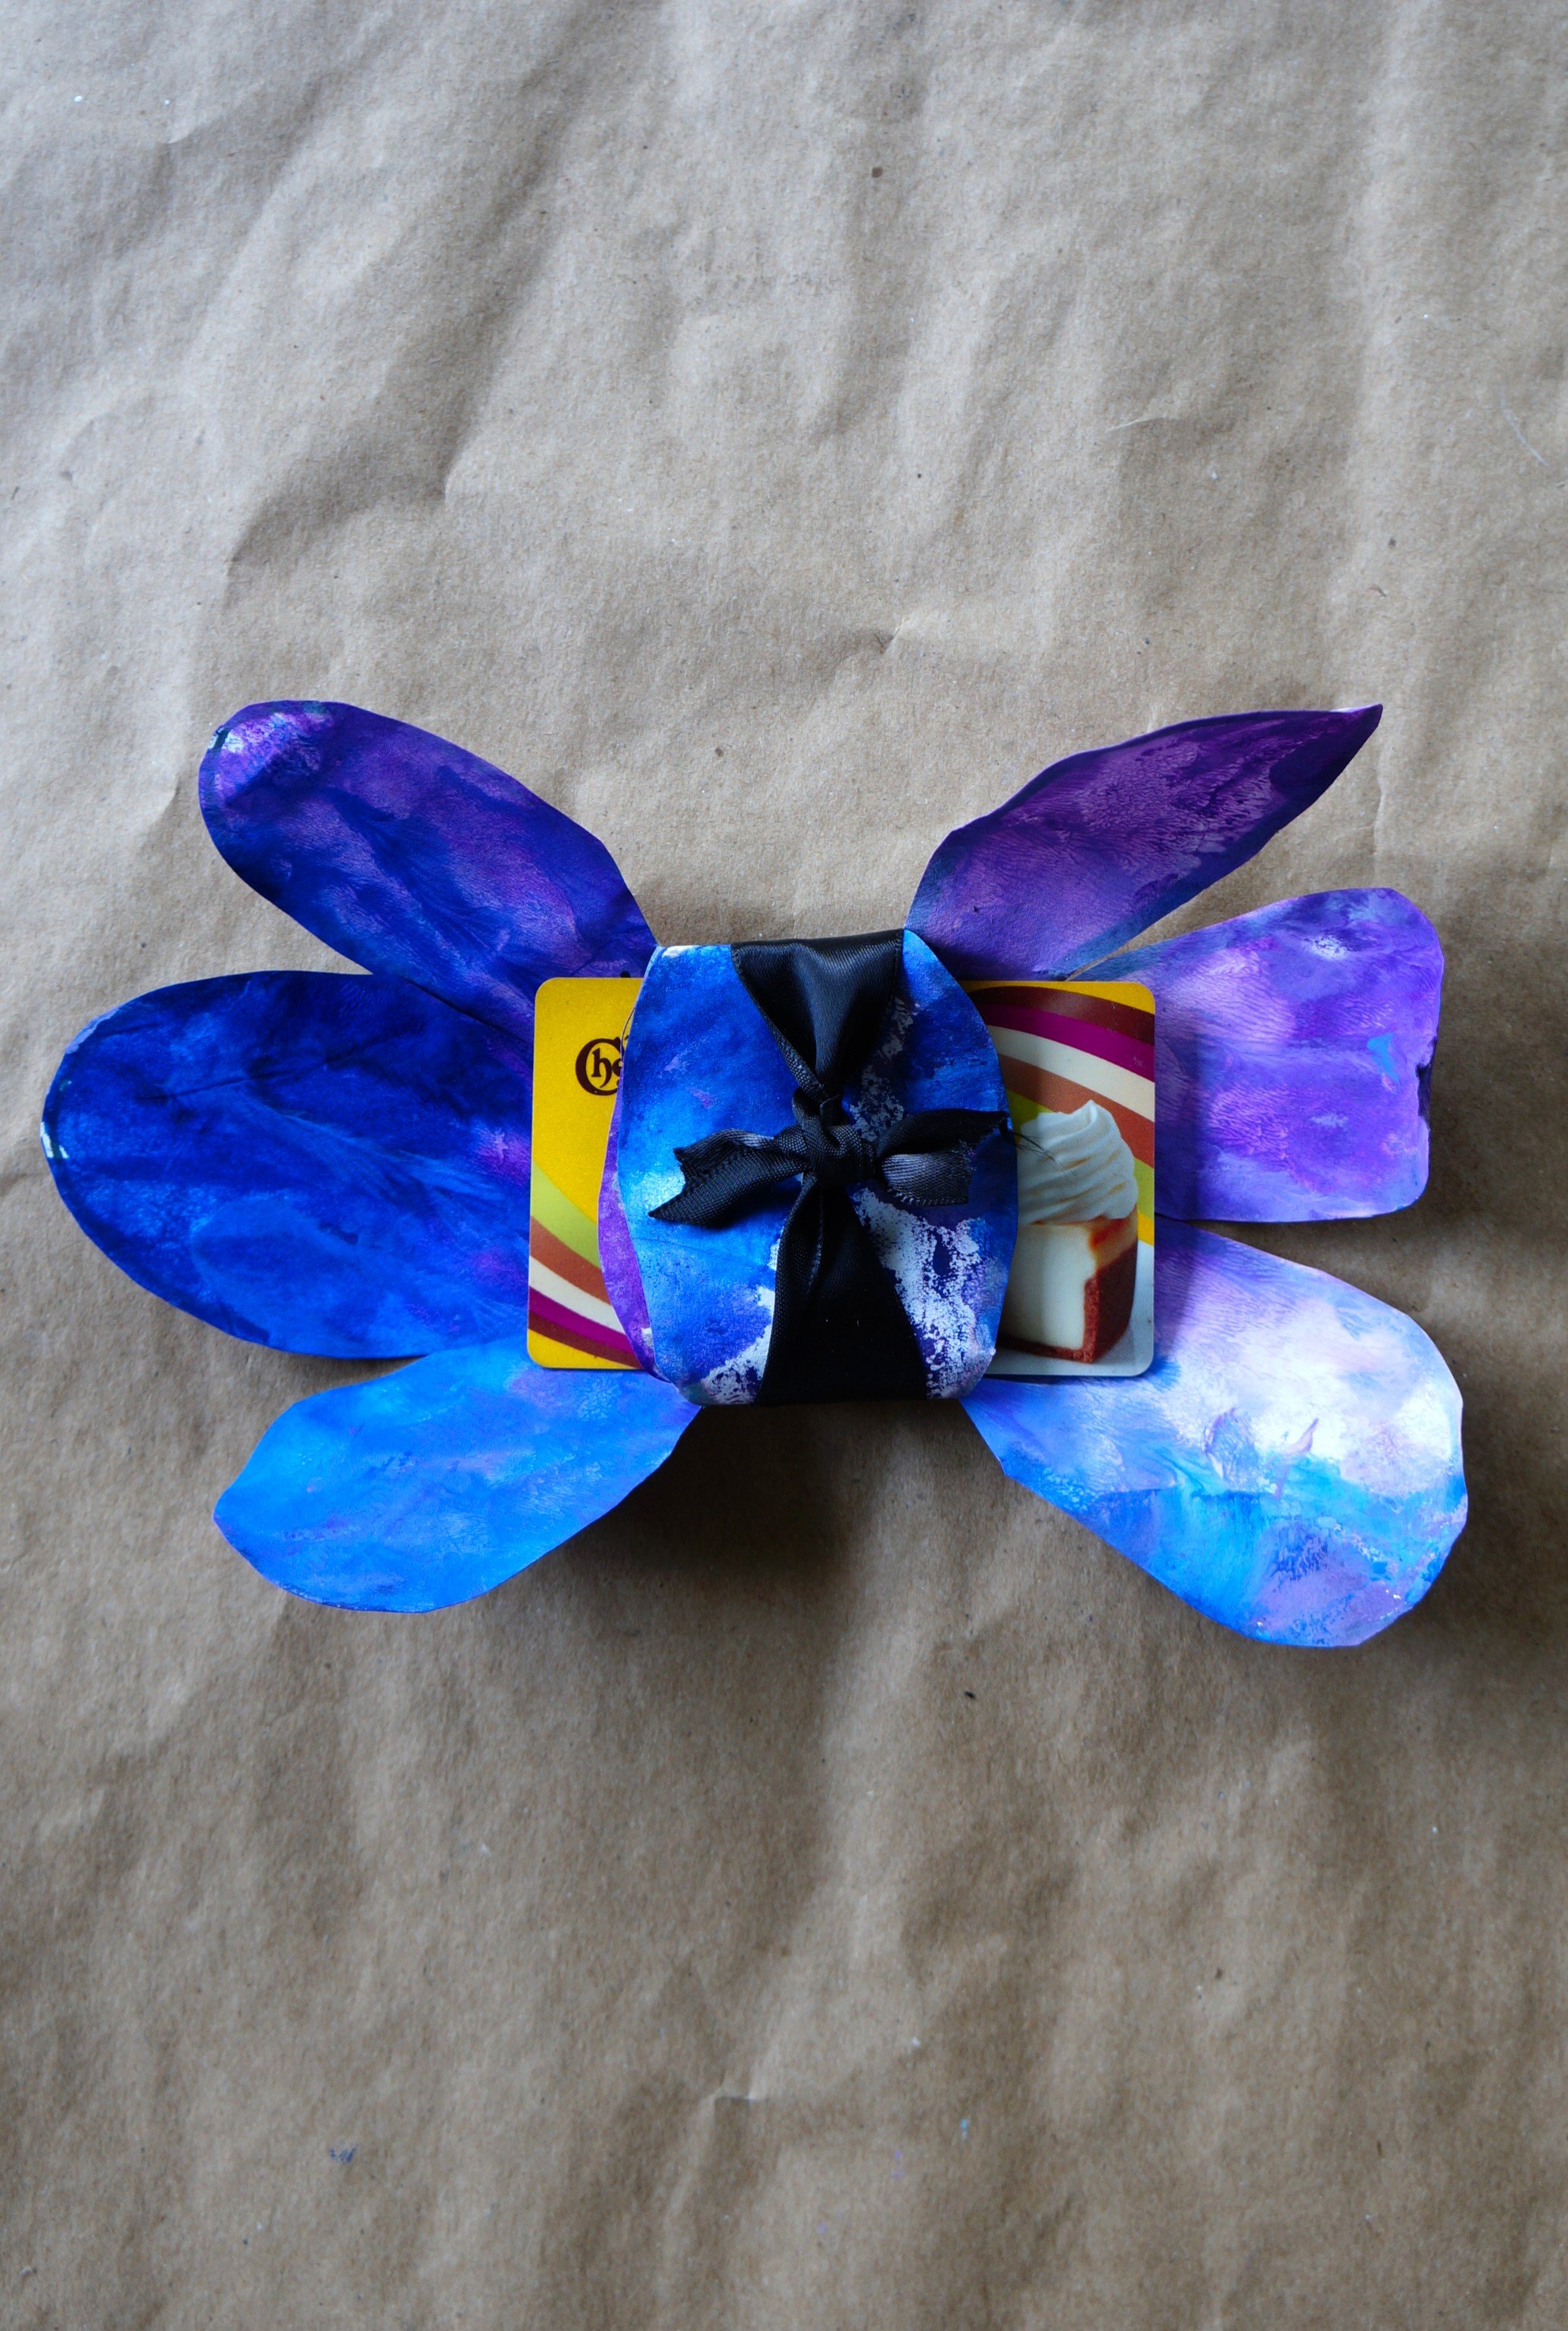
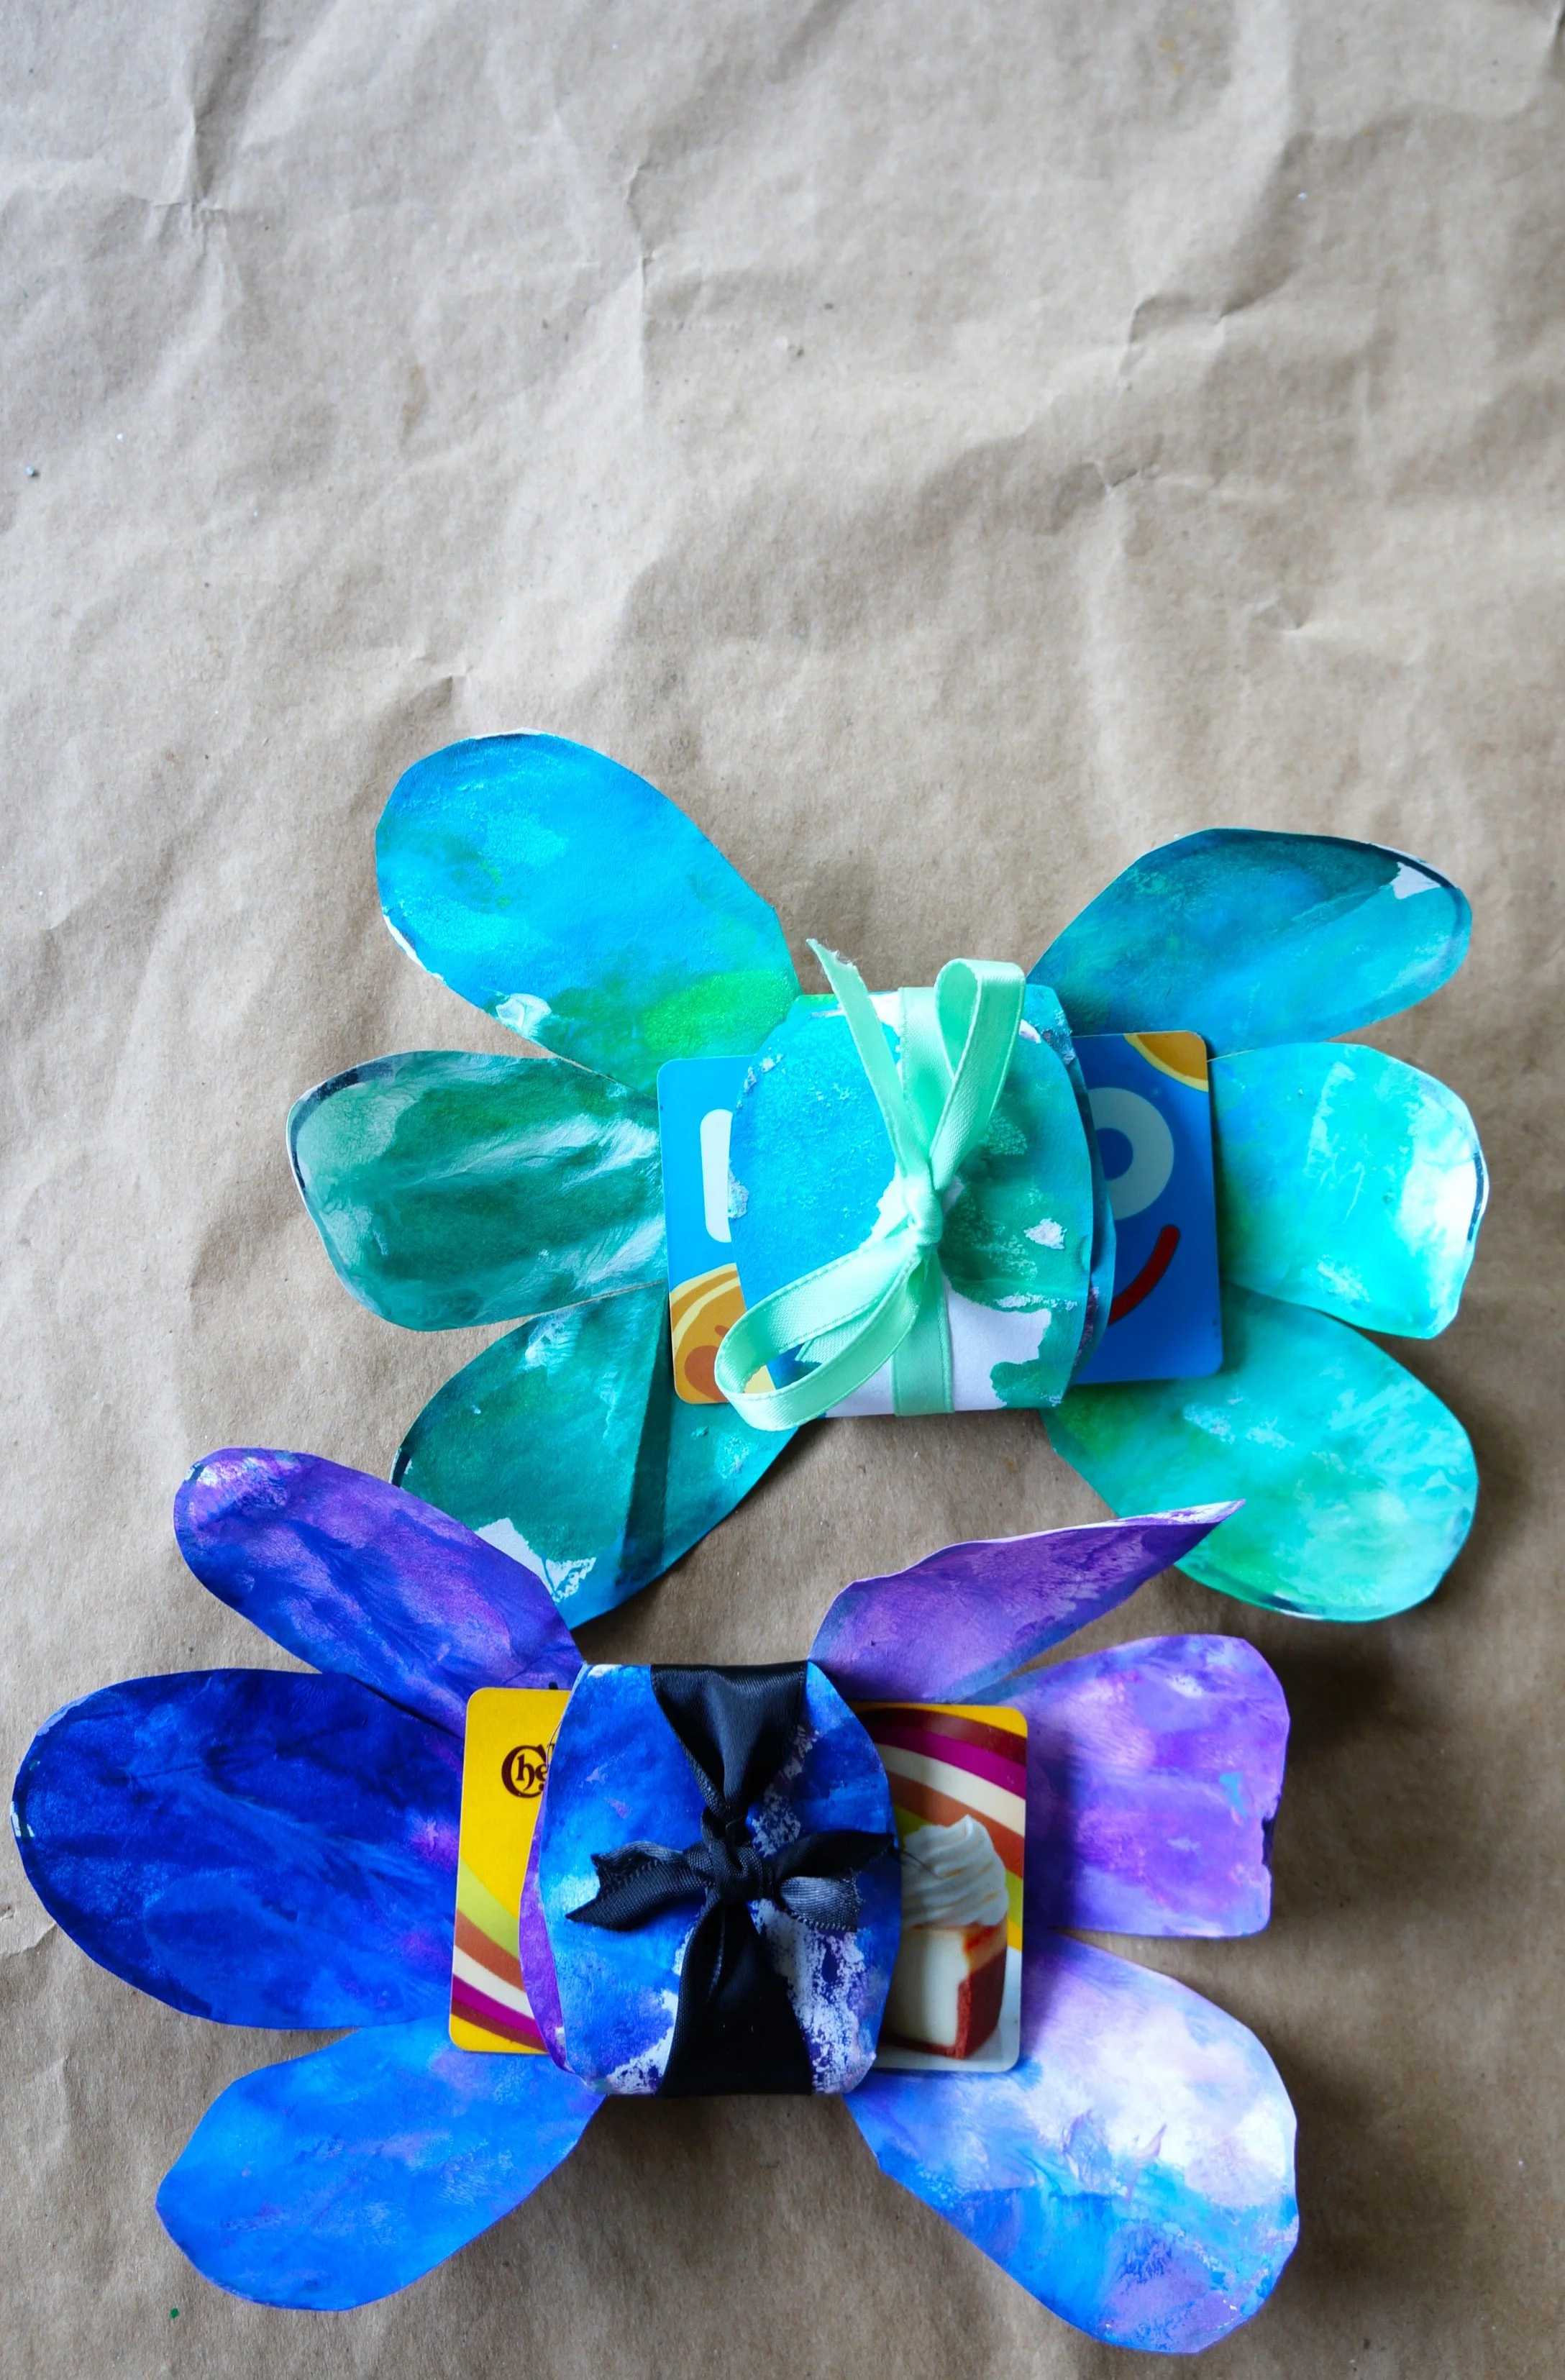
These came out so cute and were simple to make. We opted to leave the flowers as they are, but you could outline the petals if you’d like some definition.
Happy crafting,
Amanda and Naomi
To share: take a photo of your craft and let us see it! Click Photo Submission, then submit the photo.


